Step-by-Step Realistic Black Eyed Susan Flower Drawing for Nature Lovers
The Black Eyed Susan flower drawing is a wonderful way to combine creativity with the love of nature. It is known for its dark center with bright yellow petals and graceful shape; the Black Eyed Susan is one of the most well-known wildflowers of North America. Artists love drawing this flower since it provides the perfect blend of simplicity and realism. In this tutorial, you’ll learn to draw a realistic flower sketch step by step, beginning with the first outline and finishing with shading. If you’re new to drawing or want to enhance your skills in botanical illustration, this tutorial will assist you in creating a stunning and natural-looking wildflower sketch.
Understanding the Black Eyed Susan Flower Before You Draw
Before drawing your first sketch, it is helpful to know the structure of the flower. Examining the finer details of a real bloom improves precision and makes your work more real.
Key Characteristics of the Flower
This Black Eyed Susan has several distinct features:
- A central cone that is dark and textured.
- The bright petals are arranged in the center
- Long, slender stems
- Pointed leaves that have slightly rough edges
These features make the flower simple to identify and fun to draw.
Why Observation Improves Drawing Accuracy
The ability to observe is among the most crucial techniques in art.
When you study a flower, be aware of:
- The number of petals and the position of the petals
- The relation between the size of petals and the center
- Naturally curving curves, imperfections and natural lines
- The direction of the leaves and the direction of stem growth
The closer you look, the better chance you have of creating an even more realistic Black Eyed Susan drawing instead of making assumptions.
Materials Needed for a Realistic Black Eyed Susan Flower Drawing
There aren’t any expensive materials to create beautiful floral sketches.
Essential Drawing Supplies
Gather these basic materials:
- HB pencil for sketching
- 2B as well as 4B graphite pencils to use for shading
- High-quality drawing paper
- Kneaded eraser
- Blending stump or tissue
These tools are simple enough to draw a realistic drawing of flowers.
Optional Tools for Advanced Details
If you’re looking for more specificity, think about using:
- Mechanical pencils
- Colored pencils
- Fine liners
- White gel pen for highlights
These tools can improve the quality of details and add dimension to your artwork.
Step-by-Step Realistic Black Eyed Susan Flower Drawing Tutorial
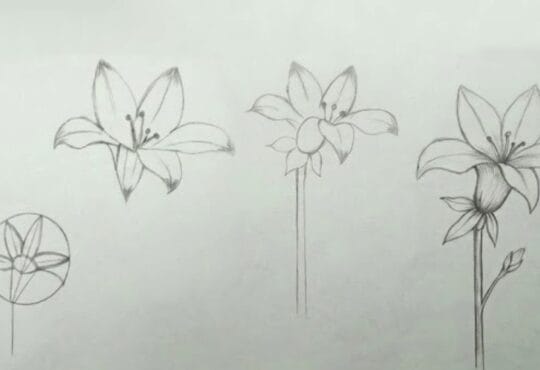
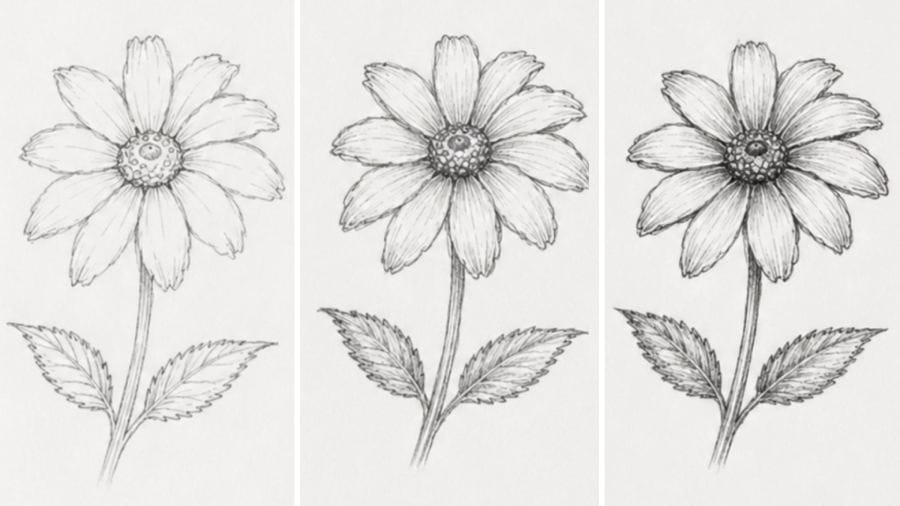
The reference image shows how a sketch of a flower gradually evolves from simple designs to more intricate drawings. Be sure to follow these steps.
Step 1 – Draw the Central Cone
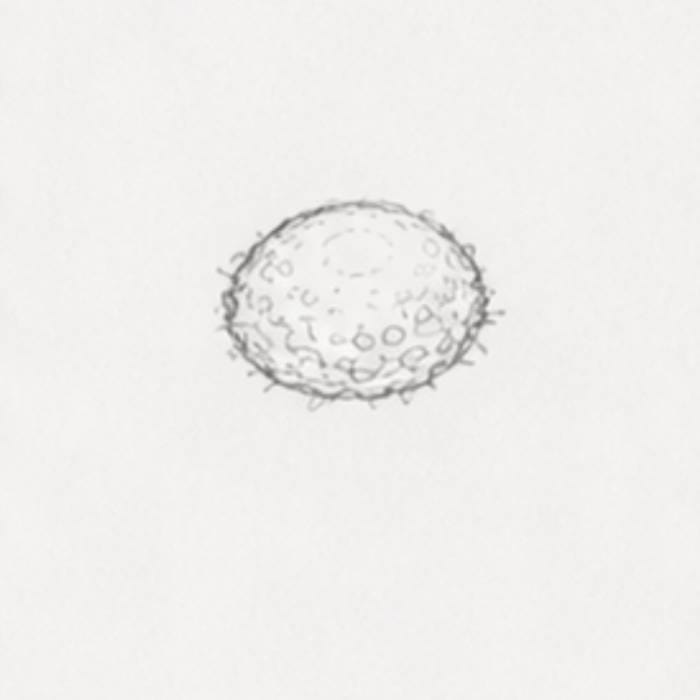
Start with the center of the flower.
- Draw a rough oval or circular shape.
- Keep lines light and adjustable.
- Create small guidelines that indicate the texture.
The center is the basis for the entire sketch, so focus on the right placement.
Step 2 – Outline the Flower Petals
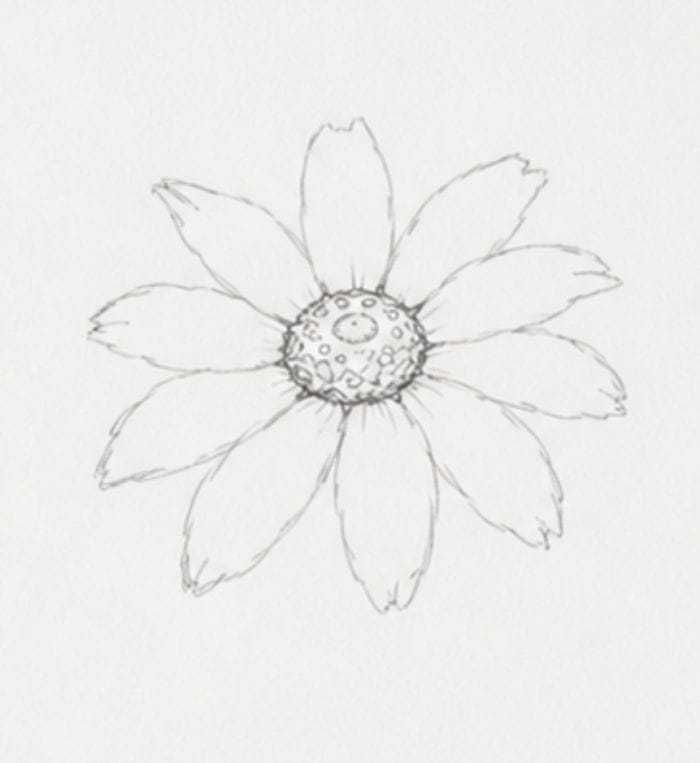
When the center is completed, begin adding petals.
- Draw petals radiating outwards towards the outside from within.
- Variate lengths slightly to create a natural look.
- Leave space between some petals.
Do not make every flower identical. Natural flowers are rarely perfect in symmetry.
Step 3 – Refine Petal Shapes
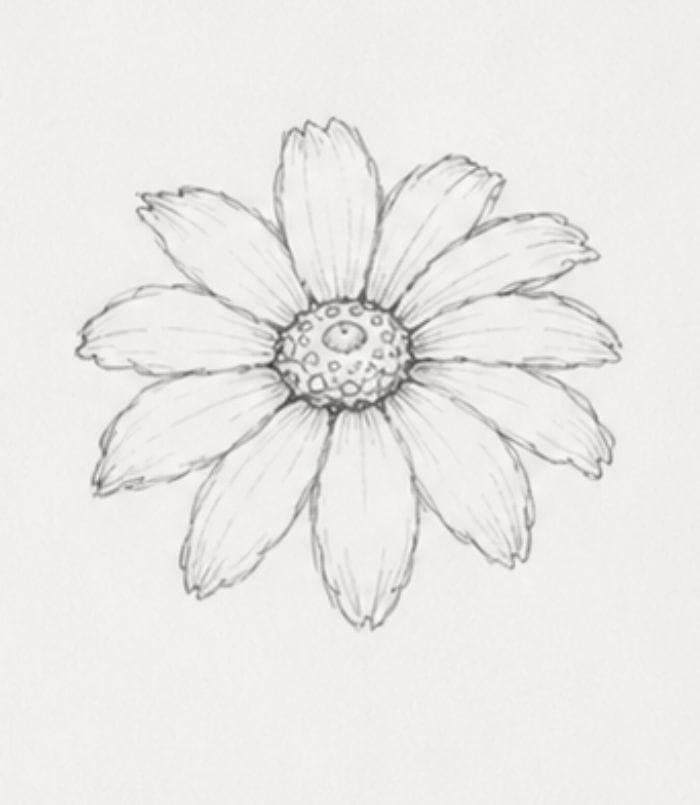
Improve the outline of the petals.
- Make soft curves.
- Create edges that are slightly uneven.
- Introduce petals that overlap when needed.
- Adjust the proportions.
The stage converts the basic shape into real flower petals.
Step 4 – Sketch the Stem and Leaves
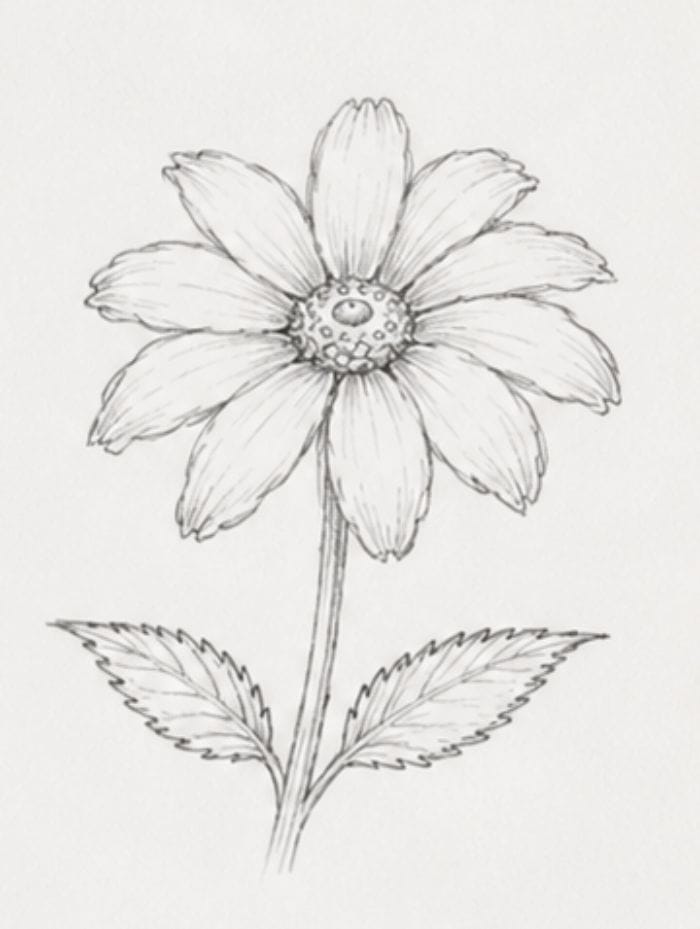
When you’ve completed the flower head After that, draw the support structure.
- Create a slender vertical stem.
- Draw leaves that extend on both sides.
- Create pointed leaf tips for the leaves.
- Add a few curves along the edges of the leaf.
Observe how the leaves naturally grow rather than arranging them in a symmetrical way.
Step 5 – Add Surface Details
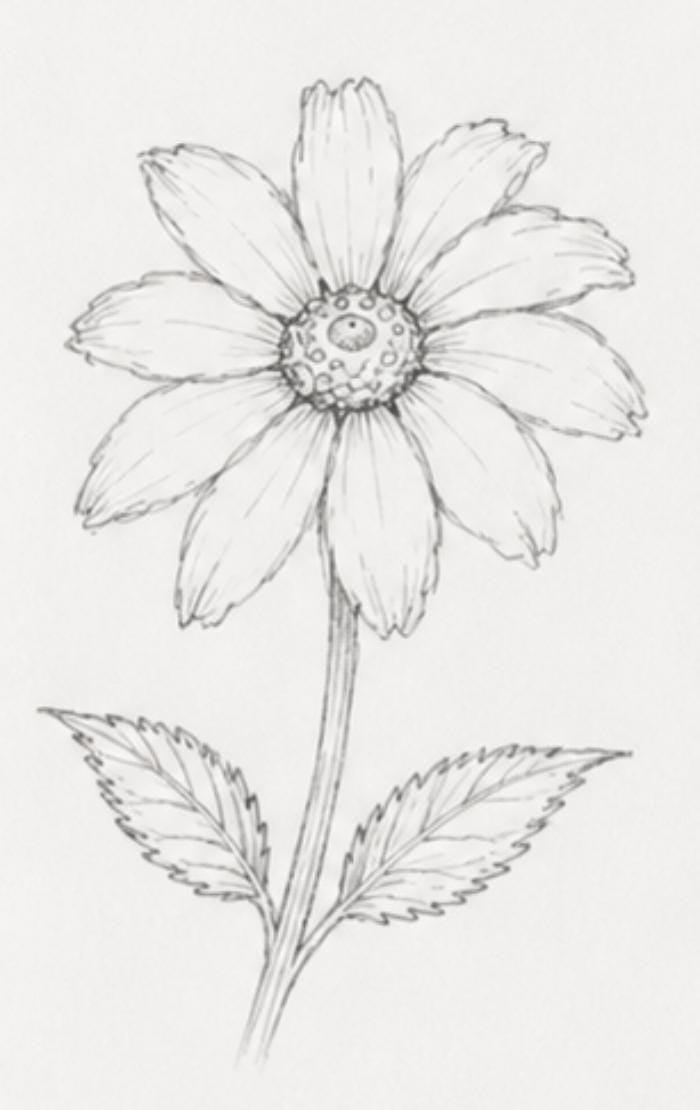
Details give life to drawing.
Include:
- Veins on the petals
- The texture of the flower’s center
- Midribs on leaves
- Minor variations in shape
Do not over-detail at this point. Prioritize the most important areas first.
Step 6 – Apply Basic Shading
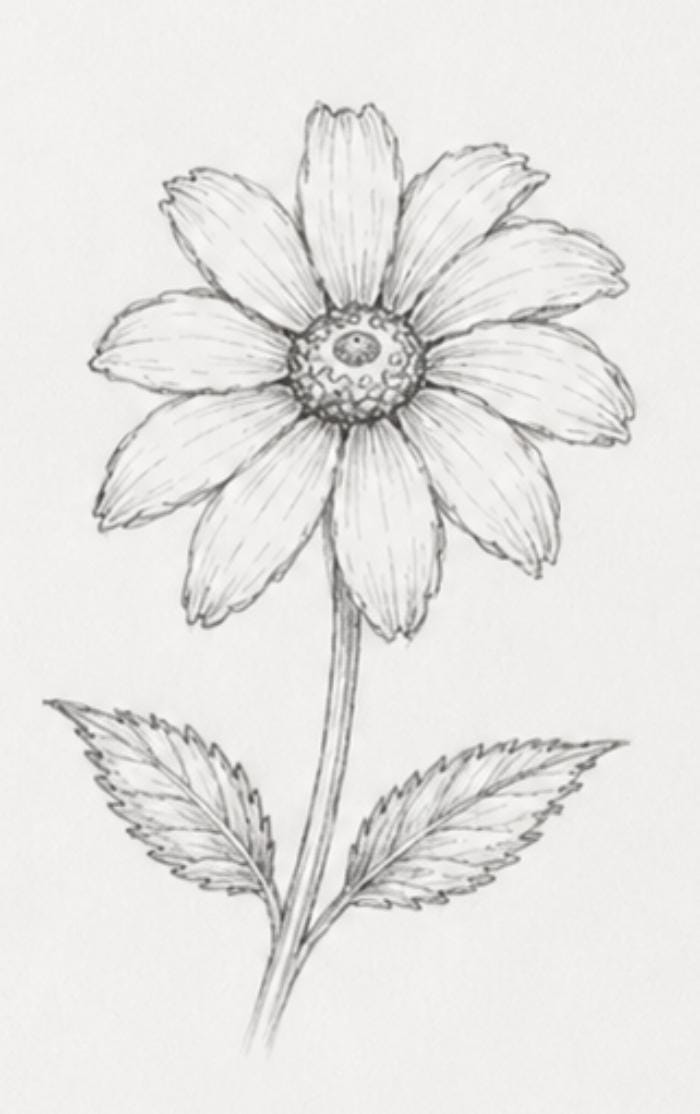
Shading creates depth and dimension.
Start by determining the source of light.
Then:
- Shade on one side of the petals more strongly.
- Darken the center of the flower.
- Add shadows beneath overlapping petals.
- Shade leaves slowly.
Begin slowly and gradually build up values by layering.
Step 7 – Create Realistic Texture
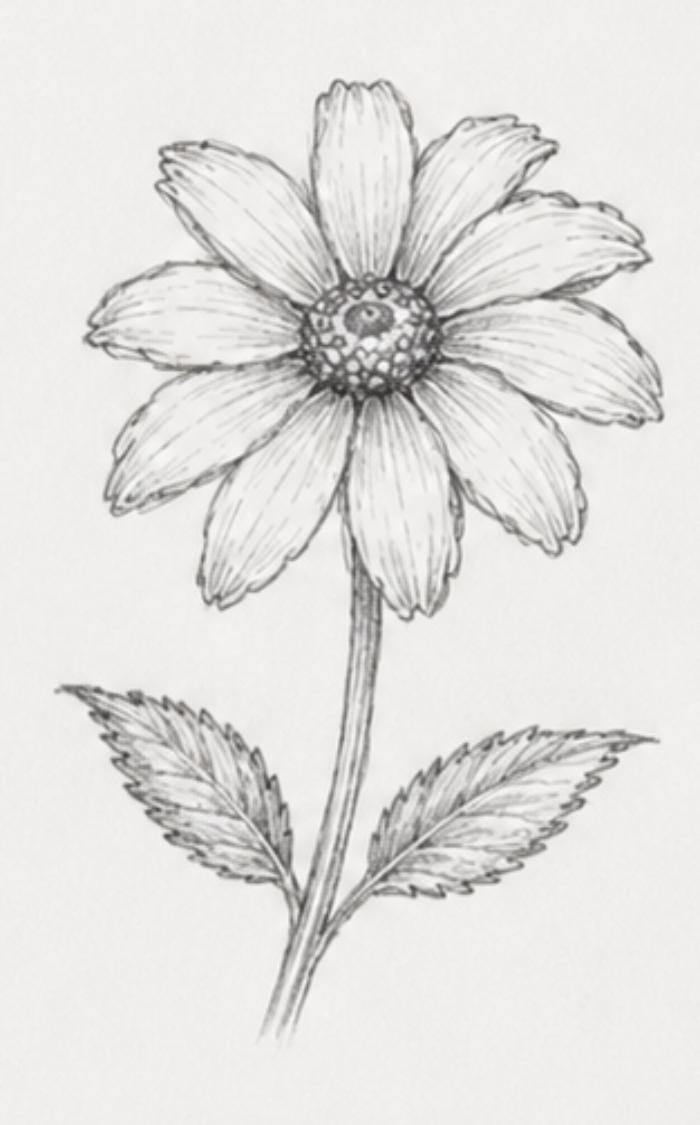
Texture helps the flower look realistic.
To achieve this:
- Layer graphite in a gradual manner.
- Use directional pencil strokes.
- Blend softly where needed.
- Keep the texture that is visible in the center.
The center of the flower must look rougher and more textured than petals.
Step 8 – Add Final Highlights and Finishing Touches
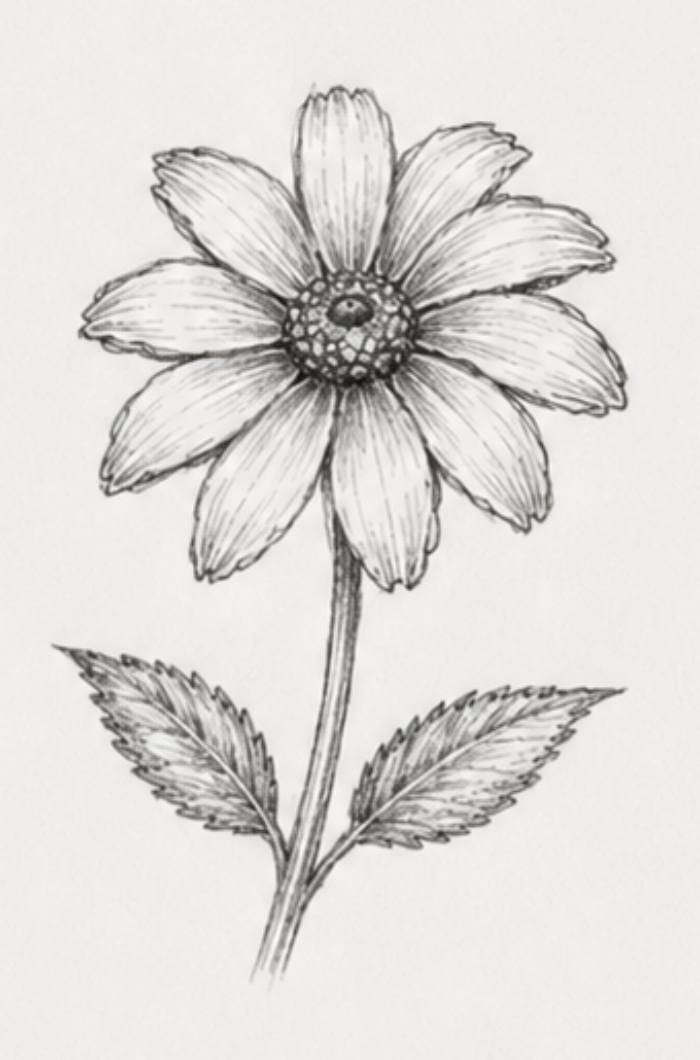
The final stage concludes the drawing.
- Refine petal edges.
- Make sure to increase contrast wherever it is needed.
- Remove construction lines that you don’t want.
- Highlights can be added using an eraser.
These finishing touches help the flower stand out and appear more realistic.
Tips for Making Your Black Eyed Susan Flower Drawing More Realistic
Small improvements can result in a significant difference in the realism.
Focus on Natural Imperfections
Nature isn’t always ideal.
Make room for:
- Uneven petal lengths
- Slight bends
- Minor irregularities
- Organic growth patterns
These imperfections are what give it authenticity.
Use Reference Photos Effectively
Reference photos provide valuable information.
Study:
- Petal textures
- Flower center patterns
- Leaf structure
- Lighting direction
References increase accuracy as well as confidence.
Build Values Slowly
One common mistake is applying a dark shade too late.
Instead:
- Begin by using gentle tones
- Gradually increase the darkness
- Continuously compare values
- Keep smooth transitions
Patience can produce more realistic results.
Common Mistakes Beginners Make
Understanding common mistakes can help avoid frustration.
Drawing Identical Petals
Many beginners create the same petals for the flower.
The result is that the drawing may appear artificial.
Instead:
- Vary the widths
- Change lengths
- Adjust angles
Natural variation improves the realism.
Ignoring Flower Structure
If you don’t understand the structure of the system, your the proportions of a given amount can be incorrect.
Always be aware:
- Petal arrangement
- Size of the Center
- Stem placement
- Leaf positioning
The structure is the basis of any successful botanical flower drawing.
Over-Blending Shading
Blending can increase smoothness, but excessive mixing can remove the texture.
Avoid:
- A lot of smudging
- Flattening details
- Losing pencil strokes
Make sure that there is a texture visible.
Skipping Observation and References
Using only memory for everything frequently leads to mistakes.
Reference photos help you:
- Learn to recognize the different shapes
- Be aware of the textures
- Study lighting
- Increase the proportions
Observation remains one of the most valuable artistic skills.
Creative Variations to Try
Once you’ve got the basics down, sketch, try out different styles.
Black Eyed Susan Flower Drawing in Colored Pencil
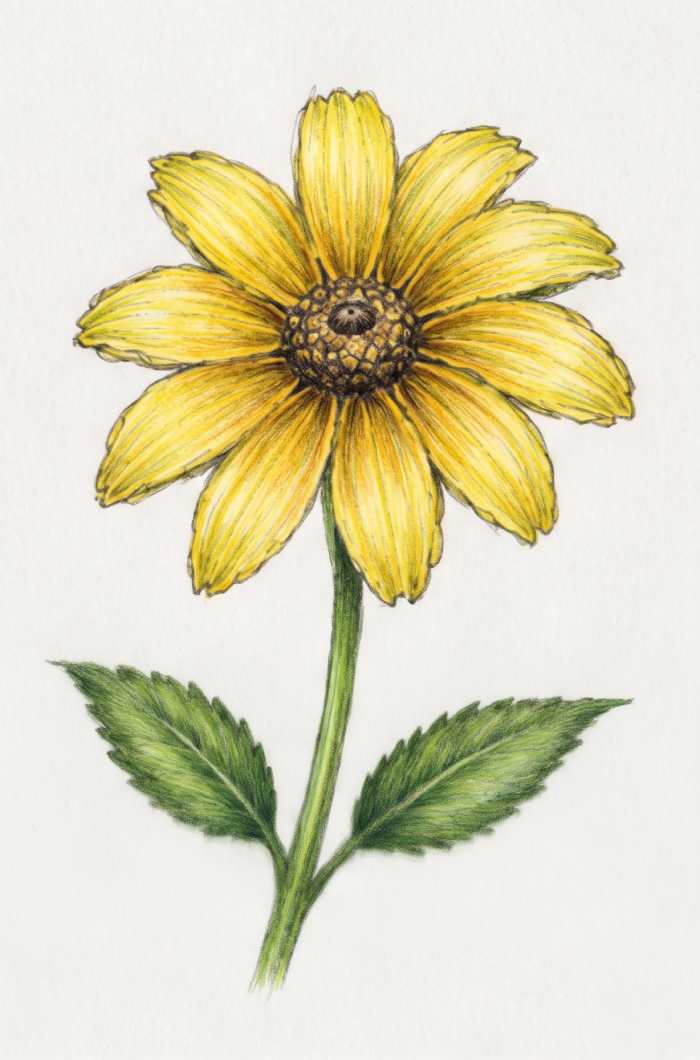
Create vibrant colors using:
- Bright yellow petals
- Dark brown central
- Stem and leaves that are green
Layer colors in a gradual manner to achieve a real-world effect.
Botanical Illustration Style
Botanical illustrations are focused on scientific precision.
The features include:
- Rich textures
- Specific proportions
- Clean outlines
- Minimal exaggeration of artistic style
This design is perfect for people who love plants.
Nature Journal Sketch Version
Nature journals usually include the arts and observations.
Try to include:
- Quick sketches
- Notes about the flower
- Date and location
- Color observations
This technique helps to improve observation skills.
Minimalist Black Eyed Susan Drawing
Minimalist drawings use fewer details.
The focus should be on:
- Simple outline
- Basic shapes
- Limited shading
- Clean composition
This style is great for those who are new to art and contemporary artwork.
Benefits of Drawing Wildflowers for Nature Lovers
Drawing flowers can provide more than just artistic improvement.
Improves Observation Skills
Regularly sketching flowers will train your eye to notice:
- Shapes
- Textures
- Patterns
- Proportions
These skills are beneficial to all types of drawing.
Encourages Mindful Creativity
Drawing flowers can help focus and create a sense of relaxation.
Many artists find it:
- Calming
- Enjoyable
- Stress-relieving
- Meditative
Spending time observing nature often enhances creativity.
Strengthens Botanical Drawing Techniques
Wildflowers provide excellent practice subjects.
They assist in developing:
- Line control
- Shading skills
- Texture rendering
- Structural understanding
Each sketch is a contribution to the long-term development of art.
Frequently Asked Questions
Is Black Eyed Susan Flower Drawing Suitable for Beginners?
Yes. The flower is simple in design, which is easy to learn and yet offers the chance to practice realistic shading and details.
What Pencil Is Best for Realistic Flower Drawings?
A blend of 2B, HB, and 4B pencils can be used effectively. Drawing with HB pencils is a great way to sketch while soft pencils provide deeper shadows and textures.
How Long Does a Realistic Flower Drawing Take?
A sketch of a basic nature can take 20-30 minutes. However, an intricate realistic sketch of flowers may take up to a full day, depending on the degree of detail.
Can I Draw a Black Eyed Susan Without a Reference Photo?
Yes, however, having a reference picture usually yields more effective results. References can enhance the proportions, textures, and overall real-world realism.
Conclusion
The process of creating a Black Eyed Susan flower drawing is a fun method to learn observation shading as well as the art of botanical illustration techniques. Through following the step-by-step process, from drawing the cone’s central part and petals through adding shading, texture, and finally highlights, you can transform an unfinished sketch into stunning flower art. Be aware that improvements are made by constant repetition and a careful examination of the world around you. Continue to experiment with different styles, like colored pencil sketches, botanical illustrations, and sketches from nature journals. Each flower you draw improves your artistic abilities and increases your appreciation of the beauty of wildflowers. With practice and patience, your realistic Black Eyed Susan drawing will keep improving with each new sketch.