How to Draw a Lily Flower Easily in Simple Steps with Drawing Tips for Beginners
Lily flower drawing is a fun and relaxing method for beginners to develop their drawing skills by using simple pencil techniques. In this tutorial, you’ll learn to draw a lily quickly in just a few steps, starting with basic shapes and finishing with the final shading specifics. In addition, we will discuss the basics of drawing for beginners, as well as the most common mistakes to avoid and methods to make your flower sketch appear more natural and authentic. No matter if you’re studying drawing for school, as a hobby, or just for enjoyment , this easy step-by-step guide will allow you to create an impressive lily drawing confidently.
Materials You Need Before Starting
Before you start your drawing of lily flowers, begin by collecting a few basic drawing supplies. It is not necessary to have expensive art tools to make stunning flower sketches.
Here are the essential materials:
- 2B or HB pencil
- Eraser
- Sharpener
- Sketchbook, drawing paper, or drawing paper
- Cotton swab or tissue for blending
- Colored pencils are available as an option.
A regular pencil is ideal for beginning students. Make sure to keep your pencil strokes light in the initial sketching phase because it helps with corrections.
Understanding the Basic Shape of a Lily Flower
Before drawing, it is helpful to comprehend the structure of the lily flower. Lilies generally have large flowers that spread outward into a star-like design. The majority of lily flowers have six petals clustered around the center .
The flower also contains:
- Long, curving petals
- Thin stamens in the middle
- A slender stem
- Small buds or leaves
A look at the real flower or an image of the same will help you see how the petals naturally overlap. Do not stress about making all of your drawings perfect. Natural flowers can be a little uneven, and this helps make drawings appear more realistic .
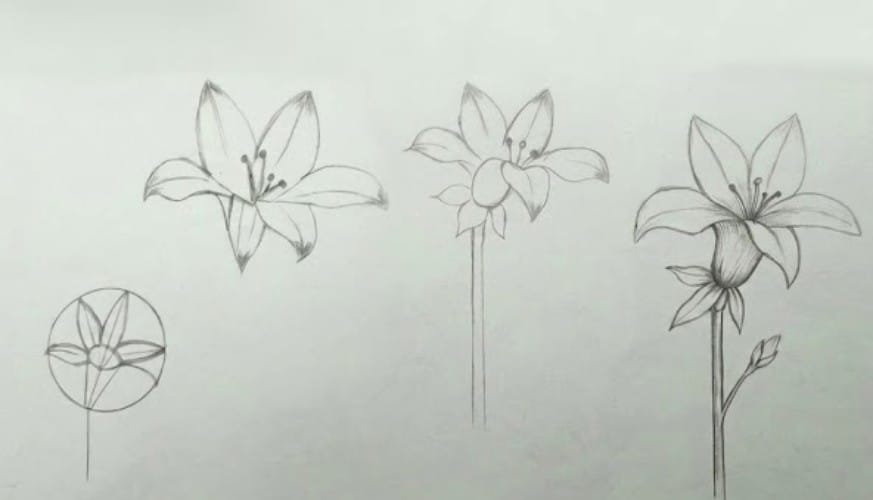
Step-by-Step Lily Flower Drawing Tutorial
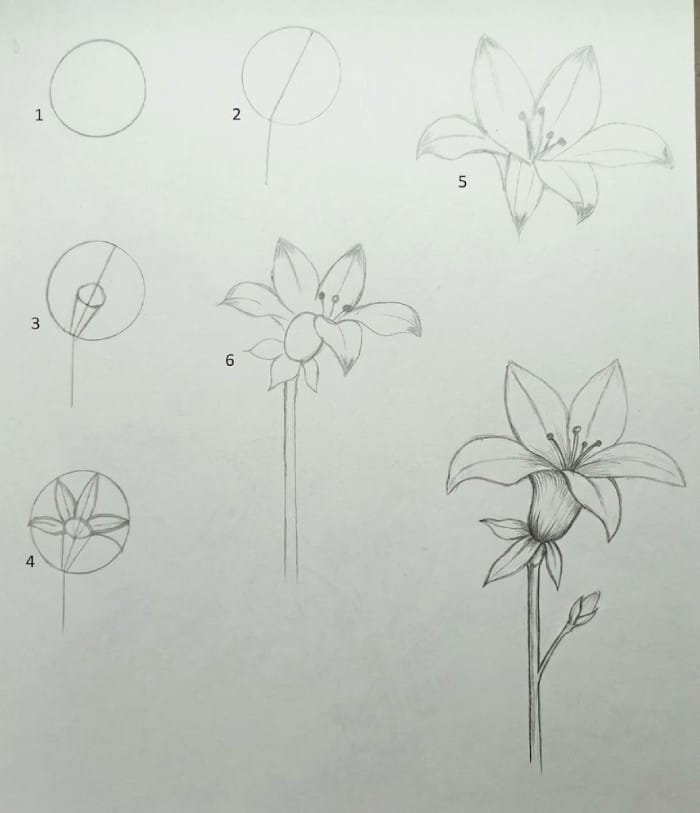
Step 1: Draw a Simple Circle Guide
Begin by drawing a thin circle on where you’ve drawn your page. The circle you draw will serve as the basis for the flower shape.
The circle assists you:
- Make sure that the petals are balanced
- Keep the proper proportions
- Ensure the flower is placed correctly
Don’t press too hard with the pencil, as these guiding lines will be erased later.
Step 2: Sketch the Flower Stem
From the bottom of the circle, draw two bent vertical lines to form the stem.
Don’t forget to save the stem.
- Natural and thin
- A little curly instead of completely straight
- Long enough to allow the flower to be balanced
A gentle curve can make the look of flowers more natural and less rigid.
Step 3: Add the Flower Center
Within the circle, create the small oval or rounded shape that is in the middle. This will form the center part of the lily.
Then, sketch lightly a few thin lines going up from the middle. They will then turn into stamens for the flower.
At this point, the drawing might appear rather simple ; however, the basic structure is ready.
Step 4: Draw the First Layer of Petals
Then begin drawing the first flowers around their center. Start with three larger petals .
Each petal must:
- Make sure you point the tip toward the top
- Curve slightly to the left
- Connect easily to the center
Do not make every flower the same. The real flower petals generally contain small variations in size as well as shape.
Utilize smooth curved lines instead of sharp edges . This will make the lily flowers appear soft and natural.
Step 5: Add More Lily Petals
Then you will draw the remaining petals on the back of the first layer. They may be slightly overlapped in relation to the petals on top.
The focus should be on:
- Creating depth
- Natural overlapping
- The petal spacing must be balanced
This is the point at which the shape of your lily flower becomes evident.
Additionally, you can include light folds or centerlines within each petal to add depth and texture.
Step 6: Draw Leaves and Buds
Move toward the lower portion of the stem. Place a few simple leaves close to the stem.
Draw leaves
- Make use of long, pointed ovals
- Include a central line within each leaf
- Make them curly for a natural-looking
It is also possible to sketch a tiny, unopened flower bud , which is then attached to the stem. This additional detail will make the sketch appear more intricate and artistic.
Don’t overcrowd the drawing by using excessive leaves. Simple designs are often cleaner and more elegant.
Step 7: Add Final Details and Shading

In the final stage, you’ll add highlights and shading .
Begin with:
- Darkening the main outline of the image
- Removing unnecessary guidelines
- Refining petal curves
For shading:
- Use darker pencil tones in the flower’s center
- The petals are shaded lightly towards the outer edges
- Blend gently with cotton or tissue
Additionally, you can make tiny dots on the tips of the stamens to add authenticity.
Shading gives the flowers depth and makes them appear more 3D.
Easy Drawing Tips for Beginners
The art of drawing flowers gets easier when you practice. Here are a few easy basic tips to help you enhance your sketching quickly.
Start With Light Pencil Lines
Make sure to sketch lightly at the beginning. Lines that are too thick are difficult to erase and could make drawings messy.
Observe Real Flowers
When you look at real flowers, you comprehend the flow of petals, forms, shapes, along with natural curves.
Practice Petals Separately
If the petals are difficult to draw, try drawing small petals before drawing the whole flower.
Use Simple Shapes First
The most complex drawings begin with ovals, circles, and guide lines. Making objects into shapes helps make drawing simpler.
Be Patient With Yourself
Don’t expect flawless results right away. Every artist gets better through regular practice .
Common Mistakes to Avoid
Beginners tend to make typical mistakes while drawing flowers . Making sure to avoid these mistakes can help make your art more effective.
Making Petals Too Symmetrical
Natural flowers aren’t alike. Some slight variations make drawings appear authentic.
Pressing Too Hard With the Pencil
Dark lines early in the process can make adjustments difficult. Make sure that strokes are soft until the end of the stage.
Ignoring Flower Direction
The petals should naturally flow outward away from their center. Unpredictable directions can cause flowers to appear strange.
Over-Shading the Drawing
Excessive shading can make the petals appear dirty. Create shading slowly and gently.
Drawing a Completely Straight Stem
A slightly curved stem appears more organic and realistic.
Simple Lily Flower Drawing Variations to Try
Once you have mastered the fundamental drawing of a lily, it is possible to explore various styles.
Cartoon Lily Flower
Make use of larger flowers with bold lines, as well as simple shapes, to create a cute cartoon-style version.
Realistic Lily Sketch
Add detail to shades, petals, and shadows to create a realistic look.
Minimalist Lily Drawing
Create a simple line-art flower with clean lines and minimal shading.
Cute Doodle Lily
Tiny doodles are ideal for use in notebooks, journals, and as decorations.
Benefits of Practicing Flower Drawing
Drawing flowers isn’t just a way to have fun ; it can also help improve artistic skills.
Improves Hand Control
Making curves and petals can help create more fluid hand movements.
Builds Observation Skills
You begin to see the smallest elements, shapes, and textures of nature.
Helps You Understand Shading
Flowers are great subjects to study shadow and light.
Relieves Stress
Many find sketching relaxing, especially at the end of a hectic day.
Boosts Creative Confidence
Drawing a sketch gives newbies an incentive to keep working on their drawing skills.
Frequently Asked Questions (FAQ)
What is the best way to draw a flowering lily step-by-step?
Begin by drawing a circle, then draw the stem and flower’s center. Then add the petals, leaves, and lastly, shade step-by-step.
Which are the simplest flowers to draw, especially for beginner artists?
Simple flowers like lilies, daisies, and sunflowers are generally easy to master for those who are new.
Which pencil is ideal for drawing flowers?
2B and HB pencils are excellent choices since they allow gentle drawing and smooth shading.
How do I make my drawing of a lily appear more realistic ?
Concentrate on soft shading, curving petal shapes that overlap, and the natural imperfections of the flower.
Do children draw lily flower designs without difficulty?
Yes. Lily flowers are easy to draw for beginners since they can be broken down into simple shapes and drawing steps.
Conclusion
The art of creating a Lily Flower Drawing is easier than many novices think. Beginning with basic forms and following these 7 easy steps, anyone is able to draw beautiful flowers through practice and perseverance. Keep in mind that all artists improve with time, so don’t worry even if your first sketch isn’t perfect. Be sure to enjoy the process and rehearse regularly. As you gain confidence, you will be able to experiment with various flower styles, as well as shading techniques and imaginative designs. Keep your pen moving, be calm, and most importantly, make sure you have fun creating your lily artwork.
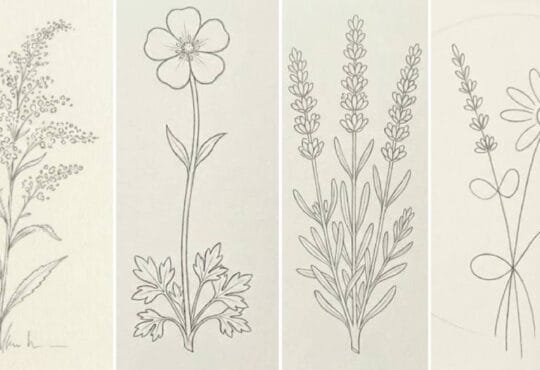
Looking for more Flower drawings inspiration? Check out these articles:
Realistic Sunflower Drawing Ideas
25 Beautiful Flower Drawing Ideas
Realistic Aster Flower Drawing Ideas
Realistic Lily Flower Drawing Ideas
Simple peony flower drawing ideas