How to Turn Waste Cardboard into Beautiful Wall Decor Step-by-Step Guide
If you love working with your hands, this wall decor is a wonderful project to try. This project uses simple materials you can find at home. The 8 images you shared show the full process, making it easy to understand every step.
You don’t need any special tools or high-cost items. You just need waste cardboard, some colors, and a little time. At the end, you’ll have a beautiful wall decoration which you can hang anywhere.
Why This Waste Cardboard Craft Is Worth Trying
Ordinarily, cardboard ends up in the trash, but there are loads of fun, creative ways to repurpose it.
Here’s why this idea works well:
- Cardboard is easy to find
- It is simple to cut and shape
- You don’t need much money
- Anyone can try it, even beginners
It helps reduce waste at home.
This project is a simple way to turn unused material into something useful.
Materials You Need
This waste cardboard craft requires only a few recycled materials that you probably already have at home.
- Thick cardboard pieces
- Scissors, or a cutter
- The glue (Fevicol and hot glue)
- Acrylic colors (black, brown, green, red, blue, white)
- Paintbrush
- Small plastic cups
- Cotton bud for dots
- Artificial flowers
- Hook or thread to hang
Step-by-Step Process
Step 1: Make the Base
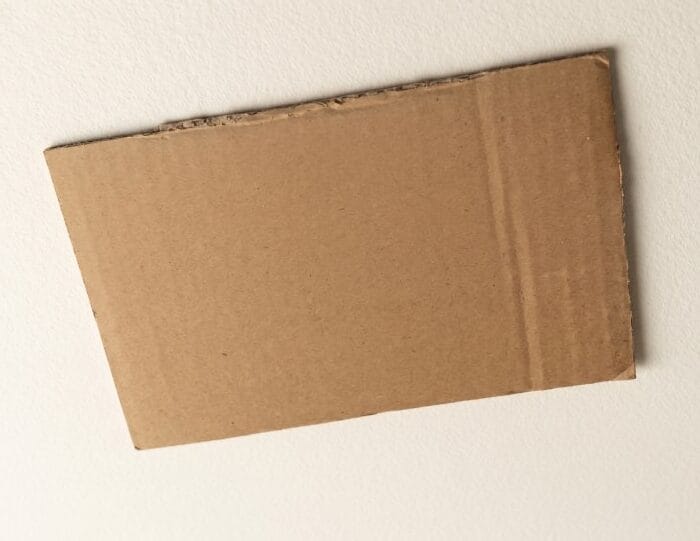
Start by cutting your cardboard into a rectangular shape. This will serve as the base for your wall decor.
Make sure:
- The cardboard is strong
- It is not easy to bend.
- The size will fit the wall you have
If needed, you can stick two layers of cardboard together for extra strength.
Step 2: Paint the Background
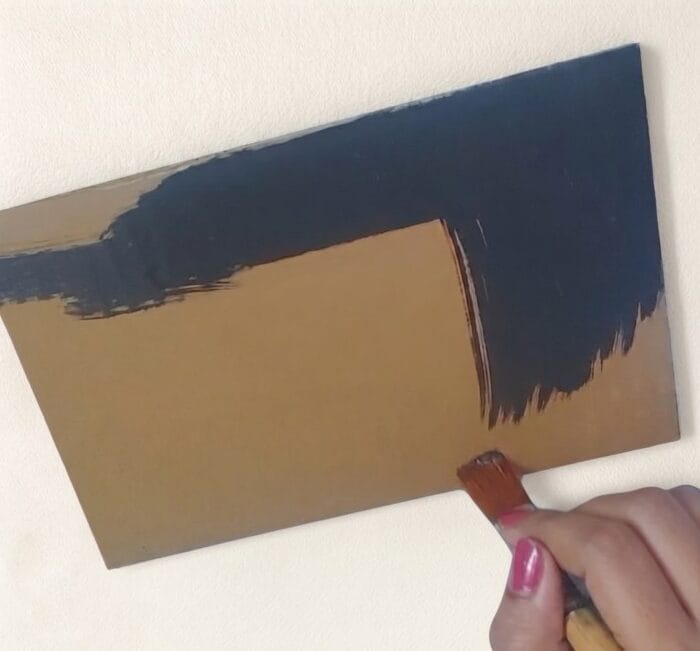
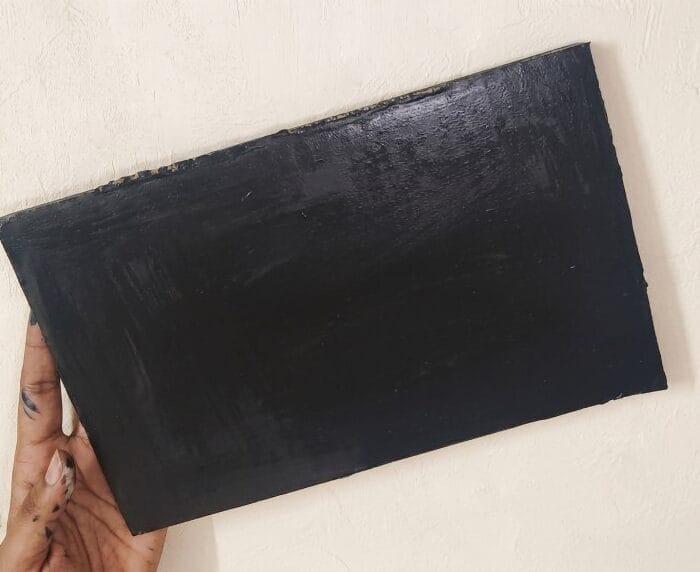
Paint the entire base with a dark color, such as black.
This can be helpful:
- Make the design stand out
- Give a clean look
Dry it completely before moving on to your next stage.
Step 3: Cut Small Pieces
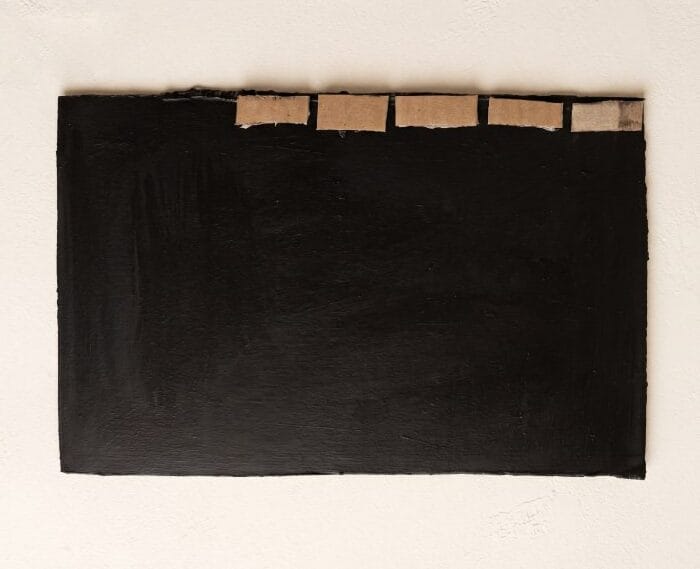
Cut small rectangular pieces from cardboard.
These will be used to create the brick pattern.
It doesn’t matter if you have perfect shapes. A few uneven pieces will look more natural.
Step 4: Make the Brick Pattern
Now stick these small pieces on the base.
Use a simple pattern to follow:
- Place them in rows
- Leave small gaps
- Arrange them in a similar way to bricks.
Take your time here, because this step sets the overall appearance of the style.
Step 5: Paint the Bricks
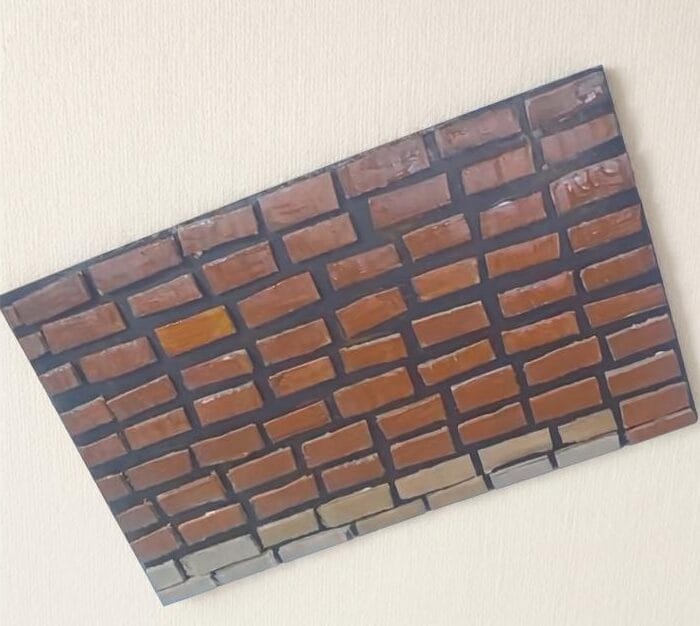
Once everything is fixed, paint the smaller pieces brown.
You can:
- Use one shade, or use a mix of light and dark
- Add small strokes to add texture
Let the paint completely dry.
Step 6: Prepare the Cups
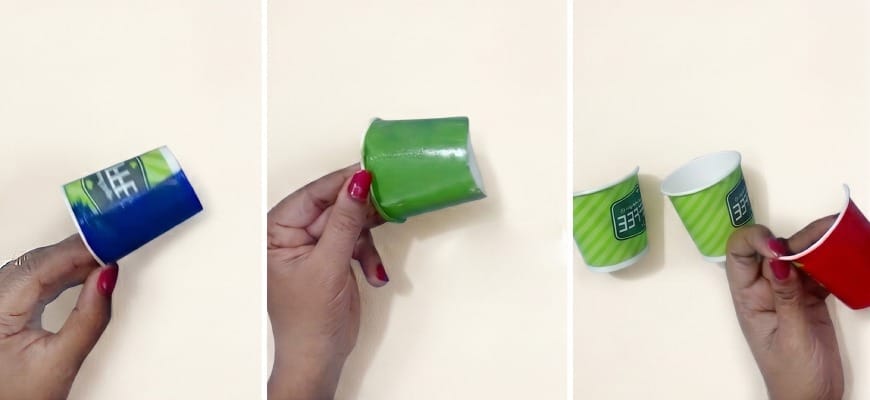
Take three small cups.
Paint each of them in an entirely different color:
- Blue
- Green
- Red
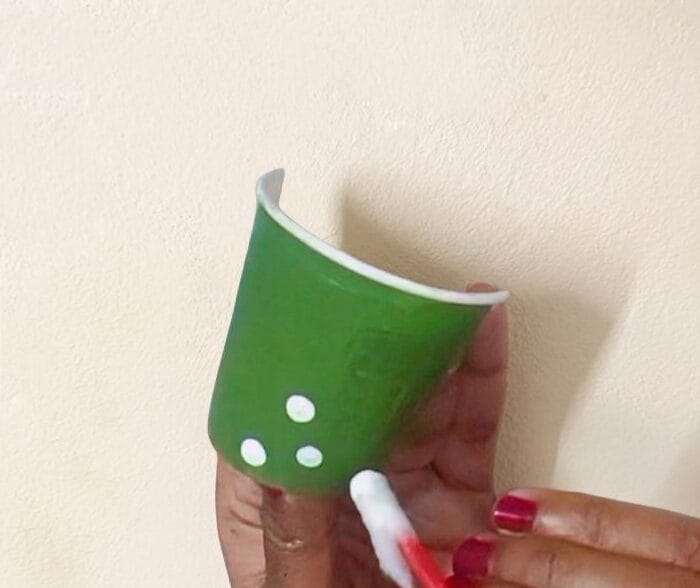
After drying, you can use a cotton bud to draw small white dots on them.
This small detail adds a nice, simple design.
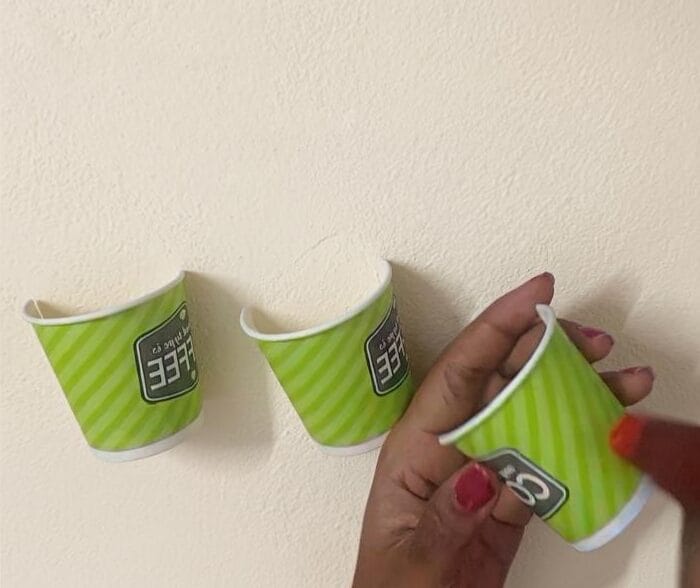
Step 7: Attach the Cups
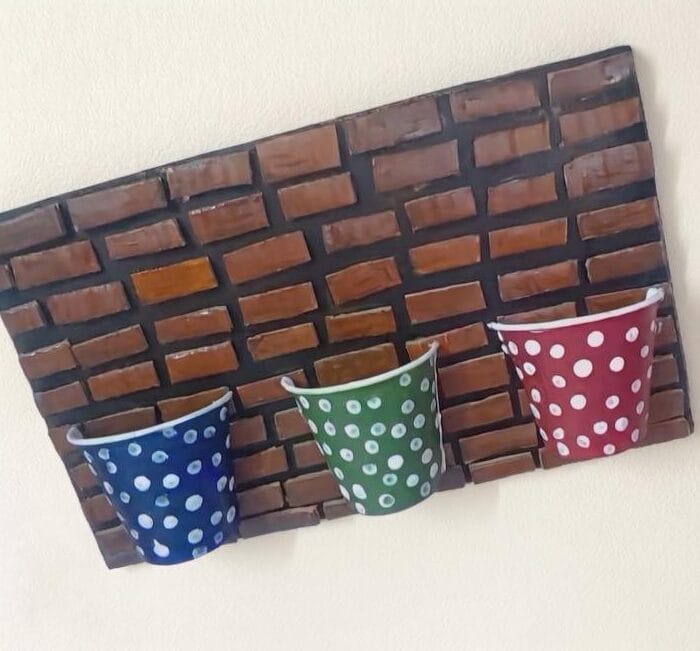
Apply glue on the back of each.
Stick them on the cardboard base:
- Keep them in one straight line
- Leave equal space between each
Press gently and hold for a few seconds so they stick well.
Step 8: Add Flowers
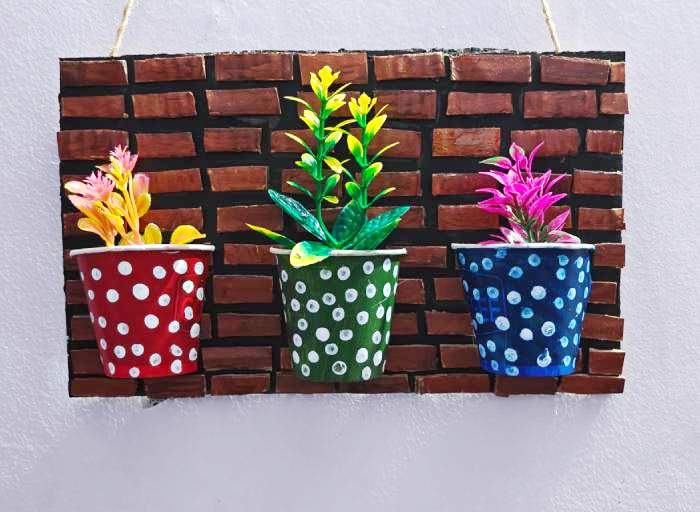
Then, place artificial flowers in each cup.
You can:
- Use different colors
- Change the size and height.
- Fill the cups up well
This step adds color and completes the piece.
Step 9: Final Check
Before hanging, make sure to check all the following:
- Fix any loose parts
- Clean extra glue
- Adjust flowers if necessary
Attach a hook or thread to the back.
Your wall decor is now ready.
Simple Tips
- Use thick cardboard to ensure it lasts longer
- Let the paint dry before the next step
- Use strong glue for a better hold
- Make sure to keep colors simple to ensure a clean and crisp finish
Where You Can Use It
You can put this decor in:
- Living room
- Bedroom
- Balcony
- Kids room
- Small art corner
It is also possible to give it as a handcrafted gift.
Final Thoughts
Cardboard wall decor is easy to make. The steps are simple, and the materials are easy to find. It doesn’t require any special skills to try this.
It also lets you use waste materials more effectively. Instead of throwing cardboard away into the trash, you can transform it into something useful.
Take a look at this design a few times. You can then alter the colors or shapes to create your own style. Handmade items always feel more personal and real.