Tulip Sketching Made Simple: Step-by-Step Pencil, Ink, and Watercolor Tutorials
Learn the secrets of bringing this timeless masterpiece of tulips the page. No matter if you’re a novice or an experienced artist this guide is the key to mastering the beautiful art of tulips flower drawing. We’ll break the process down into easily manageable steps. We’ll begin with a sketch in pencil. Learn how to create clean, sharp lines using ink before filling your artwork with vivid color by using watercolor. Prepare to transform your blank paper into an amazing flower masterpiece using our extensive tutorials on drawing tulips.
Materials You’ll Need
When you are beginning your artistic journey, having the right equipment is vital. There’s no need for a large professional art kit, just the essentials to start.
Pencil Sketching:
Pencils: Some graphite pencils of varying hardness like an HB pencil to sketch general sketches, 2B pencil for more dark lines and a 4H pencil to draw light guidelines.
Erasers: An eraser that is kneaded can be used to lift graphite and avoiding smudging. an eraser made of plastic or vinyl can be used to make precise corrections.
Paper: Sketchbook paper that has some surface (known by the term “tooth”) works well to hold graphite or ink. Smooth paper is good as well, however textured paper can make shading much easier.
Ink Supplies:
Pens/Fine Liners: An assortment of water-resistant fine liner pens with different dimensions of tips (e.g., 0.1, 0.3, 0.5mm) is ideal for adding details and definition.
Brushes: The small size of a brush along with some black, waterproof ink are suitable to make lines that are thicker and for filling in gaps.
Watercolor Essentials:
Paints: An essential watercolor kit featuring a variety of colors, including reds pinks, yellows and blues, and greens. Pan sets are ideal to carry around, whereas tube paints have more pigment.
Brushes: There are a few watercolor round brushes in various sizes (e.g. the size 4 to be used for everyday use and a size 2 for specifics and an 8-size for washes) are sufficient.
Palette: An ceramic or plastic pallet to mix colors.
Paper: The highest-quality paper for watercolor is essential. You should look for paper that weighs at or near 140lbs (300gsm) because it is able to stand up to water without breaking or buckling.
Others: A jar of fresh water, paper towels to blot the area, and a pencil for your first sketch.
Understanding Tulip Anatomy
A good drawing begins with observation. The most effective way to understand the art of drawing how to draw tulips is to comprehend the basic structure of tulips.
Petals: One of the most well-known parts in the tulip. They are usually oval or teardrop-shaped, and they form the shape of a bell or cup. Take note of the way they curve and overlap. Certain tulips have pointed petals, whereas others have frilly or round edges.
Stem: the stem an tulip is lengthy, smooth, and usually curves elegantly. It’s not a straight line! Be aware of how it bends, and is able to support the weight of the flower.
Leaves: Tulip leaves are large, long and usually possess a waxy and slightly shiny surface. They are erupting at the base of the stem before wrapping around the stem.
Bulb (optional to draw): While you will not see the bulb but knowing that the stem is derived from a single point on the ground aids in the overall design.
To create your sketch of the anatomy of a tulip you should take a minute to examine an image of a reference or more importantly take a look at the actual blooming tulip. Pay attention to the subtle curves the how light is reflected off the petals, as well as subtle folds.
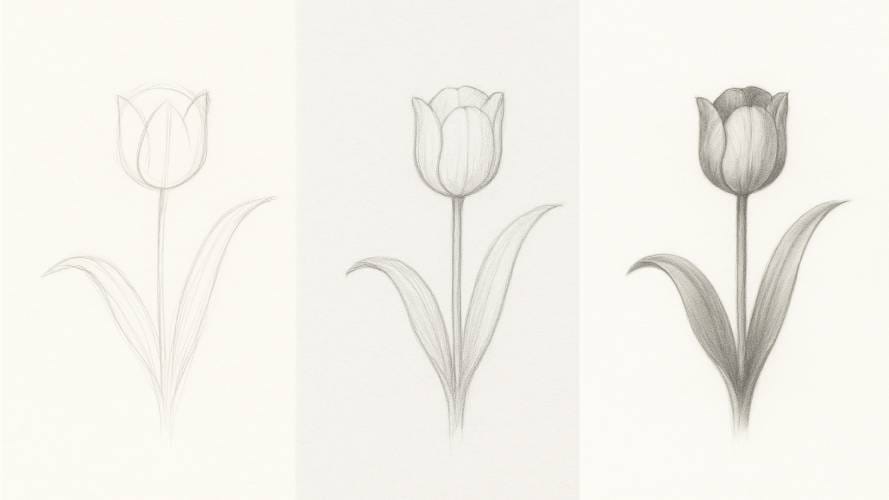
Step-by-Step Tulip Sketching in Pencil
This is the base for your subsequent work. Make sure you are using light, loose strokes.
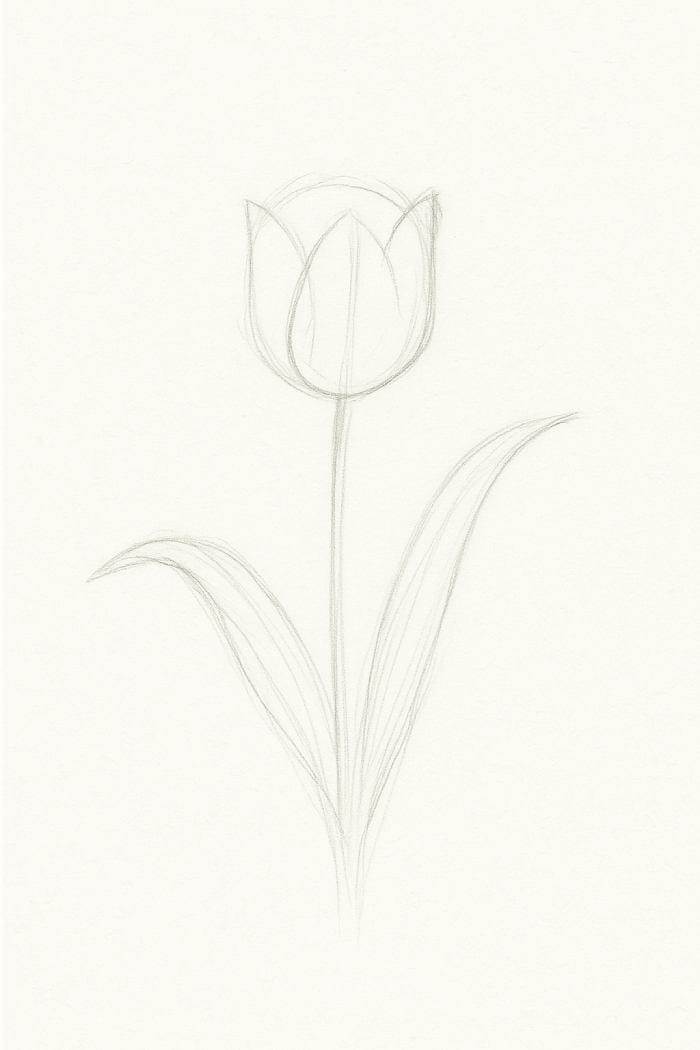
Step 1: Basic Outline and Petal Forms. Start with a thin oval for the flower’s head and a slight curving outline to create the stem. On the basis of this oval sketch lightly the three or two most visible petals. Do not worry about being perfect as this is merely to determine the basic shape.
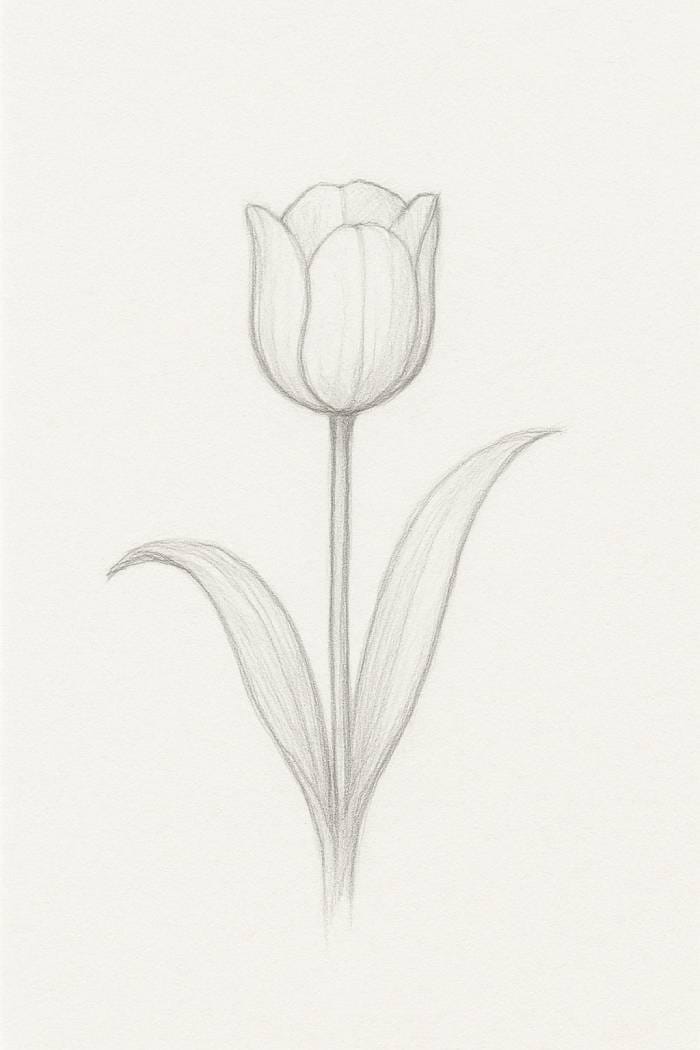 Step 2: Adding Leaves and Stems. Refine the stem line by giving it a thin thicker. Draw the leaves that are long and sweeping. Keep in mind that they are usually near the stem on the lower end and then spread out.

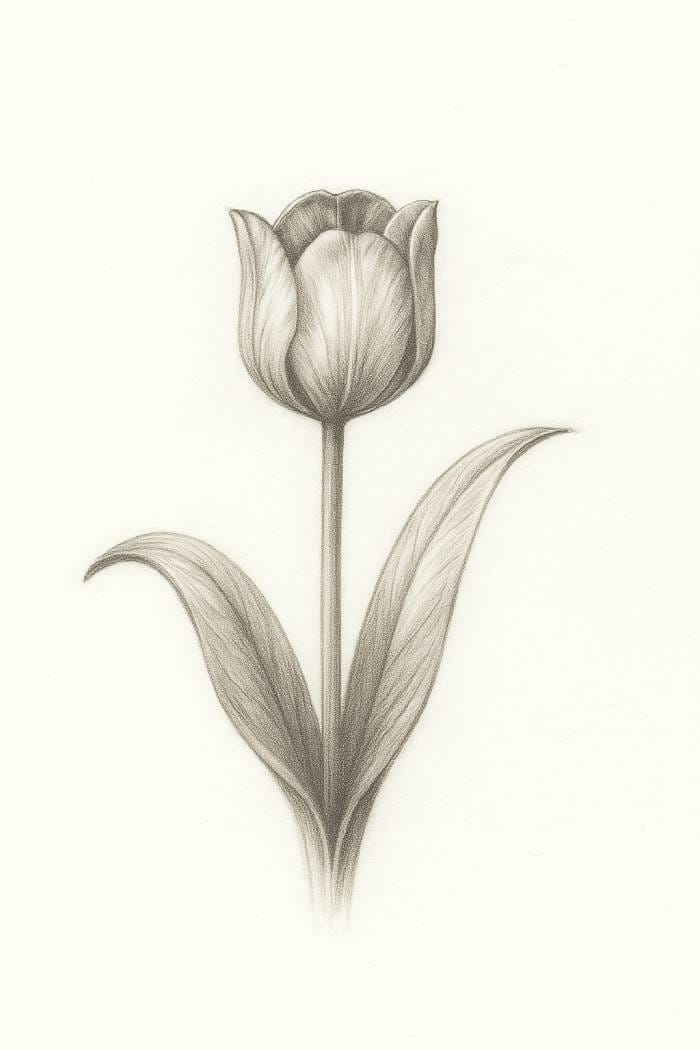 Step 4: Final touches for realistic. Add subtle details such as a line that runs down the center of the petals, or an encircling line at the point where the petal curves. Make use of your kneaded eraser draw highlights over high-up areas of petals.
Tips for Beginning users: Don’t press too for too long! Begin with the tiniest pencil you own. The most common mistakes are creating a stem that is too straight, or the petals too in a symmetrical. True tulips are imperfect and imperfections, which makes them gorgeous.
Tulip Sketching using Ink
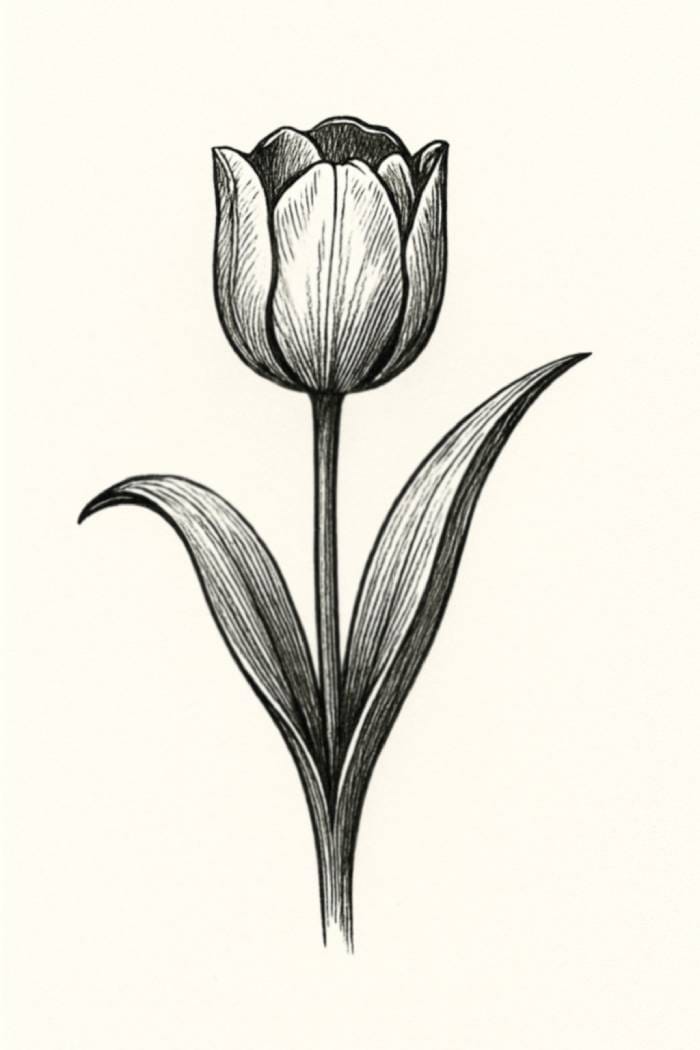
Ink can transform the sketch you made with pencil into graphic, bold illustration.
Selecting the Best Ink Pen: Choose a fine-liner that is waterproof, so that the lines don’t get smudges when you apply watercolor. A size of 0.3mm is a great general-purpose size.
Drawing the Sketch to ensure Clear, Defined Lines. Carefully go over your pencil lines using an ink pencil. You are able to be selective, and don’t be compelled to outline each and every part. A broken line will usually be more attractive. Variate the pressure to produce lines that are thicker and less.
Add Texture and Hatching for shading. Instead of solid shading, try using the technique of hatching (parallel lines) or cross-hatching (crossing lines) to create dark areas. This technique gives you the impression of a stylized illustration. The more detailed the lines, the more dark the impact. It is also possible to use stippling (dots) to create another type of texture.
Tips for beginners: Practice on a scrap of paper to feel comfortable with the pen. Don’t be rushed; the ink will last forever!
Watercolor Tulip Sketching Tutorial
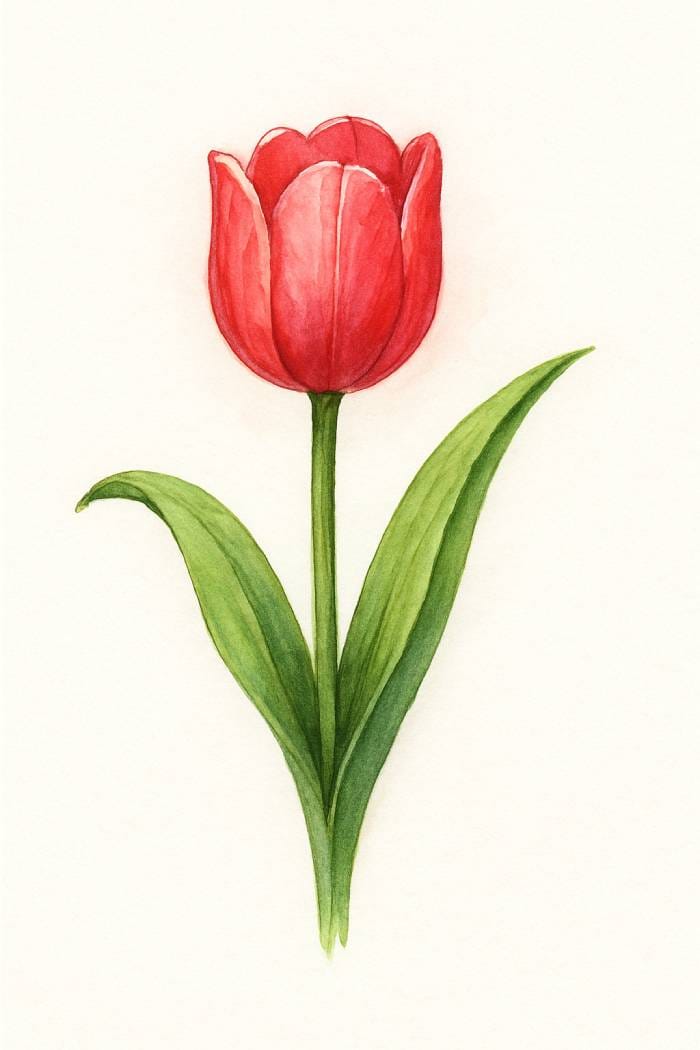
Then let’s get into the magic of color! This tutorial will focus on the art of layering and blending.
Preparing the Sketch Prior to painting. Once your ink is dry, carefully erase any remaining pencil lines. The sketch you draw in the ink should serve as your reference.
Selecting Colors in Petals, Stems, and Leaves. Mix your colors on your palette. For a red tulip begin with an ethereal wash of light red or pink. For leaves mix bright green. Be aware that you are able to add more color but it’s difficult to get rid of it.
Layering and Blending Techniques for Realistic Effects.
1st Clean: Make a thin even hue of base colors on every petal. Dry it completely.
2nd layer (Shading): Mix an a little darker shade of your shade. Apply this darker shade to areas that will be shadowed, such as where the petals overlap and where the bloom is positioned against the stem. Use a dry, clean brush to smooth the edge of the darker color to the light base. This is essential to creating a realistic, soft appearance.
The Third layer (Details): With an extremely tiny brush, apply a couple of strokes of an intense or darker shade to the darkest shadows, or to create the appearance of veins.
Adding finishing touches as well as Highlights. After your paint is dry and you are able to make use of a small, round brush to create small highlights with a lighter hue or even a little white.
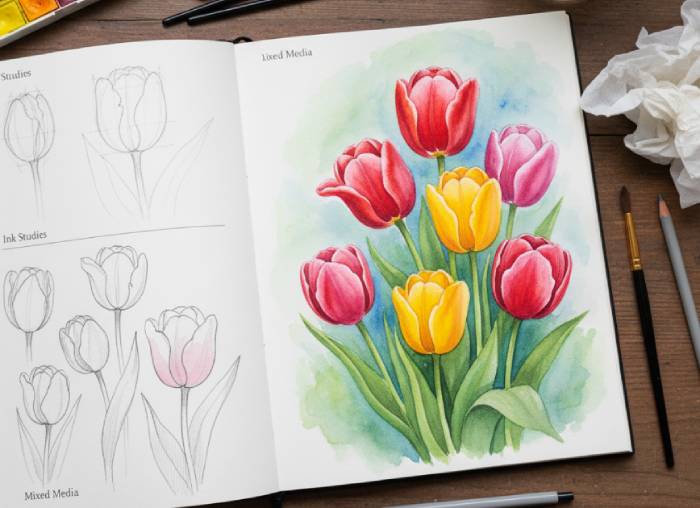
Combining Techniques
The most stunning art usually blends different media.
How to Mix Pencil Ink and Watercolor to create a polished Tulip Illustration. Start with your pencil sketch, and then add your ink pen. After the ink has dried and the pencil erased, apply your watercolor. The pencil creates structure, while the ink provides clarity, and the watercolor gives the life and color.
Examples of Hybrid Sketches:
ink and wash A style that is popular where you apply a bold outline of ink before filling it in using clear watercolor wash.
Pencil as well as Watercolor: A softer method where the shading of the pencil creates depth, while the watercolor provides a subtle hint of color.
Tips for creating unique styles of art: Don’t be afraid to play around. Try a messy, spirited pencil sketch and a striking single-color watercolor wash to create an edgy style. Try a intricate ink sketch with just the smallest amount of hue on its petals.
Common Mistakes and How to Fix Them
Everybody makes mistakes, but being aware of how to avoid them will save you from lots of stress.
Unproportioned Petals or stems: It is common when you do not draw an initial sketch. Utilize your sketch in pencil to determine proportions before you commit to painting or ink.
Over-shading, and Muddy Watercolor The effects: This is a common watercolor error. The answer is to make use of less pigment and greater amounts of water and to be patience between the layers. Each wash should be completely dry before you add the next. If your paints are getting dirty, your water or brushes may not be clean enough.
Tips for Practicing and Improving
Consistency is the most important factor to advancing in your career as an artist.
Everyday Sketching Routines: Take 15 minutes every day sketching the tulip or part of one. This helps build muscles and improves your ability to observe.
The Real Tulips to Observe to ensure accuracy: Nothing beats drawing from real life. Go to a local flower garden or purchase flowers.
Utilizing Reference Photos and online resources: If you can’t obtain a real tulip utilize high-quality images of reference. Pinterest, Unsplash, and websites that showcase botanical art are fantastic sources.
Conclusion
You’ve learned the fundamental techniques to create stunning artwork using tulips, pencils as well as ink and watercolor. Keep in mind that art is an act that requires practice and exploration. Be prepared to make mistakes. It’s an integral part of learning.
We suggest you try these techniques, and to experiment with your own personal styles. Send us your tulip sketches on social media and include us on social media and tag us! We’re excited to see what you’ve created. For any concerns, feel at ease to leave a message below. Have fun drawing!