How to Draw a Tree the Easy Way: From Basic Shapes to Realistic Form
Tired of drawing trees with lollipops as leaves? It can be intimidating to learn the basics of drawing trees, but you don’t have to! This guide will teach you how to draw trees in a simple and manageable way. We will start by breaking the structure down into basic shapes and then progress to realistic form, texture, shading, etc. Master the techniques to confidently add lifelike, beautiful trees to your artwork.
Understand the Basic Parts of a Tree
Understanding the anatomy of a forest tree will improve your work. A tree is much more than a stick with an inflated ball on top. It’s a well-organised structure.
- The trunk is the anchor: The trunk is rarely straight, and it usually widens at the base (the roots flare) to provide stability.
- Branches: The primary branches grow outwards from the trunk. They become smaller and smaller as they divide. The shape of the tree is determined by how branches develop.
- Leaves or leaf clusters: Instead, draw the leaves as large, textured “clusters” or masses. These clusters give the crown its overall shape.
- Overall Silhouette: The silhouette is a picture of the tree in relation to the sky. Is the tree tall and thin (like a cypress)? Is it wide and rounded like an oak? This shape can help you identify the type of tree early.
Understanding structure will help beginners draw better. Knowing where to place the different parts helps you avoid random scribbling. This will make your tree look stable and natural even before you add any details.
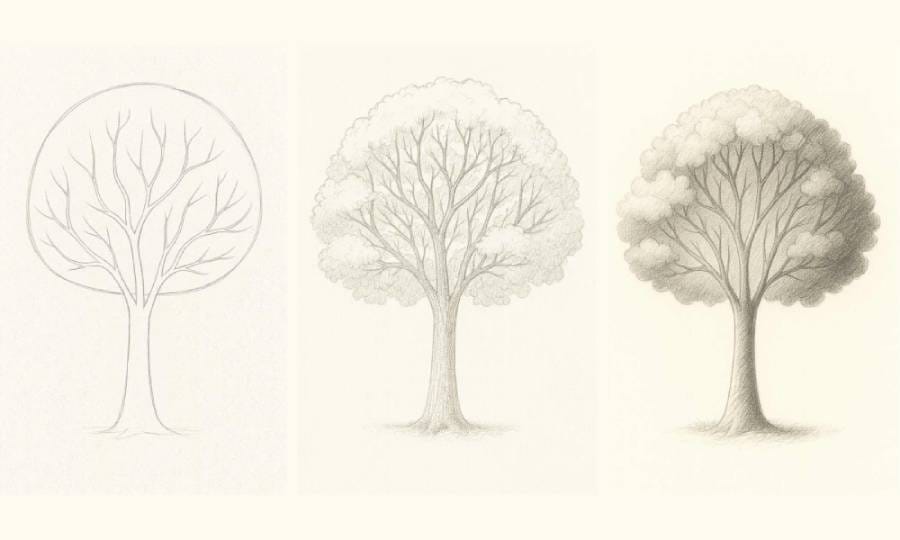
Start With Basic Shapes (Easy Beginner Method)
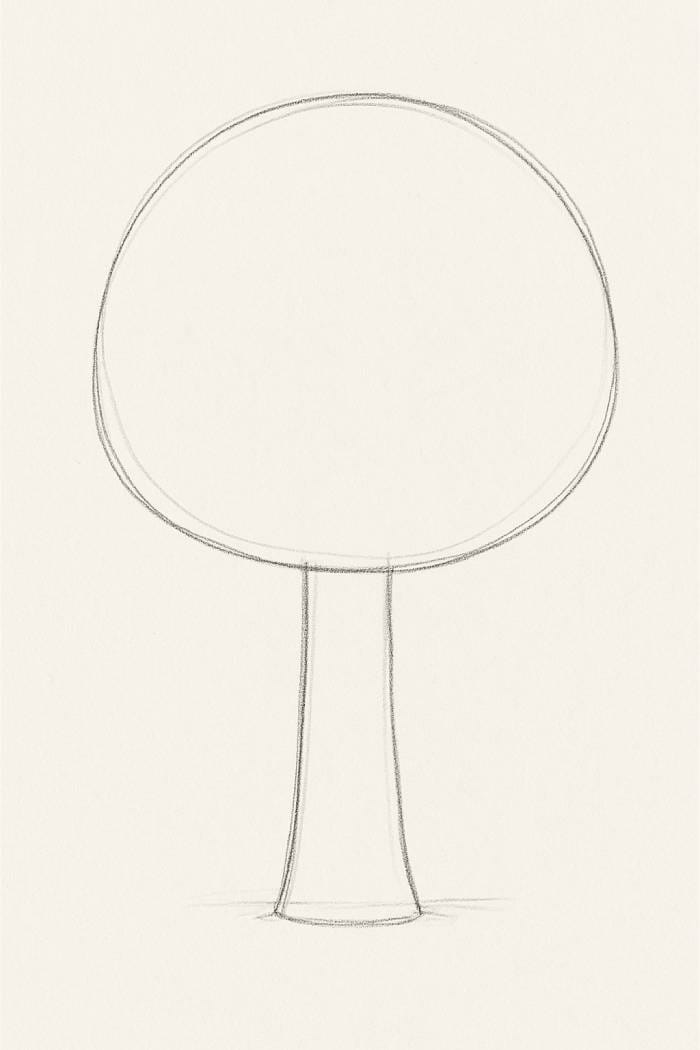
This is the important thing to drawing any complex item: simplify, simplify, simplify. We’ll use the maximum basic shapes to map out your tree.
- Draw the Simple Rectangle or Cylinder for the Trunk: Start by drawing the two vertical lines. They should be tapered slightly so that the bottom is wider than the top to mimic a cylinder. These lines are only guidelines.
- Draw Circles, Triangles or ovals on the crown of the tree: Look at the desired type of tree. Use a large oval or circle that is slightly irregular for an oak. Use a triangle for a pine. Do not worry about perfectionism; just make your shapes big and loose. If the crown is complicated, you can overlap several circles.
- Explain how these shapes guide the final form: These simple forms act as a blueprint or container. These shapes define the volume and height of the tree. They ensure that everything you draw within is proportionate and that it forms a cohesive mass.
- Quick tip: Keep shapes loose, light, and easy to adjust: Use an H or 2H pencil and a lighter hand. These guiding lines will be erased later, so they should only be barely visible.
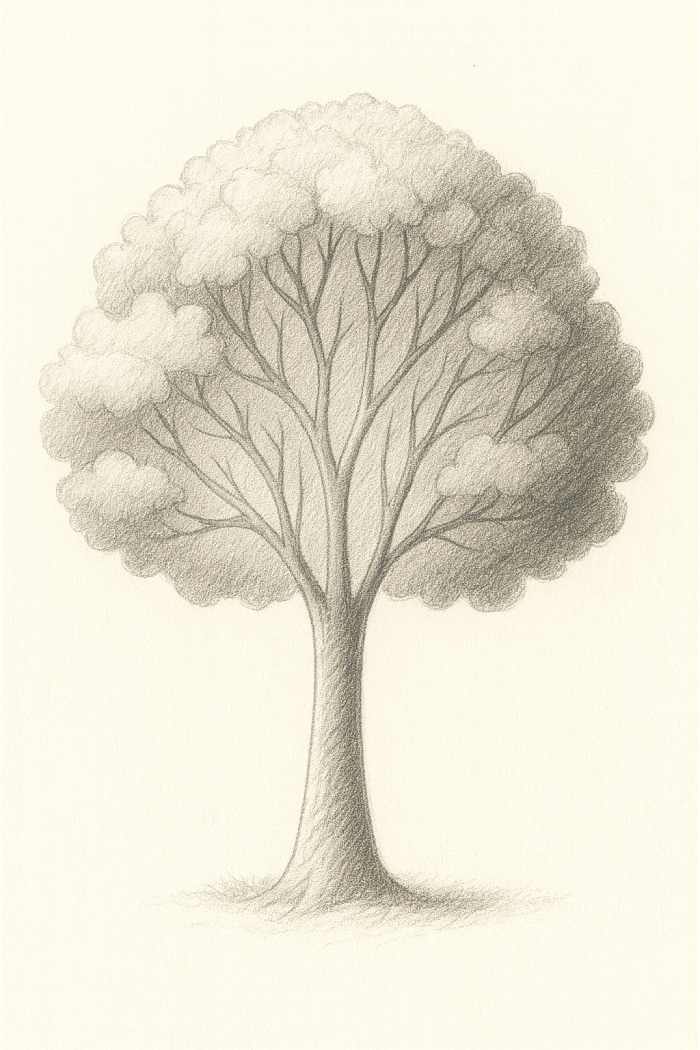
Outline the Tree Structure
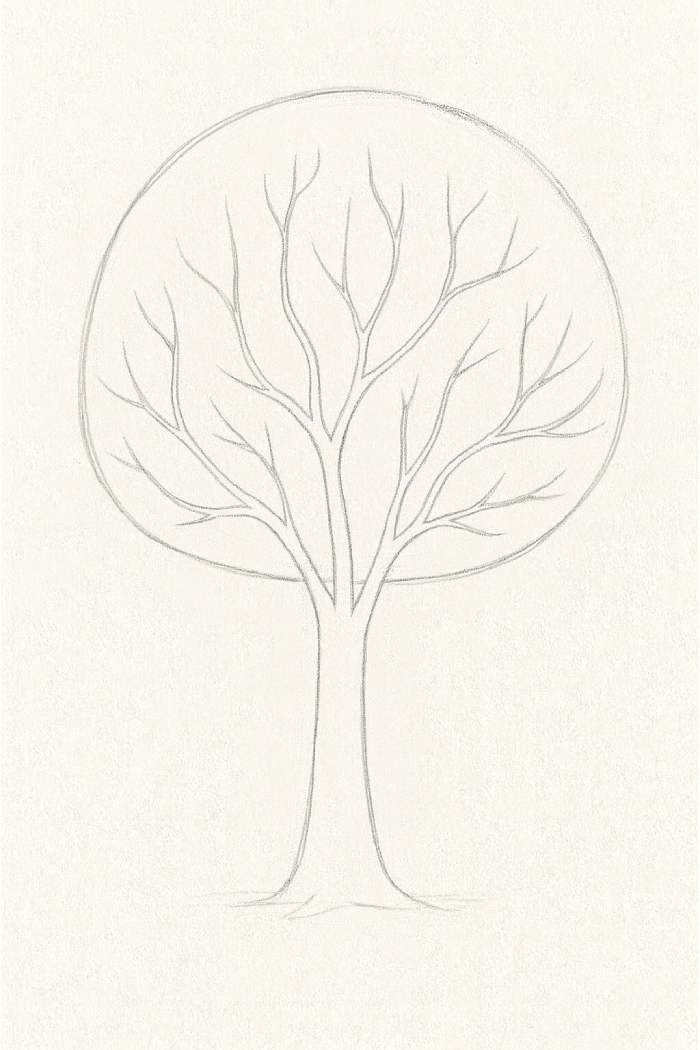
Once you have your basic shapes, it is time to create the skeletal structure that supports the foliage.
- Connect the crown to the trunk smoothly: Erase the top and bottom lines of the trunk where they meet. Sketch in the main limbs, which emerge from the trunk area and extend to the crown.
- Add Primary Branches From the Trunk: These branches should be thick and have a slightly curving path. Branches are usually angled upwards or outwards.
- Show How Branches Split Into Smaller Branches: As primary branches move further away from the trunk, they should continue to split into secondary and tertiary, progressively thinner, ‘Ramification’ is the term for this. As a rule, the combined thickness of two splitting branches should be roughly equal to the thickness of the parent branch.
- Keep the flow natural and avoid straight lines: Nature does not use rulers. Each line should be gently curved. The branches should not be shaped like pipes but should curve and taper organically. Allow some of the primary branches to extend a little beyond the initial crown shape.
Add details to make the tree look realistic
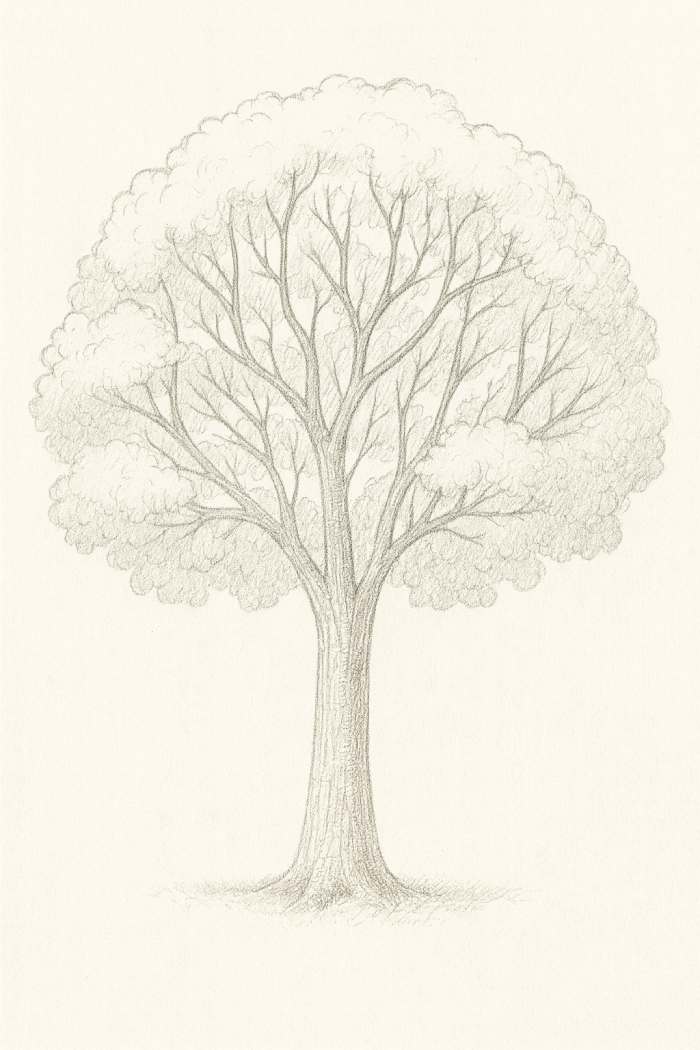
Detailing the drawing will bring it to life once the structure has been established. Draw what you see and not what you think a tree should look like.
- The bark is not smooth: For the texture, use short, parallel lines that are slightly jagged. Lines should follow the vertical direction. Add more deep, pronounced creases to old trees. A little texture can go a long way.
- It is important to add leaf clusters instead of drawing every single leaf: This step will help you achieve realism. Instead of drawing individual tiny leaves, draw the edges and large foliage masses. To define your crown shape, use a series of loose, continuous, irregular, and scalloped curves. You can create dense foliage by using a series of loose, continuous, scalloped, and irregular curves (like a cloud).
- Make the shapes of the crown irregular to mimic nature: Don’t make all the clusters uniform. You can still see the branches and the sky through some of the gaps in the foliage.
- Create Small Branch Clusters That Peep Through the Leaves: Lightly sketch the finer, smaller branches you created in Step 4. This will add depth and structure to your crown.
Add depth and shade
Shading transforms a flat drawing into a three-dimensional object.
- Determine the light source: Decide from where the sun comes (e.g., from the top left). This light source must be the basis for all shading decisions.
- Darken the side of the trunk and branches: that faces the light source. (Leave this side white or lightly shaded). The core shadow will be on the side that is opposite the light source. Use subtle hatching and blending techniques to create a soft rounded shadow.
- Layering Leaf Clusters with Simple Shading: Also, the crown of the tree has a dark and light side.
- Cast shadow: The side or crown away from the source of light gets a darker overall tone.
- Form Shadow: Shading the underside of every leaf cluster. Each cluster of foliage casts a small shadow on the one below it, since foliage is bumpy. The foliage looks dense and deep because of the layering.
- Use contrast to create a three-dimensional effect: The darkest parts (deep shadows beneath the largest clusters and the side of the trunk facing the sun) must be placed next to the brightest parts (highlights along the sunny side). The maximum contrast will create the most convincing three-dimensional illusion.
Easy Variations of Tree Drawing
Once you master the basic shape-to-structure-to-detail method, you can easily apply it to various tree types and styles.
- Simple Cartoon Tree: Use an exact circle for the top and a straight, simple cylinder as the trunk. Use a flat, simple color or minimal shading.
- Minimalist line-art tree: Concentrate only on the outline of the tree and its main structure. Use a jagged line to outline the crown and a simple, unshaded line to draw the trunk and branches.
- Full-Foliage Realistic Tree: The method is covered in sections 3-6. It focuses on deep shading, bark texture, and irregular edges.
- Winter Tree without Leaves: Do not include the leaf clusters. Focus on the complex branching structure. Be sure that the terminal, tiny branches are tapered to fine points. The shape should be spidery and intricate.
- Palm Tree or Pine Tree (Quick instructions):
- Pine Tree: For the crown, use a tall triangular shape. The trunk should be straight, and the branches should hang down slightly.
- Palm Tree: For the trunk, use a long cylinder that is slightly curved. The crown is made up of curving, radiating fronds.
Common mistakes beginners should avoid
Avoiding these traps will save you time, frustration, and money.
- Nature doesn’t make perfect circles: Use irregular and slightly scalloped edges to create a crown that is not perfectly round.
- Make all branches the same size: Branches should taper. The trunk is thickest, and the branches are thinner at the tips.
- Over-detailing every single leaf: This is a tedious process that does not improve the drawing. Focus on the texture and mass of the clusters of leaves, not individual leaves.
- Ignoring light and shadow: A tree without light or shadow appears flat. The shading gives your tree weight, volume, and grounding.
Quick Practice Exercises
With targeted practice, drawing is a skill you can improve. Here are some exercises that will help you build your confidence and speed.
- 2-Minute Sketch of Trunk: Set the timer to 2 minutes and sketch the trunk quickly, focusing on only the shape, slight taper, and beginning root flare. Do not worry about the bark texture just yet.
- Five Simple Tree Silhouettes: Draw five different silhouettes (outlines) in five minutes of different types of trees (e.g., an oak, pine, willow, or palm). Concentrate only on the unique shape.
- Draw three simple circles: Practice shading leaf clusters. Imagine they are leaf clusters. Draw a source of light and shade only the shadowy side. Also, practice shading the areas where a clump casts shadows on another.
- Speed Sketch Using Only Basic Shapes: Draw a tree but only use steps 3 and 4—the basic shapes and main branches. Don’t add element or shading. This improves your capability to map out the structure fast.
Conclusion
You now have the framework to draw a tree that is structurally sound and visually realistic. The mystery to complex topics is continual simplification: begin with the largest, most simple shapes; construct the foundational structure; and then apply the simplest information and shading. Drawing a tree will become easy while you follow this step-by-step path.