How to Create an Easy Cute Snail Drawing Step by Step for Beginners
Prepare yourself to draw cute snails! The adorable snail is a great idea for beginners and, in this step-bystep guide we’ll make it simple. It doesn’t require any specific skills or fancy equipment–just the pencil, paper and a bit of imagination. The process will be broken down into basic designs, from the beautiful shell to the griny face, making sure you make your own adorable snail drawings in a flash. Ideal for both adults and kids alike, this book will help you draw without fear. Let’s start and bring the gardening magic to your pages!
Items You’ll require
Before we begin we’ll gather our basic art materials. Most likely, you have these items in your home already. Keep in mind that you don’t need any fancy equipment to start. Simple is the best!
- Pencil: Regular graphite pencils can be used. If you own an assortment of lead grades such as HB or 2B, it is an excellent all-purpose pencil to sketch.
- Papier: Whatever type of paper can be used, no matter if it’s printer paper, sketchbook, or scrap paper.
- Eraser: An eraser of good quality is the best tool to correct mistakes and clean your lines.
- Optional Coloring Materials: Once your drawing is completed, you may like to add color. Colored pencils, crayons, as well as markers, are good alternatives.
Step-by-Step Drawing Directions
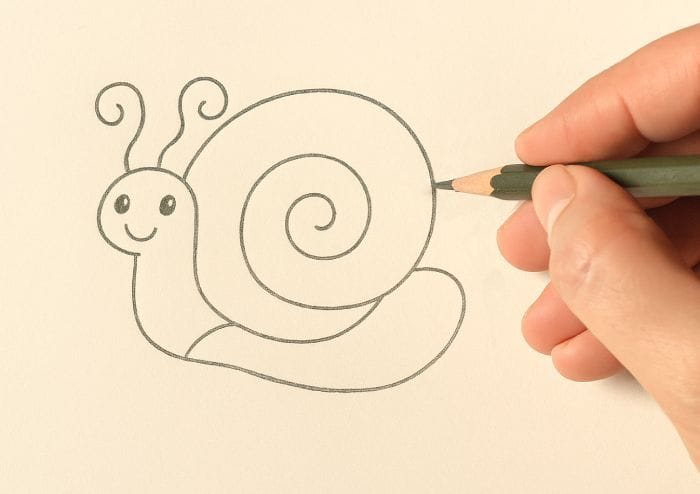
This is the time to have fun! The snail will be constructed using simple geometric designs. Make sure you follow every step carefully Don’t stress about getting it right. The aim is to have fun and gain knowledge while you go.
Step 1: Create the Body
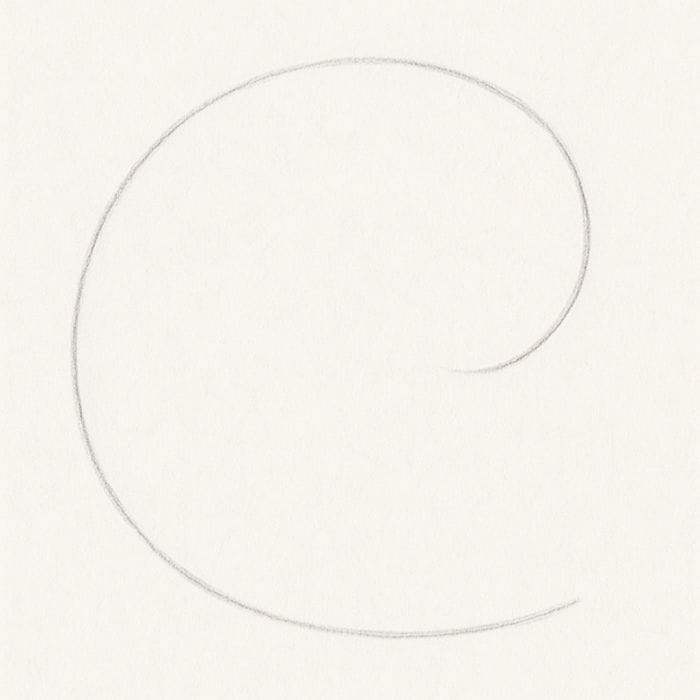
Begin by sketching the body of the snail. The easiest method of doing this is to draw an enormous, rounded “C” form that appears somewhat like the shape of a comma. This is the primary part of the body of the snail. Do not press too hard on your pencil right now; we want the lines to be simple to erase in the future.
- Tips: Make sure the bottom of the “C” tapers off to an angle. This makes the snail have a classic body shape.
Step 2: Include the Shell
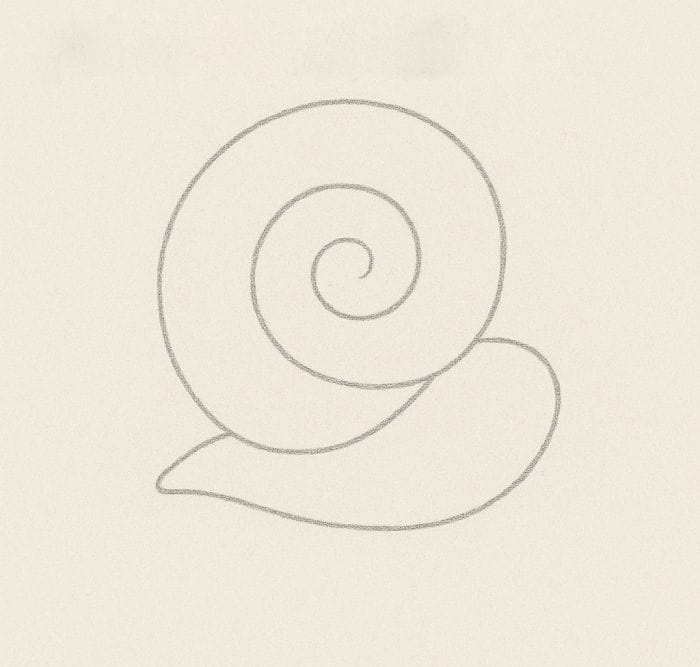
It is considered to be the single most distinct portion of the snail and we’ll make it using just a simple swirl. On the side of the body of the snail (the bigger portion that forms”C”) “C”) create an enormous circle. The circle doesn’t have to be perfect. A slightly squashed, oval-shaped shape will work just fine. Inside the circle create a spiral that begins at the center and then curves outward. This spiral is what gives the shell its distinctive style.
- Tips: You can make the spiral as tight or as loose as you’d like. A looser spiral is more adorable and cute.
Step 3: Draw the Face and Head.
Then, we can give our snail an appearance. In face of our body (the open portion in”C”), draw a small head “C”) Draw the head of a small, round shape. It could be an easy oval or an elongated shape which extends beyond the body.
After the head is in position, it’s time to finish the facial characteristics.
- Eyes: Create two tiny ovals and circles for your eyes. They can be placed on top of your head or give them little eyestalks. To make them more adorable make a smaller black dot within each eye, and then a small white circle to give them an effect of sparkle.
- Mouth: An easy curved line, or small “D” shape is perfect for a cute, smiley mouth.
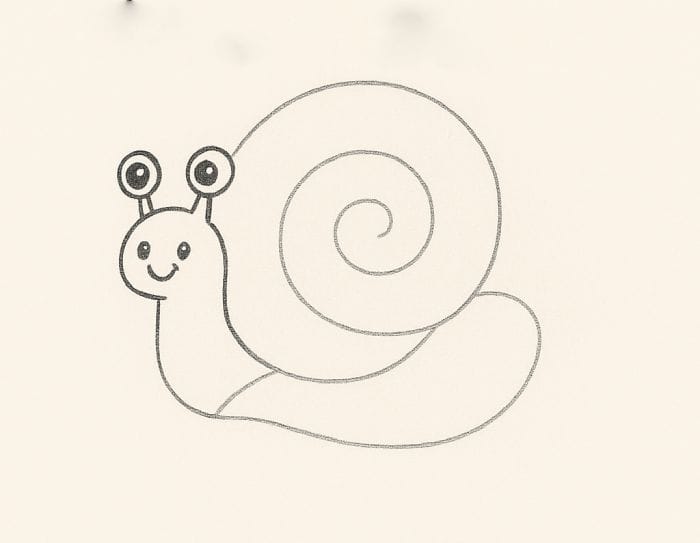
Step 4: Incorporate the Antennae
Snails are composed of two pairs of antennae, or tentacles. We’ll be focusing on the bigger and more prominent pair. At the very top of the head sketch two small, curly lines that run upwards. After the lines, trace a tiny circle or teardrop. These are called the eyestalks.
- Tips: You can make the antenna straight, or curve them toward the side for a look that shows some personality.
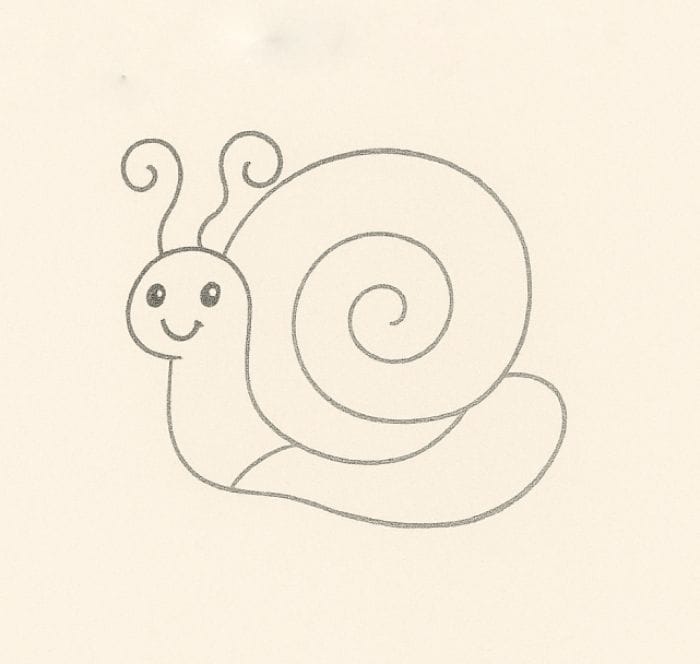
Step 5: Outline, and erase
After you’ve got every basic shape down now is the time to complete your sketch. Review the lines of your pencil with the use of a more firmer hand to make your final lines more pronounced and clearer. Use your eraser to gently eliminate any extra lines of pencil or sketch lines that you don’t want. This will make your drawing appear refined and complete.
What Color Should You Use Your Snail
Once you have your drawing sketched out, you can end your drawing there or bring the snail to life by using colors. Here are some suggestions:
- Body: Nature’s snails can be found in a variety of colors however warm browns, beige or even a light yellow can be great for your body.
- Shell: Here’s where you’ll be able to be really imaginative! Choose various shades of brown to create an authentic appearance, or get wild with vibrant colors such as stripes, Polka dots.
- Eyes: Eyes should be simple with a dark pupil and a tiny highlight in white to create a pop.
- Trail: A fun detail to add is the idea of a “slime trace” in the background of your snail. Make use of the light blue or gray pencil for drawing a basic line to indicate where it’s been.
Tips to Make Your Snail More Cute
Are you looking to take your snail the next step? Follow these easy steps:
- Add Personality: Give your snail a quirky expression. Perhaps it’s giggling or sticking its tongue out, or even has a smug face.
- Make it into a Hat: What’s more adorable than a snail sporting an incredibly small cap? Create a small top cap, Baseball cap, or an adorable flower to its top.
- Draw an image of a leaf: Place your snail on a leaf. It provides the context and creates a more comprehensive scene. A simple curly shape with a few lines to form veins are all that you require.
- Create a friend: Draw an additional smaller snail beside the first. They may be looking each other in the eye or looking through the back of the other.
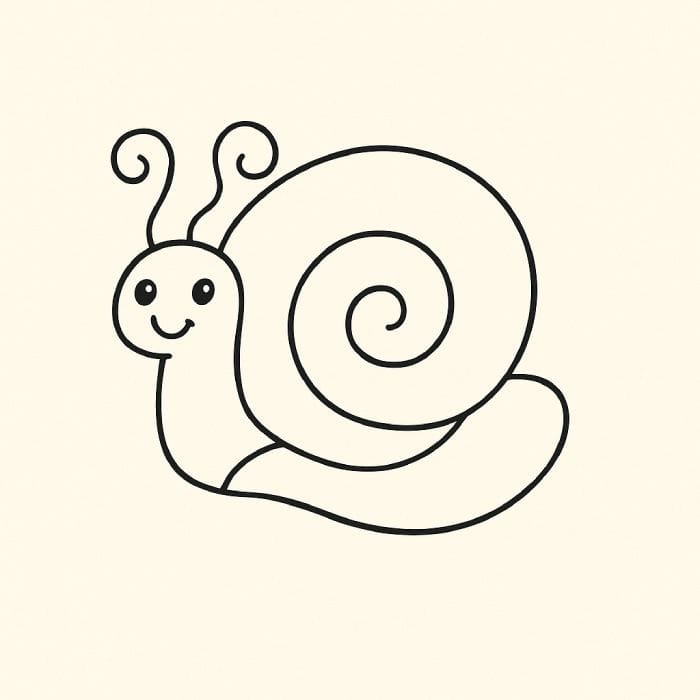
The Final Words
Congratulations! You’ve created an adorable snail design! This challenge is about developing confidence and seeing what simple patterns can be put together to create a beautiful and beautiful image. The great thing about this project of this project is you are able to use the same techniques to draw any other object. Start with the basic shapes Add details, and in no time you’ll be drawing everything from new shapes to.
Practice Have fun and don’t be scared to play around with your personal style. What other creatures of the garden can you draw in the future? A friendly worm or active ladybug are great next steps!
Looking for more drawings inspiration? Check out these articles:
How to Draw a Realistic Butterfly
Easy Bee Drawing Ideas for Beginners
How to Draw Realistic Flowers Step by Step