Peony Flower Drawing Made Simple: Easy Steps Anyone Can Follow
Peonies are often called the “king of flowers.” People love them for their big, fluffy layers and romantic look. While all those petals might look hard to draw, making a peony is actually pretty easy when you start with simple shapes.
Whether you are drawing for fun or trying to get better at botanical art, this guide is for you. We will take away the hard parts and show you how to build a beautiful flower from the center out. In this tutorial, you will learn the basic shape of the peony, easy shading tricks, and a simple step-by-step way to create professional-looking floral art.
Why Peonies are a Total Vibe for Drawing
If you’re looking for a floral subject that’s actually interesting to look at, the peony is basically the “final boss” of botanical art—but in the best way possible. While a daisy is cute and predictable, a peony is more like a ruffled, dramatic masterpiece.
Here’s why they’re so fun to sketch:
- The “Cabbage” Factor: Think of a peony like a tightly wound ball of ribbon. Once you realize the whole flower is basically a sphere, figuring out where the petals go becomes way less intimidating.
- Embrace the Mess: Honestly, no two petals look the same. They’re delightfully irregular, which is a huge win for beginners because you don’t have to stress about making everything perfectly symmetrical.
- Instant Depth: Because the inner petals are all tucked in and crowded, they create these gorgeous, moody shadows. It’s the perfect playground for practicing your shading and making things look 3D.
The Gear You’ll Actually Need
You definitely don’t need to drop a fortune at an art supply store to get started. Just grab these basics and you’re good to go:
- Pencils: Grab an HB for your initial “rough draft” lines and a 2B or 4B when you’re ready to bring in those deep, dark shadows.
- Paper: Any smooth drawing paper works, but a sketchbook with a little “tooth” (texture) feels great under a pencil.
- Eraser: Do yourself a favor and get a kneaded eraser. You can mold it into a point to “pick up” highlights without tearing up your paper.
- The Fun Extras: If you want to get fancy, fine-liner pens are great for a crisp line-art look, or you can grab some pink and cream colored pencils to really make it pop.
Step-by-Step Guide to Drawing a Peony Flower
Step 1: Draw the Basic Circle
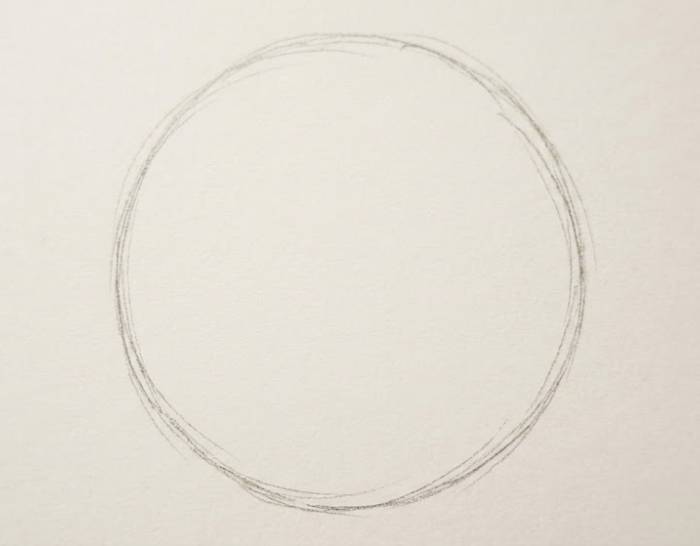
Kick things off with a light, breezy circle. Don’t stress about making it perfect—this is just a “container” to keep your flower from growing too big and wandering right off the edge of your paper.
Step 2: Sketch the Center of the Flower
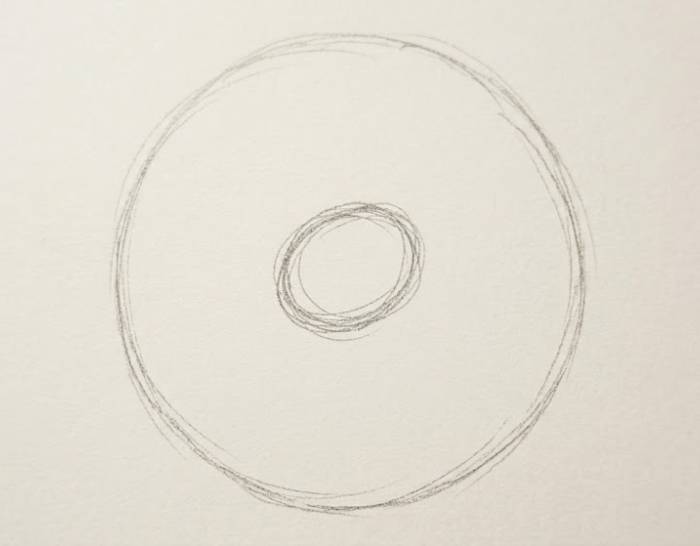
Right in the middle of that circle, go ahead and sketch a little messy oval. Think of this because the flower’s heart, wherein all the ones tiny, delicate petals like to hang out together.
Step 3: Draw Inner Petals
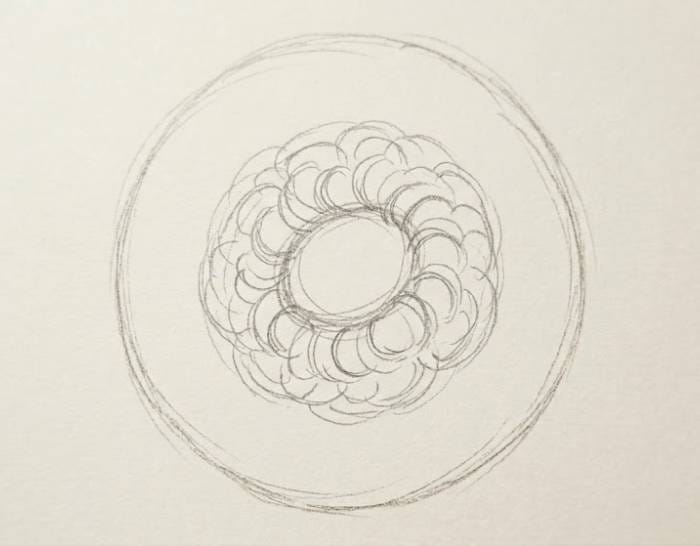
Now, start tucked in around that oval with some small “C” shaped curves. Overlap them as you go. Honestly, they should look a bit like little waves of water all rushing toward the center at once.
Step 4: Add Outer Petal Layers
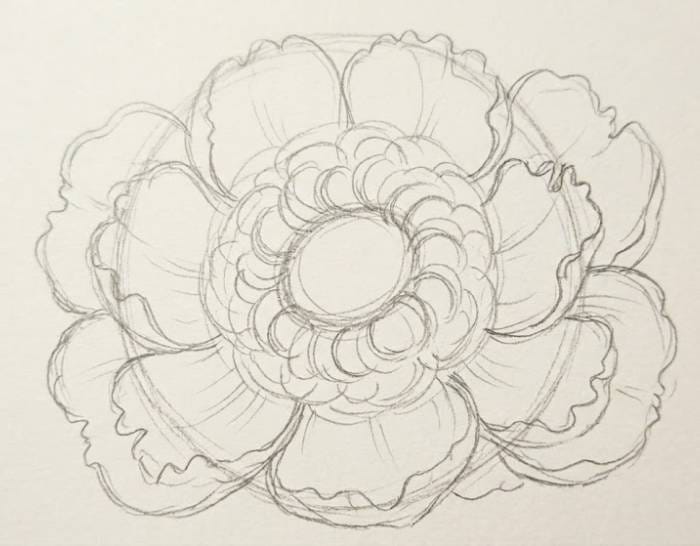
Work your way out toward the edge of your original circle. These petals need to be bigger and shaped kind of like hearts with wiggly edges. Let them be wide and flowy; they should feel a lot looser than those tight layers in the middle.
Step 5: Refine the Shape
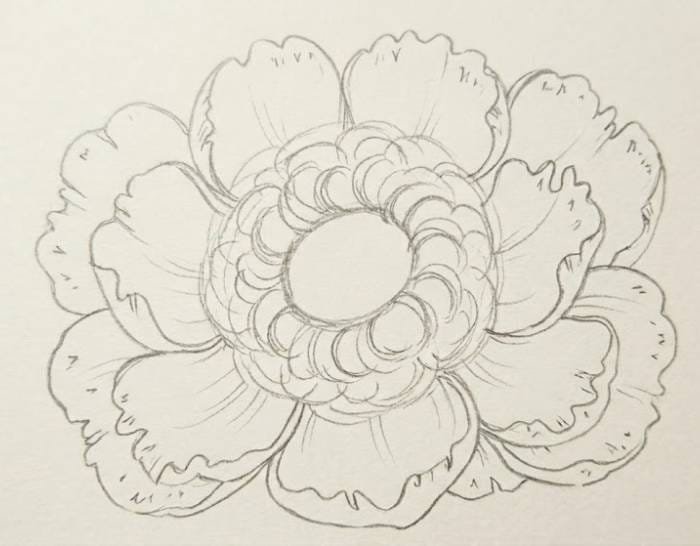
It’s time to give this bloom some real personality. Go back in and add little notches or tiny “v” shapes to the petal edges—real peonies are pretty jagged, not perfectly smooth. Once you’re happy, go ahead and rub out that initial guide circle.
Step 6: Add Details and Texture
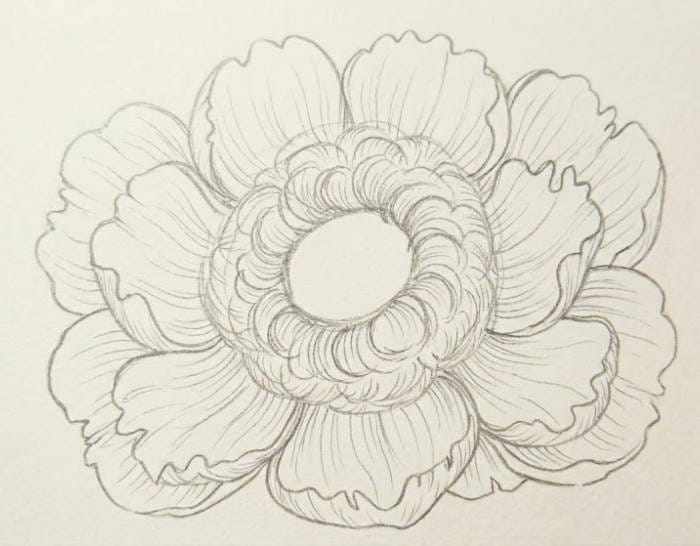
Let’s get those details in. Draw some faint, lines traces stretching from the bottom of the petals out towards the tips. These “vein” lines really sell the delicate look of the flower and give you a great roadmap for when you start shading.
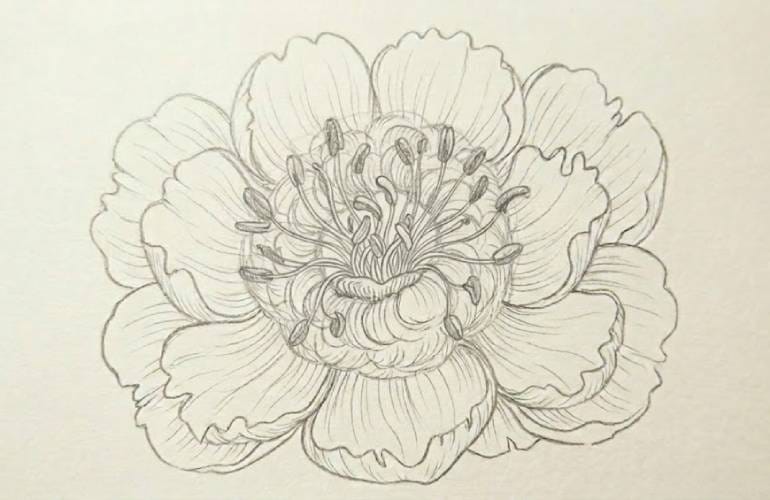
Step 7: Final Stamen Detail and Shading
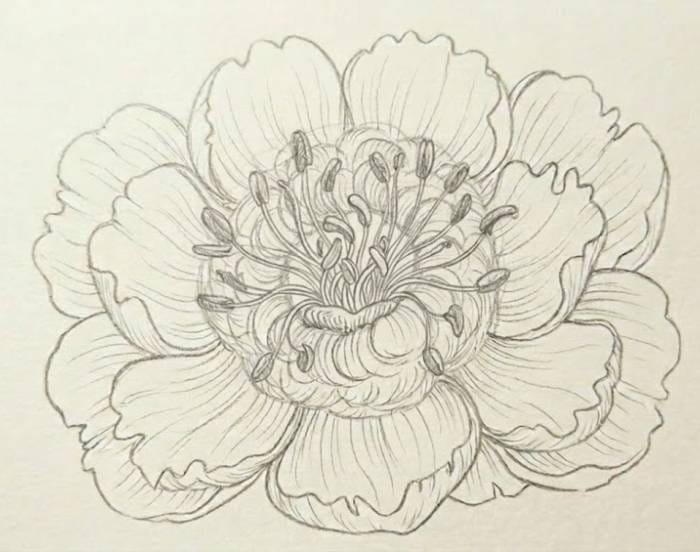
Finish the heart of the bloom by piling in a dense cluster of stamens. We’re talking a ton of fine little filaments topped with tiny, textured dots for the anthers. To wrap it all up, add some graphite shading and a bit of cross-hatching where the petals overlap. It adds that depth that really makes the whole thing pop.
Simple Shading Techniques for Beginners
Shading is the magic trick that turns a flat, boring sketch into a 3D flower that looks like you could grab it off the page.
- Darkest Areas: Go heavy-handed with the pressure where petals overlap or right at the very base of the flower. That’s where the deep shadows live.
- The “Gradient” Look: Try to smoothly blend your pencil marks, moving from those dark, moody centers out toward the airy, light edges of the petals.
- Highlights: Don’t be afraid to leave some white space! Keeping the top edges bright or totally blank shows exactly where the sun is hitting.
Common Mistakes to Avoid
- Over-Symmetry: Nature is a bit of a mess, and that’s a good thing. If every petal is a carbon copy of the remaining, your flower is going to look like a plastic prop.
- Heavy Outlines: Resist the urge to draw thick, darkish borders round everything. Keep your lines light and “breathable” so the drawing feels soft and realistic.
- Ignoring the Stem: Peonies are big, heavy blooms. If you give them a tiny “noodle” stem, the whole thing will look lopsided—give that flower some sturdy support!
Easy Ways to Improve Your Skills
- Practice “Petal Studies”: Dedicate a whole page to just drawing single petals from bizarre angles. It’s like a exercising for your hand.
- Use Reference Photos: Get some high-res photos on your screen. Varieties like the Sarah Bernhardt or Bowl of Beauty are perfect for seeing how light dances across all those ruffles.
- Repeat Shapes: It’s all about muscle reminiscence. The more you sketch those “C” curves, the more natural they’ll begin to sense.
Creative Variations
- Minimalist Line Art: Grab a single-width pen and just do the outlines. It’s a great clean, trendy lool that’s ideal for wall art.
- Watercolor Wash: Sketch things out lightly in pencil, then drop in some soft pink watercolor. Let the rims bleed and do their personal thing for a dreamy vibe.
Why Peony Flower Drawing Is Perfect for Beginners
Drawing peonies is a massive confidence booster because, honestly, the flower is naturally “messy.” There’s really no “wrong” way to place a petal! It’s a great way to learn how to handle complex shapes by breaking them down into layers, which is a skill you’ll use for basically everything else you ever draw.
Frequently Asked Questions (FAQ)
Q: Is peony flower drawing hard for absolute beginners? A: Definitely not! They look intimidating, but they’re really just a bunch of circles and wavy “C” curves stacked together. If you can scribble a wavy line, you can do this.
Q: How long does it take to learn? A: You can knock out a decent first sketch in about 15–20 minutes. Mastering the shading takes a bit more patience, but you’ll get there in a few practice sessions.
Q: What is the easiest way to draw petals? A: Think of them as “melted hearts” or “wonky cups.” Just remember: keep them narrow at the bottom and wide and ruffled at the top.
Conclusion
Learning how to draw a peony is a really fun way to dip your toes into botanical art. By starting with a basic circle and just building up your layers, you end up with a sophisticated piece of work without the “perfectionism” headache. Just lean into the natural, ruffled flow of the petals. Grab a pencil and start on that first layer today—you’ll be shocked at how fast your paper garden starts to grow!