Beginner Jellyfish Drawing: How to Draw a Jellyfish Using Simple Shapes
Have you ever seen jellyfish gliding through the waters and thought it looked too complicated to draw? Don’t be! The art of creating a beautiful jellyfish drawing is among the most relaxing methods to help beginners improve their abilities.
Since sea creatures are composed of organic, fluid forms, they don’t require precise lines to create an impressive result. In this tutorial we’ll break down the process into steps that are easy to follow with basic geometric shapes, such as domes and curving lines. From selecting the materials to adding the final, glowing details, you’ll discover how to transform basic circles into a stunning underwater artwork.
Why Jellyfish Are Great for Beginner Drawings
If you’re only beginning your journey into art, Jellyfish is a great companion. In contrast to drawing faces or a high-performance car, jellyfish have no bones and precise proportions.
Why is jellyfish simple and enjoyable drawing?
Jellyfish are in essence “liquid” with regard to their movements. This means that if the part of your drawing appears somewhat different than the other side, it appears more real. The lack of symmetry eliminates this “perfectionist’s block” that a lot of beginners experience.
Benefits of using basic shapes
Beginning with simple shapes, such as an equilateral triangle for the head or wavy lines for the body, you can eliminate the fear of a blank sheet. Simple shapes act as a sketch and ensure that your drawing is solid before adding the intricate details.
What will you learn
At the end of this course you’ll have learned:
- How do you “see” complex topics in simple shapes.
- The art of drawing fluid organic lines.
- Basic application for shadow and light that creates transparency.
Materials You’ll Need for Drawing the Jellyfish
There is no need for a professional studio to begin. In fact, the majority of the equipment you’ll need is probably already on your desk.
Basic Drawing Materials
- Pencils: The HB pencils are ideal for sketching light, and a 2B or 4B pencil is ideal for drawing darker lines.
- Eraser: Kneaded erasers are ideal to lift light graphite without causing harm to the paper.
- Paper: The standard draw paper is acceptable, but the smoother texture aids in mixing.
Additional Tools for Outlining and Shading
- Blending Stump (Tortillon): Useful to create the “misty” view inside a bell of the jellyfish.
- Fine-liner Pen: For those who want a sharp, illustrative, and clear appearance.
Digital Drawing Alternatives
If you prefer the look of pixels over paper, applications such as Procreate, Adobe Fresco, or Autodesk Sketchbook are excellent. They have “streamline” settings that create a look for your tentacles that is extremely smooth.
Understanding the basic shapes of the Jellyfish
Before we apply pencil to paper, we need to look at the subject from a different angle. When you view an image of an eel, it’s composed of three components:
- The Bell: Think of this as an elongated domed roof or half-eaten orange.
- The Oral Arms: These are the frilly, thick parts hanging from the middle. Imagine them as bands of ribbons.
- The Tentacles: The tentacles are thin, long stingers. Consider them to be thin silk threads and silk strings.
These shapes help keep the proportions. Instead of trying to guess where the tentacles are, you’ll be able to tell they are at the lower part in your “dome.”
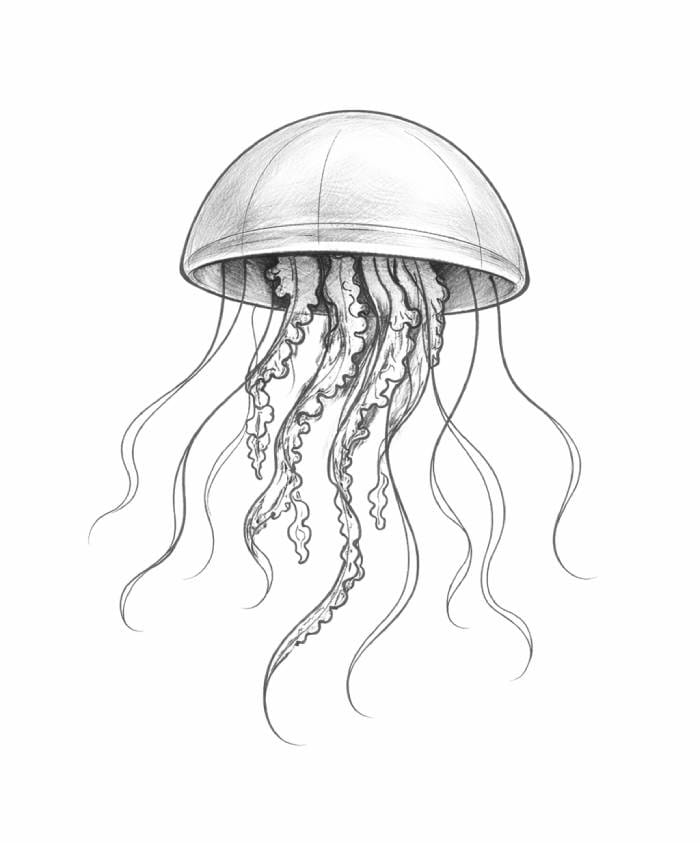
Step 1: Make The Jellyfish Bell Using a Simple Dome Shape
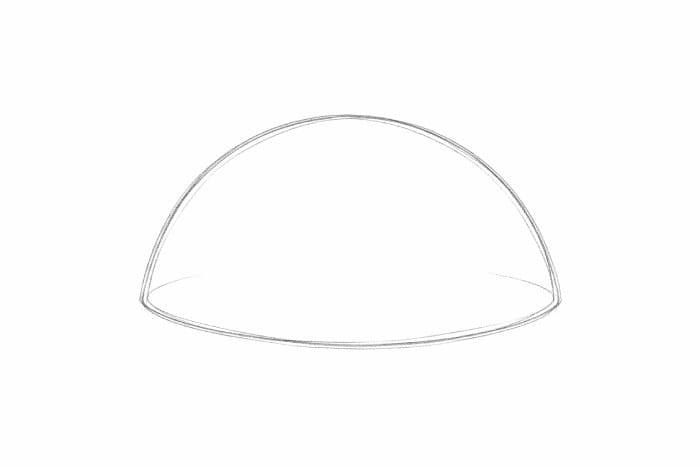
The bell (the “head”) represents the drawing’s anchor.
- The Half-Circle: Draw a light half-circle, slightly flattened. Don’t stress about drawing an exact mathematical arc, the slight wobble adds to the character.
- The bottom edge: The two sides of an arc are connected using an arc that is slightly curled and is bent upwards. The bell will have the 3-dimensional “bowl” design.
- The Lightest Touch: Make use of your pencil and lightly press. This is a way to create “ghost lines” that we could edit or erase later.
Step 2: Add the Bell Details. Bell Details
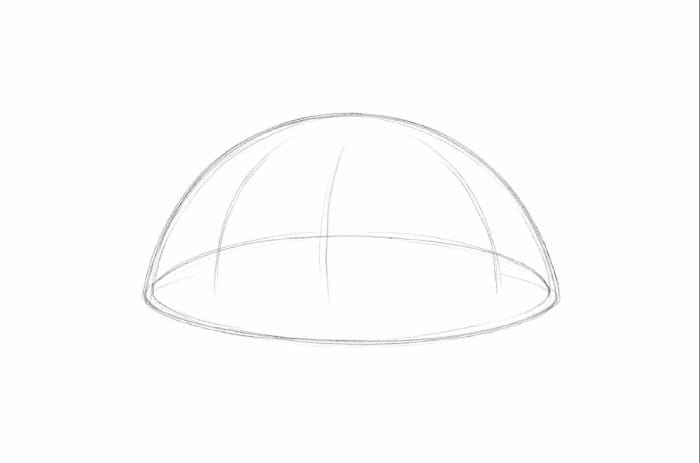
Jellyfish can be transparent. To illustrate this, it is necessary to sketch the “inner” portion of the bell.
- The arc: In the main dome, create a smaller parallel curve, just over the lower line. This will create the appearance of a “lip” or a thickness of the bell.
- Create Depth: Add two or three thin vertical curves within the bell. Imagine them like being the “ribs” from an umbrella. This instantly transforms your flat-shaped shape into a 3D object that is floating around in space.
Step 3: Draw the Tentacles in flowing Lines
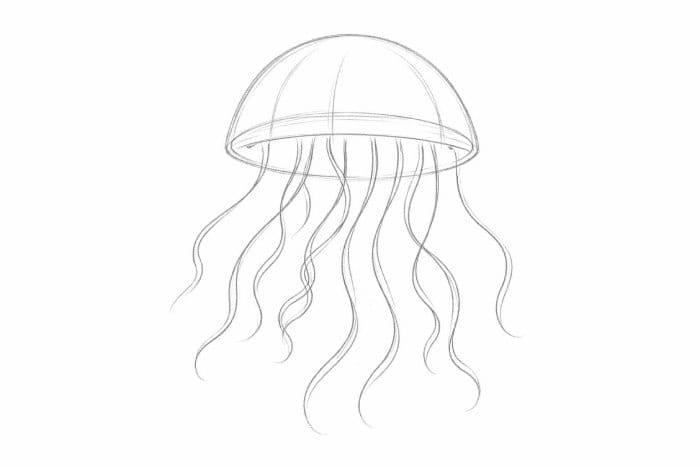
It is the most relaxing aspect of the jellies drawing.
- The flow: Start from the outside corners of your bell. In a single fluid motion, you can pull your pencil downwards in an “S” or “C” curve.
- Vary the length: Some tentacles should be long, whereas others are small. This gives a sense of depth. Some have a greater distance from the viewers, and others are further away.
- Avoid Stiffness: Don’t draw straight lines! At sea, all of it moves along with the current. You can shake your hands just a bit to make natural ripples.
Step 4: Add Oral Arms to give A More Realistic Look

Many beginners confuse tentacles and oral arms. Oral arms refer to the larger and frilly structures located in the middle of jellyfish.
- The Ribbon Form: Instead of thin lines, make these long and wavy ribbons. They should be longer at the top and then taper downwards.
- The “Frill” Effect: Give the edges of these ribbons a “zigzag” as well as a “scalloped” appearance. This gives that classic jellyfish texture, which appears to be complicated but is actually the result of a few small “u” forms.
Step 5: Fine-tune your Outline for the Jellyfish
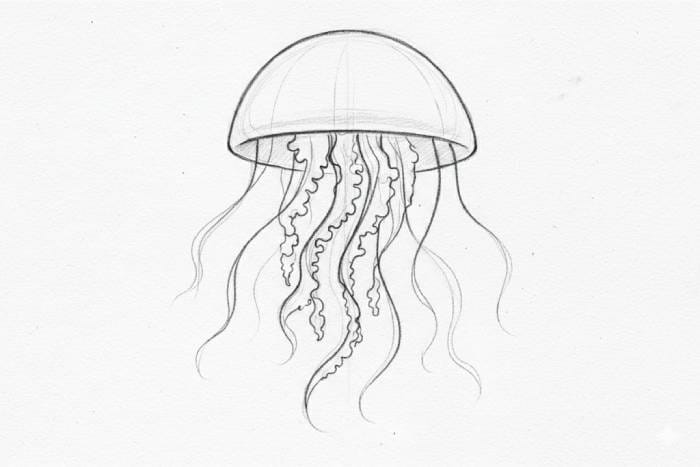
Once your plan is complete, it’s time to put your stamp on it.
- Cleaning:Use your eraser to erase any lines that overlap from the initial dome sketch.
- Darkening:Draw over the most effective lines using an older pencil (2B) or a fine-liner.
- Organic Version:Make some parts of the bell’s outline thicker than other parts. This is similar to the way light strikes the creature and makes the drawing appear “alive” rather than an engineering diagram.
Step 6: Add Simple Shading to give Depth
Since jellyfish are mostly water-based, the shading should be soft and subtle.
- The Light Source: Select a place (e.g., the upper right) from which light comes.
- Shadows: Include light shade on that side that is opposite the right (bottom right) of the bell.
- The Central: Shade the area in which the oral arms touch the bell’s inside. The “recessed” area is the darkest area of your drawing to give an illusion of a hollow inside.
- Technique: Use small, circular movements using your pencil. Blend the lines with your fingers or a mixing stump.
Step 7: Optional Color Your Jellyfish
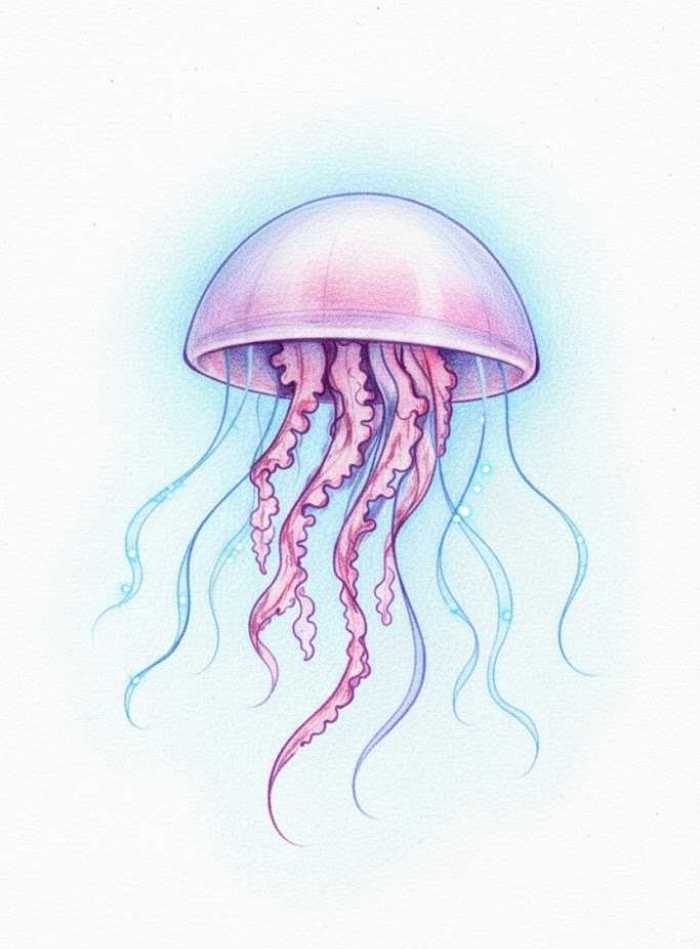
Color is the thing that makes the colors of a jellyfish design make a splash!
- Color Palette: For beginners, it is recommended to use a “monochromatic” (different hues of one colour) as well as an “analogous” (colors adjacent to one another in the wheel of color, such as purple and blue) palette.
- Glow Effect: Keep the top portion of your bell in white or a light shade. Utilize darker hues towards the lower part of the bell. This “gradient” makes a jellyfish appear as if it’s glowing. (glowing).
- Digital Tips: If using an application, you can use the “Neon” or “Luminance” brush to create tiny dots of illumination along the tentacles.
The Most Common Errors that Beginners Make While Drawing Jellyfish
Beware of these common pitfalls to ensure your artwork looks professional.
- Complexity of the Shape: Do not try drawing every ripple in one go. Begin with the basics!
- Stiff Tentacles: Beginning artists often draw tentacles as straight hair. Be aware that they’re floating in water.
- Overly Shading: When you tint the entire image dark, it will lose the “watery” transparent appearance. Make sure it’s clear and light.
Tips to Enhance your Jellyfish Drawing Skills
- Learn “Ghost” Lines: Do some practice drawing S-curves and domes onto a scrap page for five minutes before beginning your main work.
- Watch real references: Look at videos of jellyfish on YouTube. Note how their bells beat, and the tentacles follow their movements.
- Modifications: Once you master the “standard” jellyfish, you can try drawing the “Box Jellyfish” (more than a square) as well as one called “Lion’s Mane” (lots of tentacles with fuzzy outlines).
Frequently Asked Questions Concerning Drawing Jellyfish
Does this work for children?
Yes! Because it’s based on simple shapes, like semi-circles, it’s great for children aged 5 and over.
What is the time it will take?
A basic sketch can take 5-10 minutes. The one that is fully shaded will take approximately 30 minutes.
Can it be used to create digital art?
Absolutely. The “simple shape” approach is the most common for digital concept art professionals.
Continue to Practice Simple Drawing Shapes
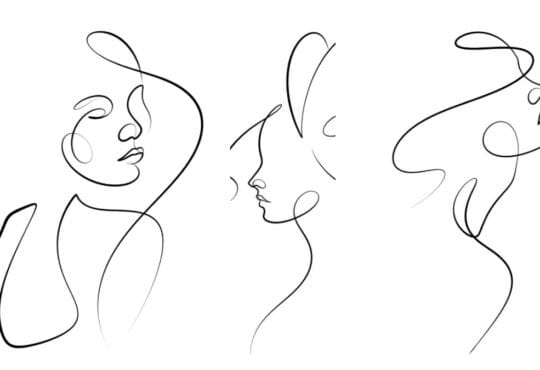
Congratulations! You’ve accomplished an impressive jellyfish sketch by using the power of basic shapes. When you break down a complicated creature into ribbons, domes, and threads, you’ve gained a technique that can be applied to anything that involves drawing flower designs or drawing people.
The most important thing to keep in mind to remember is that the art of creating is always a process. Your first jellyfish may appear odd; however, that’s part of the beauty of nature. No two jellyfish look alike! Continue to practice your fluid lines, and don’t be afraid to explore color.