How to Create a Realistic Sunflower Drawing Using Pencil Shading Techniques
Are you looking to learn how to draw a stunningly realistic sunflower drawings? The sunflower is a top art subject because of their vivid, intricate beauty. While they might be difficult to draw in a drawing, the trick to bringing them to life is mastering the art of pencil shading. This guide will take your through this process beginning with the sketch, and moving to the final, polished elements. Learn how to create depth, texture and make use of the power of light and shadows to turn a basic sketch into a breathtaking masterpiece. Let’s begin by turning your sketch of a sunflower into an art piece.
Materials You Will Need
When you are beginning your journey into art it is essential to use the appropriate tools. Making use of the right tools and pencils can make a an enormous difference on the final outcome that you draw.
Pencils in Different Gradients It is necessary to have a assortment of pencils, which range from soft to hard. The pencils that are hard (indicated by the letter ‘H’, like 2H 4H, 2H) make lighter, smoother lines that are perfect for your sketching ideas. The more soft pencils (indicated by the letter ‘B’, such that 2B 4B and 6B) create darker, more rich tones that are essential to add depth and shading. A HB pencil is a fantastic all-purpose option for mid-tones.
Eraser An eraser that is kneaded can be ideal since it can be turned into a point to allow precise erasing, or to lift graphite to create highlights. A standard eraser made of plastic can also be useful for large areas.
Sharpener Sharpeners that are good quality is a must. Sharp pencils allow for precise lines and fine work, particularly when you are making textures.
Blending Tool: Blending stumps (also called tortillons) are rolled and tightly wrapped paper tools that are used to smudge or blend graphite, resulting in smooth transitions. A cotton swab or an unclean tissue could be used in a pinch to cover larger areas.
Sketch paper: Select a high high-quality drawing paper that has the slight texture called “tooth.” The texture of the graphite helps it stick to the paper, helping to create the layers of shading.
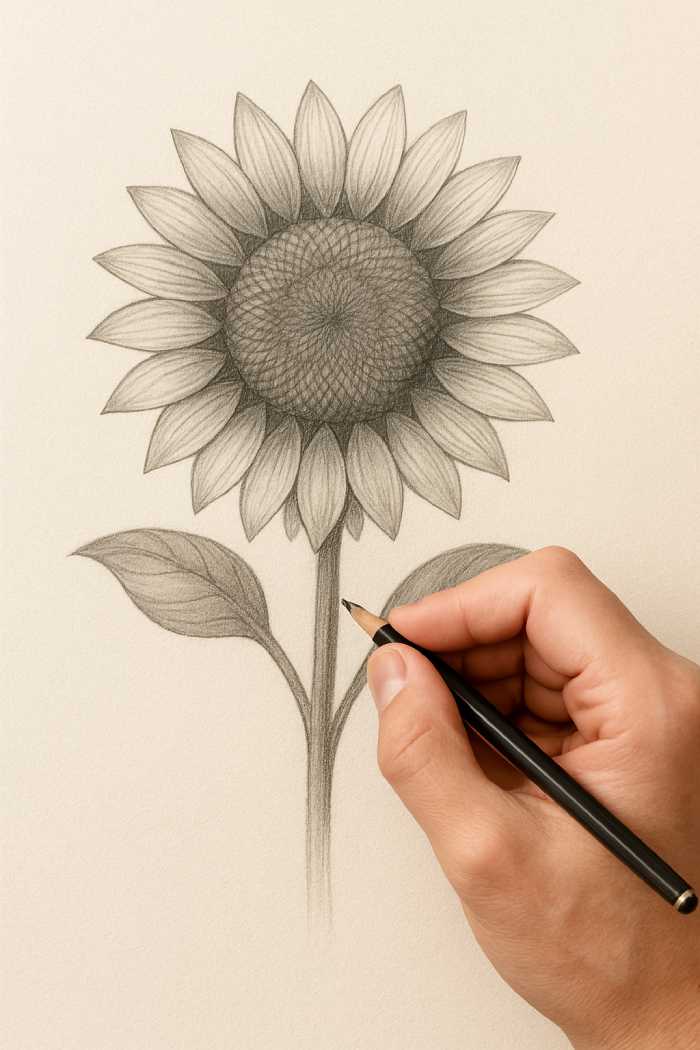
Step 1: Begin with the Basic Forms

The base of a realistic drawing is a sturdy sketch. Do not worry about the details at this point, instead focus on creating the right proportions and composition perfect.
Draw a small circle to represent the flower’s center. Use a hard pencil (like 2H) and draw the circle lightly. It will form the central point for your flower.
Draw petal lines within the circles. Around the central circle, sketch out the general shape and location of petals. Don’t try to make them uniform and vary their lengths and angles so that they appear more natural.
Draw the leaves and stem by drawing simple designs. Draw a light vertical line for the stem, and simple oval or heart-shaped designs to make leaves. Pay attention to their position and size with respect with the head of flower.
Step 2: Refine the Petal Structure

Once you’ve got the basic outline now, you can begin to refine the petals. This is all about bringing depth and realism in the design.
Modify the size and position of the flowers to achieve natural appearance. Look at a image of a sunflower as a reference. You will notice that some of the petals are shorter, while some are taller and don’t all have the same orientation. Make minor changes to your sketches to show this natural variation.
Overlap petals to create the illusion of depth and real. This is a crucial technique to create the illusion of three dimensions. Draw certain petals while drawing other petals. Eliminate the lines of petals that lie “behind” the ones in the front. This easy step instantly increases depth.
Tips to keep petal proportional. Use a pencil to determine distances. Keep your pencil in front of your image of reference and make use of your thumb to trace the length of a flower. After that, you can transfer the measurement onto your drawing to determine whether your proportions are precise.
Step 3: Add Details to the Flower Center

The sunflower’s center is a wonder in intricate designs and patterns. It is essential to capture this for drawing realistically.
Create texture on the center of the sunflower’s disk. Use a sharp soft pencil (like a 4B) to draw a series of circular, small or waves. These marks should resemble the spiraling pattern of seeds.
Use dots, tiny strokes as well as circular shading, to add details. Start by filling the center with a mid-tone with light circular movements. Add an darker tone to the crevices that are deeper among the pattern seed by using tiny small circles or dots.
Demonstrate how shading gives depth on the seeds. The central disk isn’t flat. The seeds and florets form three-dimensional surfaces. The darker areas are in which”seeds” and “seeds” meet and leave the top of the “seeds” lighter. The contrast of shadow and light makes them pop.
Step 4: Shading the Petals

It is here that your sketch becomes real. Shading is the process of changing a flat outline to an ethereal form.
Techniques to create light and dark shading.
The process of hatching: Utilize parallel lines for creating shadows. The closer the lines are, the more dark the shadow.
Cross-hatching: In addition, you can layer a third series of parallel lines on top of the first to create a grid-like pattern for darker shades.
Blending: Utilize a blending stump for smoothing your graphite and create an even, soft gradient.
Gradient shading is a way to catch shadows and sunlight. Identify your light source. If the light source is from the left side of the petal, the top left of every petal is going to be lighter and the right-hand portion will appear darker. Make use of a soft pencil to apply a light layer graphite to the darker parts before gradually building up the color by adding more layers.
Avoiding flatness by keep the petals realistic and layered. Remember the overlapping petals in Step 2. Make use of shading to highlight this. Use a light, thin shadow in the areas where one petal is overlapping one. The effect creates clear distinction and creates an illusion of depth.
Step 5: Shading the Stem and Leaves
Don’t forget the other parts portion of the plants! Shading the leaves and stems gives context and a complete composition.
Highlight veins and natural curvatures on the leaves. Leaves are not flat. Create a center vein as well as several smaller veins that branch out. Make use of a sharp pencil to create a gentle depression along the veins, by shading the surrounding area.
Blend dark and light tones to create a realistic appearance. Just like the petals shades the leaves in accordance with the lighting source. Blending can create an organic, soft look be aware that certain portions of the leaves might fold or curl, creating shadows that they own.
Utilize contrast to distinguish the leaves and stem from the flowers. The leaves and stems are usually lighter that the yellow flower petals. Choose a darker range values for these areas to help the sunflower head stand out.
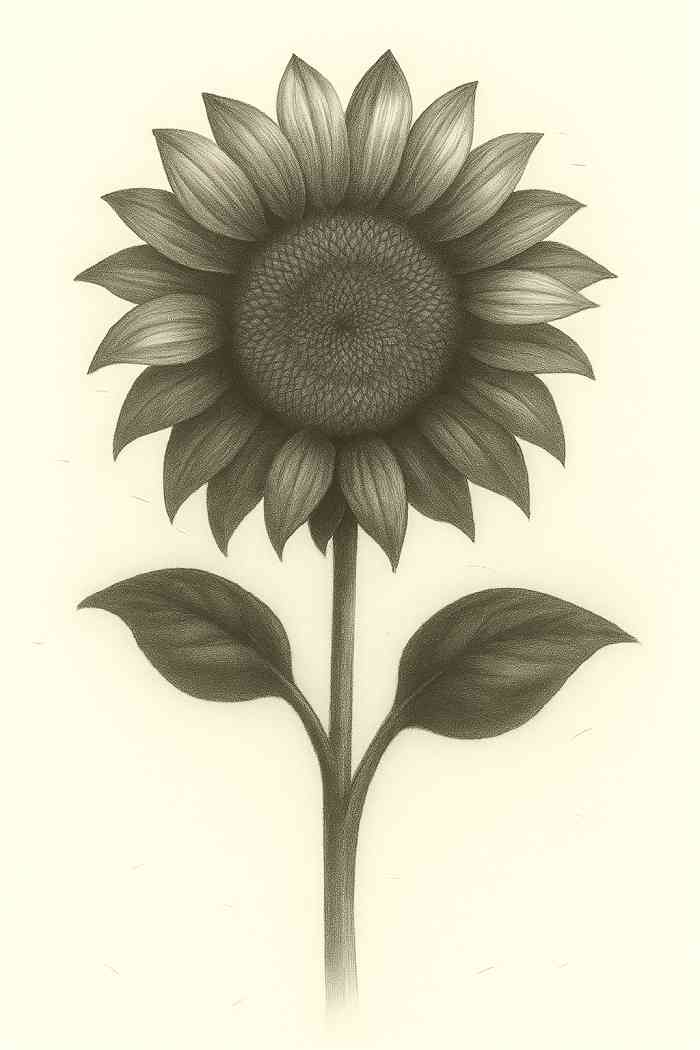
Step 6: Final Touches and Highlights

The final stages will be about enhancing your work, and adding the small details that can make an enormous impact.
Highlighting highlights using an eraser to create authentic effect. Use your kneaded eraser, then molded into a fine point to lift graphite out of areas that are where light strikes the hardest. It could be the top of a flower, a line on the leaf or the rim of a sunflower’s central.
Examining the balance of shadow and light. Step back and examine your drawing. Do the source of light appear similar across all the parts of your drawing? Do your darkest shadows appear dark enough, and your brightest highlights bright enough? Be prepared to retrace your steps and darken shadows using an easier pencil or your eraser to make more bright highlights.
Clean smudges and stains for polished look. A clean drawing is professional looking. Make use of a clean, dry cloth or an eraser made of plastic to clean up any marks or smudges that have accumulated around your drawing.
Common Mistakes to Avoid
Even professional artists aren’t immune to mistakes. Knowing these common mistakes will help you to improve your.
Over-darkening of petals: Sunflowers are bright. Although they do have shadows, they shouldn’t appear too dark. Be cautious not to put excessive pressure or use too delicate of a pencil to the petals.
Inattention to light source direction: Inconsistent lighting will make your drawing appear dull and unreal. Always choose the source of your light at the beginning, and then stick to it.
Utilizing just one pencil grade to shade: This is the most efficient method of creating an unidimensional, flat drawing. A range in pencil grade is crucial to achieve a wide spectrum of values starting from the brightest highlight to darkest shadows.
Extra Tips for Improving Realism
Learn to observe real sunflowers or photos of reference. The more you look at a real sunflower the better you’ll get to know its shape, texture, and how the light plays with it.
Try different pressures for shading. Learn to control the pressure that you use on your pencil. A gentle touch is ideal for blending subtle, whereas the firmer touch can create the appearance of a dark, rich tone.
Utilizing blending stumps or tissues to achieve effortless shading. Don’t just rely on your fingers. They could leave oil marks in the papers. Utilize blending tools with proper technique to achieve a professional smooth finish.
Conclusion
Drawing a realistic sunflower is an enjoyable procedure that involves meticulous observation and skillful execution to the techniques of shading pencils. Beginning with simple designs, then building layers of tone and detail, and paying attention to shadow and light the artist can transform your sketch into an impressive realistic work of art.
Keep in mind that practice is essential. Don’t be afraid to play around making mistakes and then learn from these. Drawing more and practice, it’s easier to be proficient with these techniques. It’s now your turn. Get your pencils out and find a stunning source, and start sketching. We’re excited to see your stunning realistic sunflower sketch! Send us your progress and the final creation with us by leaving a comment below!