Realistic Azalea Flower Drawing: From Simple Sketches to Stunning Artworks
Welcome to the wonderful world of art and flowers! Flowers like Azalea, which are known for their vivid hues and delicate petals have always captivated gardeners and artists alike. How can you convey their stunning beautiful beauty in a piece of paper? This guide will take you through the process of making an realistic azalea drawing starting with simple sketches to breathtaking, realistic art. No matter if you’re just beginning to enhance your skills, or a seasoned artist looking for new methods, you’ll be taught everything from the basics of techniques to more advanced shading and layering techniques. Start sketching and bringing these beautiful blossoms to life!
1. Understanding the beauty of Azalea Flowers
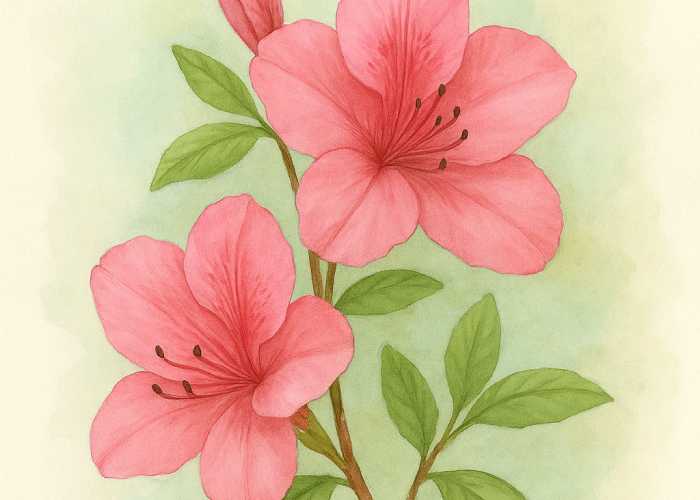
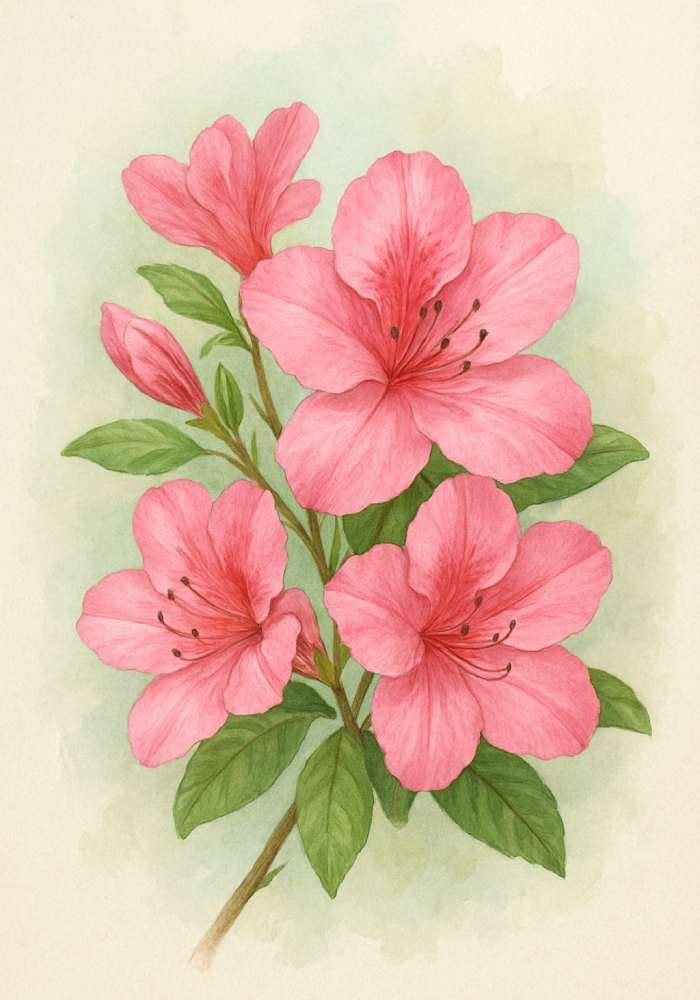
Before you draw an azalea you have to know the reasons why it is so unique. Azaleas are famous for their striking array of colors, ranging from simple light pinks, whites, to intense deep purples and reds. They are often cultivated in dense big, dazzling clusters that create stunning visual effects. In symbolic terms, azaleas may represent various significance, such as fragile beauty as well as a desire for returning to the home of their origin, and a sense of the ability to temper, which makes them a fascinating topic for art.
The main characteristics that make azaleas both difficult and satisfying to sketch include their slender, frequently frilly petals and complex vein designs, as well as their ability to bloom in natural flowy groups. The ability to capture these subtleties is what differentiates a basic sketch from a real drawing. When you master how to draw azaleas you’ll also be able to build a solid foundation to draw other complicated flowers, and improve your overall skills in floral art.
2. Essential Materials and Tools
Drawing is a great art that starts with the appropriate tools. There is no need to spend a lot of money to begin however, using a few good tools can make all the distinction.
Drawing Pencils: The graphite pencil set is essential. An assortment of sharp 2H for drawing light sketches to the soft 6B for darker shading will allow you to have complete control. If you want to draw more vibrantly using high-quality colored pencils is the best choice. Find brands that are known for their blendability and deep color.
Erasers: The use of a good, kneaded eraser can be necessary to lift graphite with no smudging, and also for creating highlights. A fine-tipped eraser may help in cleaning up small errors and making delicate small details.
Sketch Pads & Paper: Select a paper that’s smooth, but with sufficient “tooth” (texture) for the graphite pencil or colored pencil. Bristol paper is an excellent choice for creating intricate designs. Inks or watercolors the use of a heavier paper made specifically for wet media is vital to stop stretching.
Alternative Mediums: While pencils are the ideal starting point you should also think about exploring watercolors because of their fluid, soft nature or fine-liner pens that provide clear outlines and sharp the finer details. Digital artists can utilize an image tablet or software such as Photoshop and Procreate.
3. Beginning with Simple Sketches
Each stunning painting begins with a sketch. Do not worry about being perfect when you’re drawing but the aim is to get an essence that reflects the beauty of the bloom.
The importance of observation: Before you even take out a pencil and begin to look at an actual azalea flower or a photo of a superior quality reference. Pay attention to the overall form of the cluster of flowers, how the individual petals curl and overlap, as well as the direction of light source.
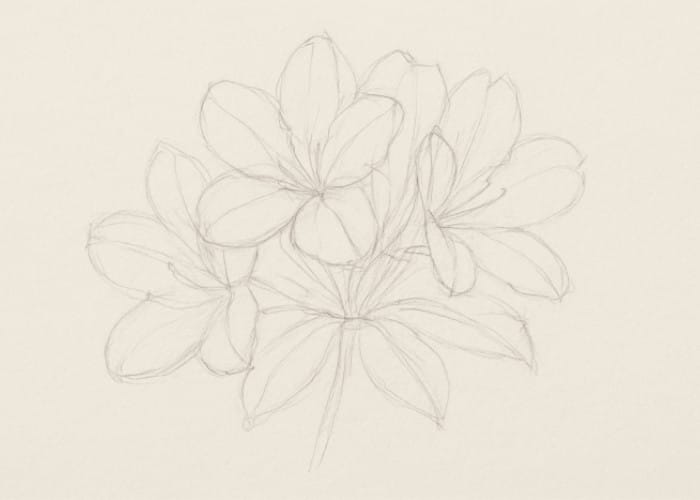
Fundamental Outlines: Begin by sketching out the fundamental forms. Imagine the overall shape of the head of the flower as an easy circle or oval. Then trace the individual petals, with a focus on their proportions as well as placement. Do not force them; they are guidelines.
Simple Sketching Methods: Utilize a soft hand with a pencil that is hard (like 2H) to make a natural-looking base. This lets you easily erase and alter when you are able to refine your designs. Concentrate on capturing nature’s flow, rather than creating perfect uniform shapes. Azales are a natural, imperfect flower.
4. Strategies for Realistic Azalea Flower Drawing
When you’ve got an established sketch, it’s now time to bring the azalea’s sketch to life using realistic methods.
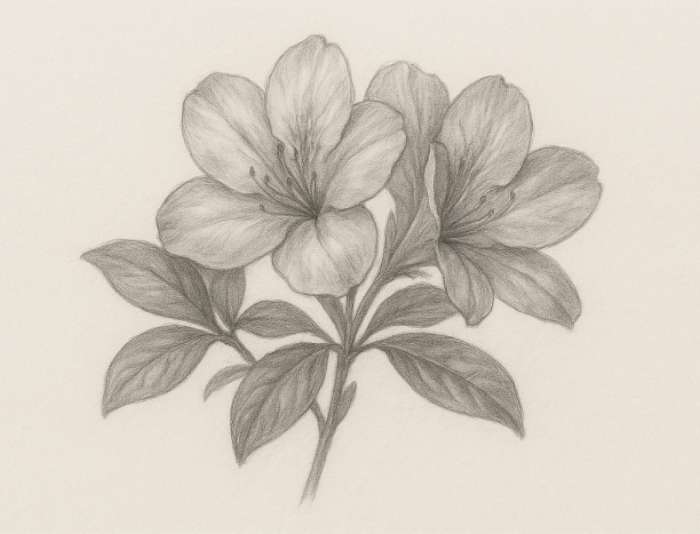
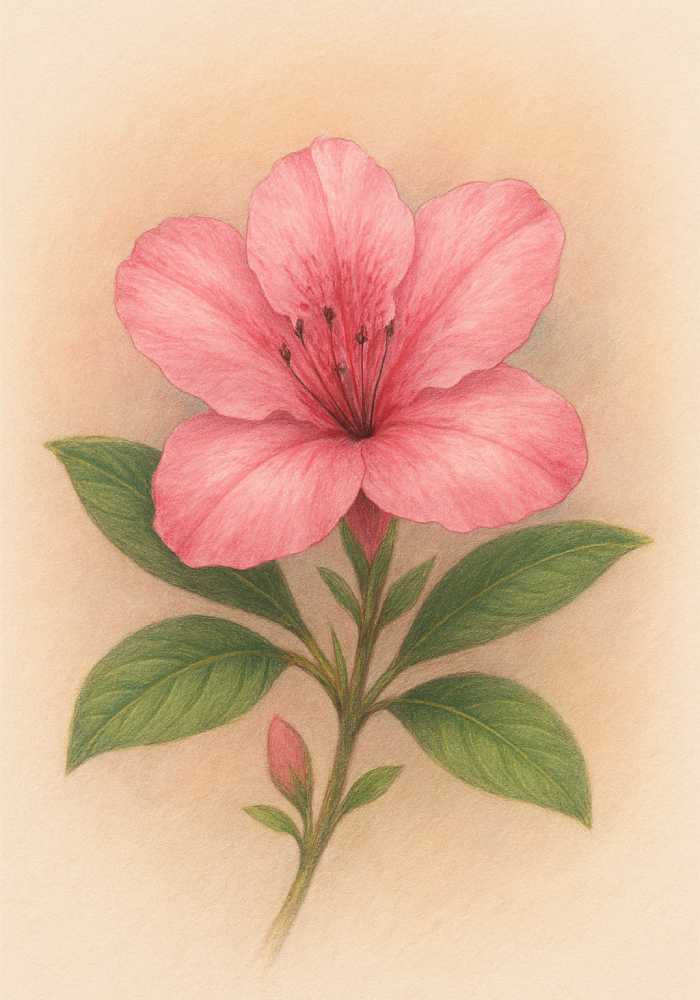
Shading and Depth: This is the point where your drawing shifts between flat and three-dimensional. Determine the source of light and shade areas that are shadowed like the base of the petals, where they join the stem and the folds in which one flower is overlapping one. Make use of a soft, smooth pencil (like a 6B or 4B) and apply pressure in varying degrees in order to make gradients.
Flower Textures: The petals of Azalea are delicate and smooth. To create this look apply smooth gradients and soft blended edges. When using colored pencils it is about applying your colors in a light layer and gradually building the pigment. Utilize your eraser to boost colors to create subtle veins and highlights. This will add some realism.
Leaves and Stems: A real-looking flower can only be as beautiful as the elements that surround it. Take note of the texture, shape, as well as the veins of leaves. The leaves often have an ethereal sheen that is easily captured by highlighting a tiny area. Draw the stems in a natural curve and add tiny details such as buds or new growths to complete the design.
Common mistakes to avoid: Avoid drawing petals that appear “flat” by focussing on shadow and light. Avoid making a highly symmetrical and perfect flower and embrace the natural imperfections. Also, don’t over-shade because this could cause your drawing to appear muddy. Make your shadows gradually and layer by layer.
5. Transitioning from Sketches to Fine Artwork
Are you ready to bring your sketch to the next level? These tips will help transform your sketch into an art piece.
Refining Outlines: Once you have your shading set, you can improve the light outline you created. Apply a pencil that is slightly darker to draw lines around the flower but keep the lines smooth and natural. Avoid sharp, sharp lines which can cause the flower to appear cartoon-like.
Methods of Layering for Color: For colored pencil drawings, layering is essential to create realism. Begin with a light base color, then include darker shades in shadowed areas as well as lighter shades for the highlights. If, for instance, you’re drawing an azalea in pink begin using a pale pink and then apply a darker pink, or perhaps a hint to red under the shadows.
Blending Techniques: To achieve those natural, seamless hues mixing is essential. Blending can be accomplished with a stump (tortillon) or an easy tissue or even a colorless blender pencil to soften your color. For colored pencils applying an additional or three-layer of coloring using an easy hand will aid in mixing the colors.
Add the Soft Background: A simple background with a soft texture will make your azalea design sparkle. You can create a subtle wash using watercolor or subtle gradients with colored pencils. Your background must be subtle and not distracting so that the flower can remain the center of the display.
6. Creative Uses to Azalea Flower Drawings
Your journey as an artist doesn’t need to be finished with a drawing. Your talents can be utilized in a variety of ways.
Botanical Illustrations: Realistic illustrations of azaleas are great as illustrations or botanical study which require precision and precision.
DIY uses: Use your drawings to design custom artwork, greeting cards or even tattoo designs for temporary use.
Training Projects: Try drawing Azaleas with different types, ranging from basic line drawing to a intricate, full-color work. Consider drawing them in different seasons, with budding leaves in spring or when they are in full bloom during summer.
7. Inspiration from artists and real-life Examples
The best way to get better is to draw inspiration from other artists. Study the works of botanical artists and illustrators who have perfected their art in drawing flower petals. Be attentive to how they draw shadow and light and how they convey the delicate texture of petals and leaves.
Learn Effective Artwork: Look for examples in books or online and examine the factors that make them effective. Are they the subtle changes in hue? It’s the realistic vein pattern? The way the background highlights the subject?
Explore Your Personal style: While it’s great to take inspiration from others but remember to play around with your individual style. Don’t be afraid to experiment with different techniques or add personal touches to your sketches.
Conclusion
You’ve begun the journey of creating an accurate azalea drawing and the way to mastery lies in practicing and perseverance. Keep in mind the most important lessons begin with sketchy sketches to build depth, then add shading. Pay close attention to the tiny elements that will bring your drawing to life. Be prepared to make mistakes. Every one of them is an opportunity to learn.
We invite you to get your pencils out and begin with a basic sketch today. You’ll be able to improve your skills gradually, and before you know it, you’ll be able to create amazing, realistic azalea art. We invite you to share your artwork online, and make sure to read our other guides on floral art for inspiration!
FAQs
How can draw realistically azalea petals? Focus on capturing the light and shadows on the petals using blend and soft shading techniques. Be aware of the way the petals curve and overlap and fold naturally. Make use of a kneaded eraser in order to enhance the color and create subtle highlights that emulate the delicate appearance of petals.
Which pencils work most suitable for drawing flowers? For graphite drawings it is recommended to use a set that has an array in the hardness (from 2H up to 6B) is the best choice. When it comes to colored pencils brands that are known for their blendability as well as rich colors, like Prismacolor and Faber-Castell Polychromos, are highly suggested.
How long will it take to complete a real-looking sketch of an azalea flower? The amount of time required to complete the task depends on the dimension and extent of the drawing as well as your ability level. A sketch of a simple design could take around 30 minutes, whereas an intricate, full-color drawing can take a few many hours, or perhaps days. The most important factor is to be patient and be awed by the process.