Simple Orchid Flower Drawing Techniques to Create Stunning Art
The beauty of an orchid on paper may be intimidating It doesn’t need to be. This article will help you learn simple techniques for drawing orchids that can help you draw stunning artwork, even if you’re just a beginner. Drawing orchids is a great method to enhance your drawing abilities and increase your creative side. We’ll break the process into manageable steps, and provide useful tips to help you master the art of orchid drawing. Soon, you’ll be able to understand how an easy sketch of orchids can turn your sketchbook into an original work of art.
Why Draw Orchid Flowers?
Orchids have fascinated botanists and artists throughout history, and with great reason. They’re a powerful symbol of luxury, beauty as well as elegance and distinctiveness. The intricate, and often pattern of their petals make them an intriguing topic to observe and draw. As opposed to a typical rose or daisy orchids require you to take a closer look and look at its distinctive anatomy.
Popularity of orchid flower drawings is a result of the evolution of botanical illustrations to the latest sketches and digital artwork. They’re an iconic subject which adds a touch of elegance to any work. When you practice the orchid sketch tutorial isn’t just about re-creating the appearance of a flower, but also about developing your basic artistic skills. The delicate lines of the petals as well as the subtle differences in shading can help you develop your linework control and ability to create a three-dimensional shape. The ability to master these techniques on the complexity of a subject such as orchids will allow drawing other, more simple subjects appear much more effortless.
Materials You’ll Need
Before beginning drawing your orchid flower sketch It is essential to collect the tools you’ll need. There is no need for a huge expensive, costly kit. Actually, a basic setup is usually the best option to concentrate on techniques. Here’s a list of the necessary orchid drawing beginner materials:
Pencils: The ideal set for beginners of pencils includes an HB for drawing light lines and drawing and shading general in nature plus a 6B pencil or greater to add dark shadows and depth.
Sharpener and Eraser: A kneaded eraser is perfect for lifting graphite with no getting smudged, while a precise sharpener will keep pencil tips sharp for precise work.
Drawing Paper/Sketchbook: A sketchbook that is smooth or lightly texture paper is the best choice. Smooth paper is perfect for precise line work and blends, while a touch of tooth can aid in shading.
Other materials: Once you’re comfortable with the fundamentals it’s time to expand your toolbox. You can consider adding colored pencils, watercolors or fine-tip markers to experiment with various styles and add hue to your artwork.
Step-by-Step Guide to Drawing an Orchid Flower
Let’s move on to the exciting part. We’ll break down the steps of creating the orchid in a basic step-by-step tutorial. Keep in mind that this is all an opportunity to learn, not stress about being perfect.
Step 1: Outline Basic Shapes
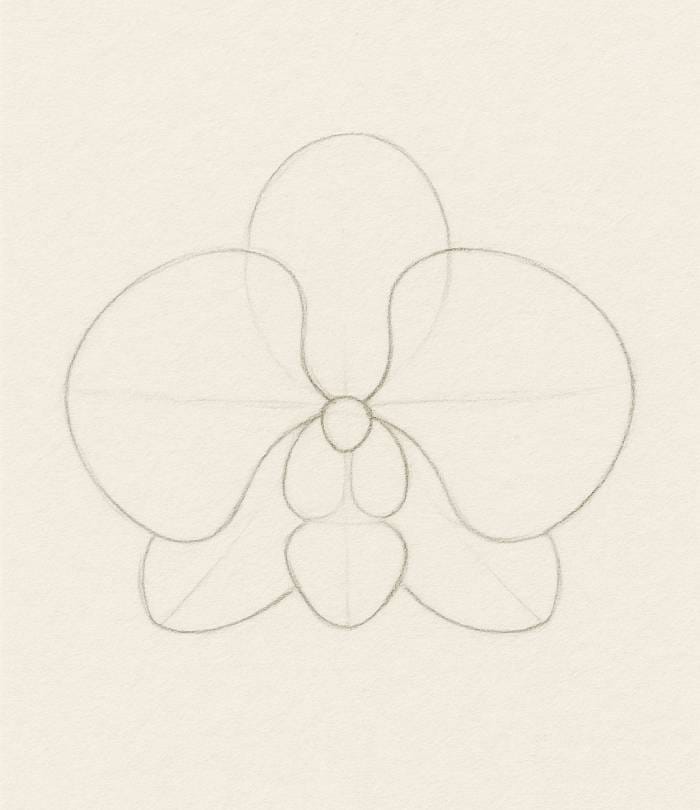
Each intricate drawing begins with simple shapes. Take the orchid for instance as a collection of oblongs and circles. Start by drawing a huge circle to identify the dimensions of your flower will have. This will be your guideline. Within this circle make smaller teardrops or ovals to represent the main petals. Be aware of their position and size relative to each other, giving a consistent but natural look. This is a fantastic way to start. orchid sketch quickly and build a solid and solid.
Step 2: Draw Petal Structure
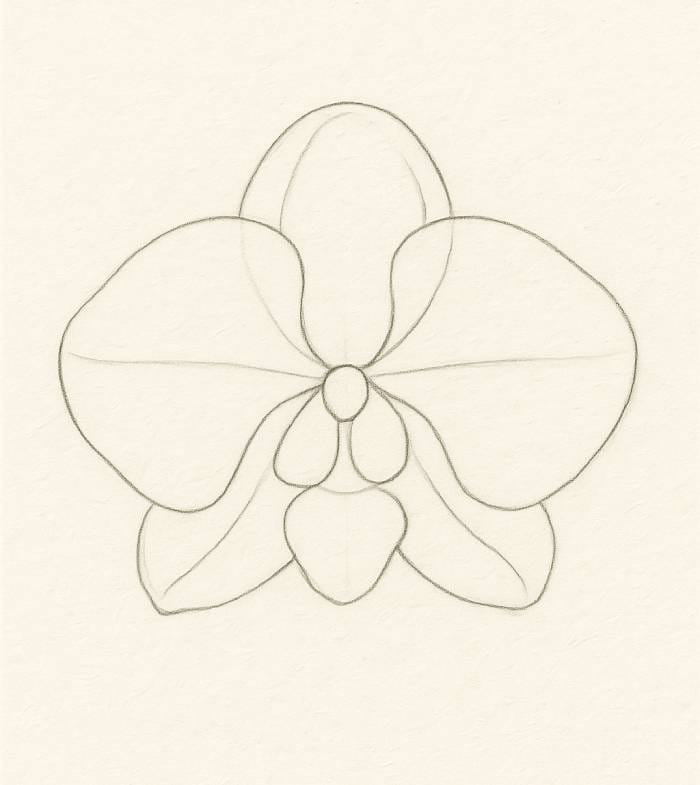
After the basic shapes are established It’s time to fine-tune the petal arrangement. The most important thing to draw flowers is take its flowing, curving lines. Instead of drawing a rigid straight outline, you should use gentle, curving strokes to create the shape of each petal. The three top petals (sepals) and the two sides petals (petals) tend to be the most noticeable. Take note of the way they are overlapping and how they join with the central column. The petals usually have some slight curve or cup in them. So you should try to express this using your lines.
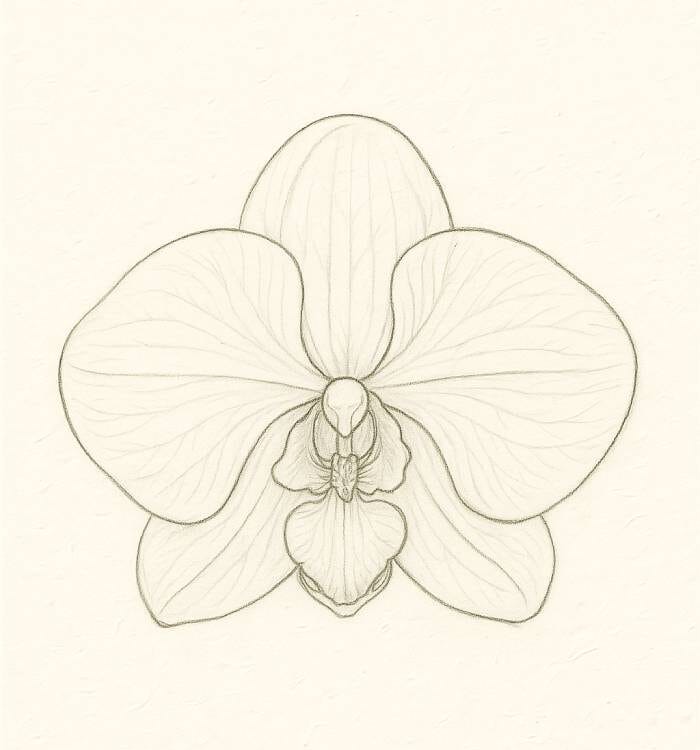
Step 3: Add Details to Petals and Center
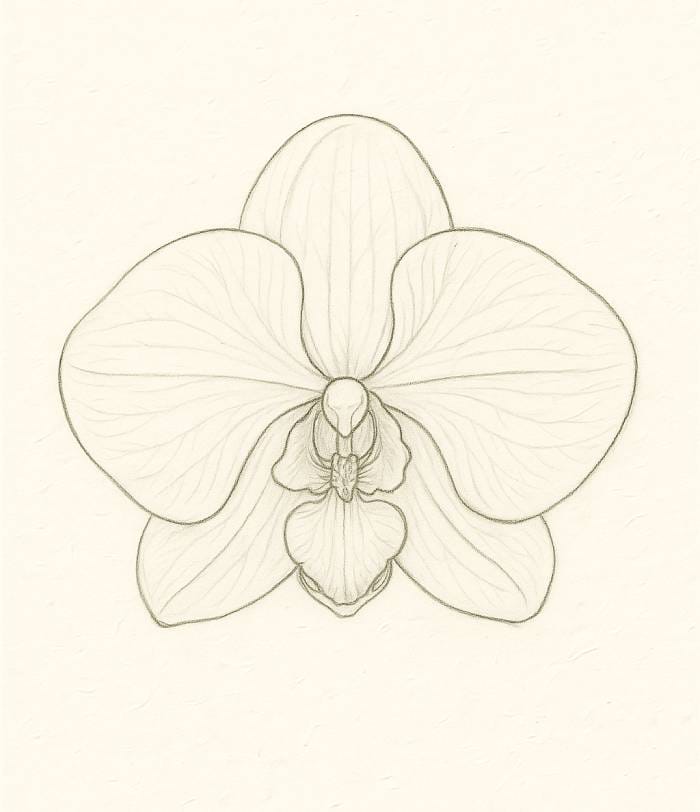
This is the point where your orchid truly comes into life. Remove the guideline shape that was initially created and pay attention to the delicate particulars. Its central column also called labellum is the most distinctive component in the flower. It usually has a distinctive shape or texture as well as a pattern. Draw the outline of the labellum and note its central ridges, as well as the minute specifics that make it distinct. The petals should draw delicate lines that make veins. These lines must be thin and be in line with the natural curve of the petals, creating an organic feel in your sketch.
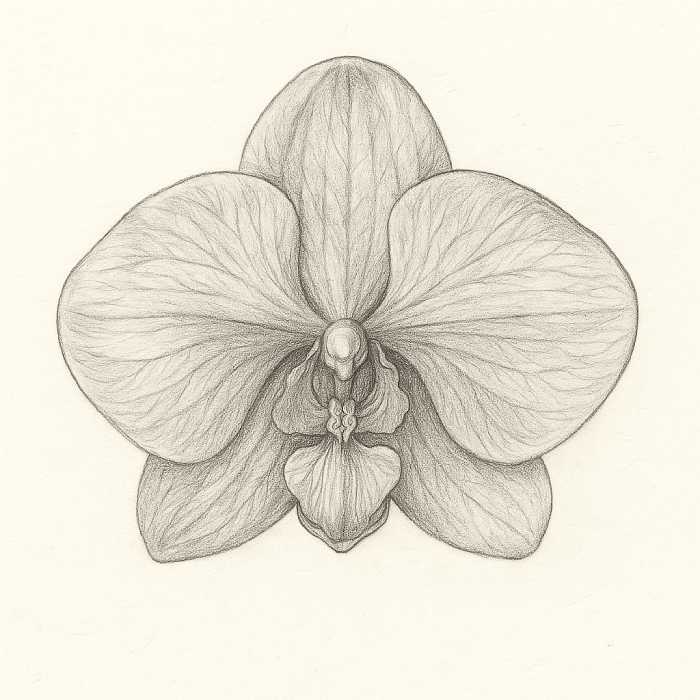
Step 4: Shading and Depth
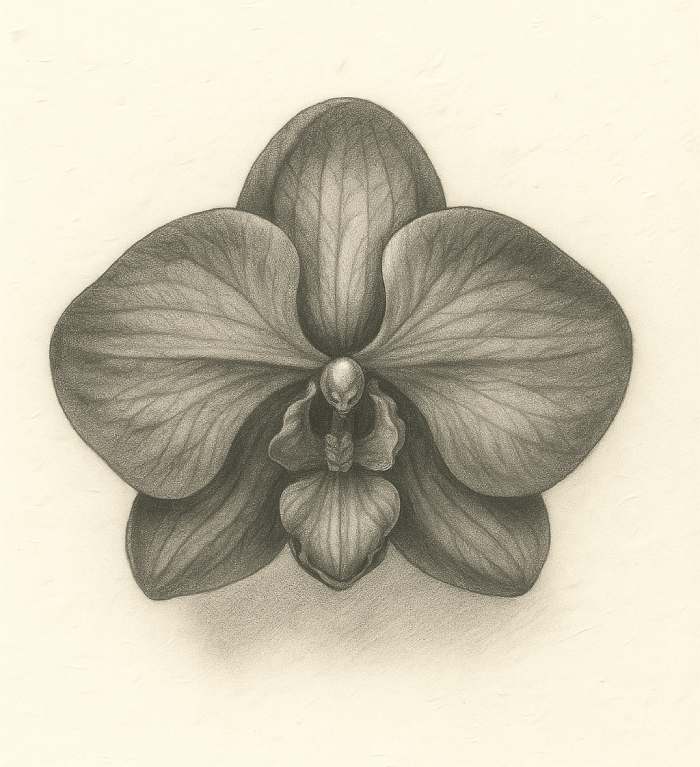
Shading transforms a sketch from flat to a 3D work of art. Utilizing your pencils 2B and 6B start adding shadows. Consider the location where light originates from and draw shadows on the other side of every flower. The petals overlap so the areas that join will appear darker. Create a gradual, layered method with your pencil, increasing the dark areas slowly. The middle of the flower is likely to be the darkest and creates a sense of a deep receding space. The most light-colored parts of the petals – where the light hits them directly will create a visual impact. This is a crucial step to create an effective orchid flower drawing that includes shading.
Step 5: Optional Coloring
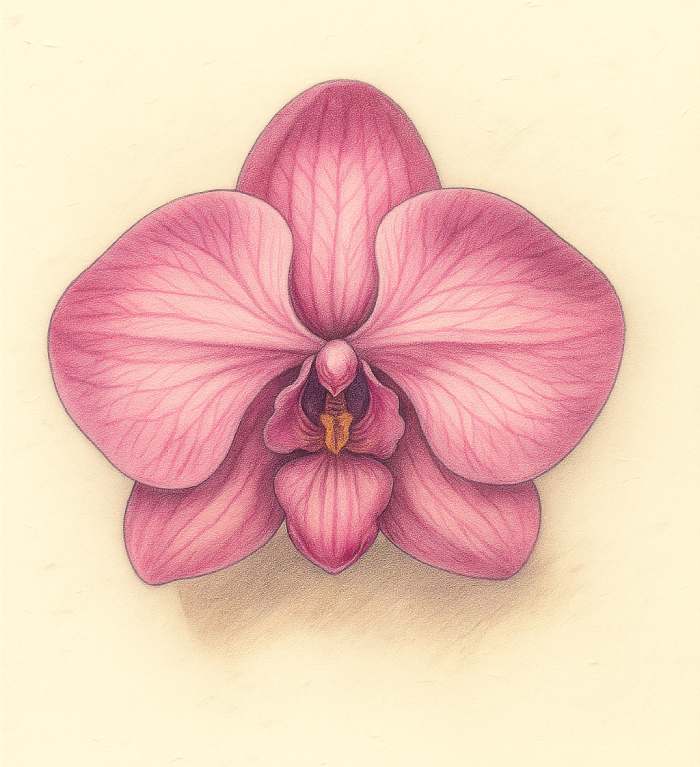
If you’re looking to add some color this is the perfect time to do it. Colored pencils are an excellent beginning point for those who are just starting out since they are precise and provide control. Color is applied using thin, layering strokes gradually increasing the amount of color. To create a realistic appearance apply multiple hues of the exact color for depth. For instance using a light pink base with deeper purple and rose layers for shadows. If you’re using watercolors, begin by using a gentle wash, and then build layers of color as each layer dries. This will ensure a clean appearance and let the distinctive textures to be seen.
Creative Variations of Orchid Drawings
Drawing is about individual expression. Once you’re confident with the basics it’s time to explore the many different floral styles to find your individual style.
The Realistic Orchid Sketch: It focuses on fine detail, exact shading and realistic proportions. It’s a relaxing and enjoyable way to work for those who appreciate the process of meticulously working.
Simple Orchid Line Artwork: This is the opposite of real-life drawings. It is based on clear straightforward, confident, and simple outline to express the essence of orchid. The beauty is in negative spaces and in the movement of lines.
Cartoon Orchid Drawing: Fun and enjoyable style that reduces shapes and adds character. This is an excellent exercise for children or anyone who wants to draw a fun artistic drawing.
Colored Watercolor Art: This medium gives an effervescent, fluid look to your artwork. Concentrate on creating gentle washes of color which merge into each other to capture the delicate and beautiful nature of the flowers.
Common Mistakes to Avoid
When you are practicing the art of karate, you’ll encounter difficulties. Knowing the most typical mistakes could help get them fixed and progress faster.
Draw petals that are rigid or flat: Orchids are natural and naturally curvature. Do not draw straight lines, and instead concentrate on creating flowing, curved shapes that make your drawing more believable of life.
The over-shading of the drawing or pushing too hard on your pencil: It can cause your drawings to appear blurred and reduce the details. Utilize thin layers and a range of pencil grades to manage the shading and add depth slowly.
Inattention to proportions of the petals and the center of the flower: The labellum and petals are in proportion to one another. A moment of comparing their dimensions and shapes at the start of your sketch will protect you from a sloppy final sketch.
Tips to Improve Orchid Drawing Skills
Consistency and repetition are the most important factors to art development. Below are few tips on drawing orchids for those who are new to drawing:
Learn with real orchid images: Use high-quality reference photographs to examine the form as well as the light and shadow of the various varieties of orchids.
Begin with a simple sketch: Don’t try to create a complex collection of orchids in a matter of minutes. Start with one flower drawn from a simple, easy angle.
Try different art media: Don’t be afraid to play around with colored pencils charcoal as well as digital art tools. Each art medium can give you a new perspective and will help you improve your abilities.
Conclusion
The path that an artist takes is one of constant exploring and learning. We’ve gone over the fundamentals of basic orchid drawings and also provided a comprehensive tutorial on drawing orchids to help you begin. From understanding the anatomy of the orchid to adding detailed shading you’ve got the tools necessary to create stunning and captivating works of artwork.
Keep in mind that the aim isn’t to duplicate an orchid in a perfect way, but rather to have fun and express your personal idea. Get your pencil out and find an amazing orchid picture, and begin sketching. Make sure to share your artwork with other people as well as be pleased with the work you have created. The world of artistic orchid flower drawing awaits!