How to Draw a Bunch of Grapes for Beginners: Simple Shapes, Smooth Shading
Are you ready to create stunning, realistic art? This tutorial will show you how to draw realistically! It’s a great way to improve your sketching skills if you are new to it. This complex subject will be broken down into two simple parts: simple shape and smooth shade. Discover how simple circles can be transformed into a three-dimensional cluster. You will also learn how to easily apply layered, soft shadings that make each grape appear round and shiny. You’ll learn all the tricks you need to draw a bunch of grapes that look like a picture. Grab your pencils and let’s get started!
What You Need Before You Start
Make sure you have the proper tools before we begin. This is especially important for subjects that require smooth transitions, such as grapes.
Basic Tools for Beginners
- Pencils: (HB-4B). You’ll need a variety of hardness.
- Use for initial sketches, light, and guidelines. Easy to erase.
- B & 2B: Ideal for shading general tones and constructing medium tones.
- 6B or higher (reserved for the darkest shades and final accents):
- Eraser: A soft plastic or vinyl eraser to clean up mistakes. For lifting graphite without smudging, kneaded erasers are highly recommended.
- Drawing paper: Use drawing paper with a medium tooth. Too smooth paper will not hold graphite for deep shadows, and too rough paper makes it difficult to blend smoothly.
- Blending Stick (Tortillon): A tightly rolled paper stub used to blend graphite and smooth it. The secret weapon of soft, smooth shading.
Optional tools for better shading
- Cotton Swab or Tissue: A piece of soft facial tissue can be wrapped around a finger to blend large shades, creating a soft gradient.
- Soft pencil (6B or Above): A soft pencil will help you add those dramatic, deep shadows at the end to make your grapes appear three-dimensional.
These materials are helpful for beginners
When drawing grapes, it is common to aim for a specific goal. Smoothness You can also find out more about the following: clean layers. You can gradually build depth by using different pencil hardnesses. Start with an HB pencil to ensure your initial structure can be easily changed. By using a blending brush, you can avoid your shading looking messy or scratchy. This will give the skin of the fruit a soft, polished appearance.
Grape Shapes: Basics and Definitions
The complexity of a grape bunch is beautiful, but to draw it, you need to simplify the drawing.
How to break grapes into simple circles
In its simplest form, a single grape is a ball. You can draw it by drawing a circle. Many circles are stacked on top of each other to make a bunch. You can draw grapes if you know how to draw a circle.
The importance of learning form, spacing, and overlapping
The illusion is sold by the arrangement:
- Form: Keep in mind that you are drawing spheres and not circles. It is important to have consistent lighting and shadow.
- Space: Grapes packed tightly. They are packed tightly; they touch each other, and there is rarely a large gap between them.
Overlapping is important for depth. Some circles should partially hide others. Grapes that overlap other grapes will appear closer to the viewer.
Quick visual explanation: How circles turn into a grape cluster
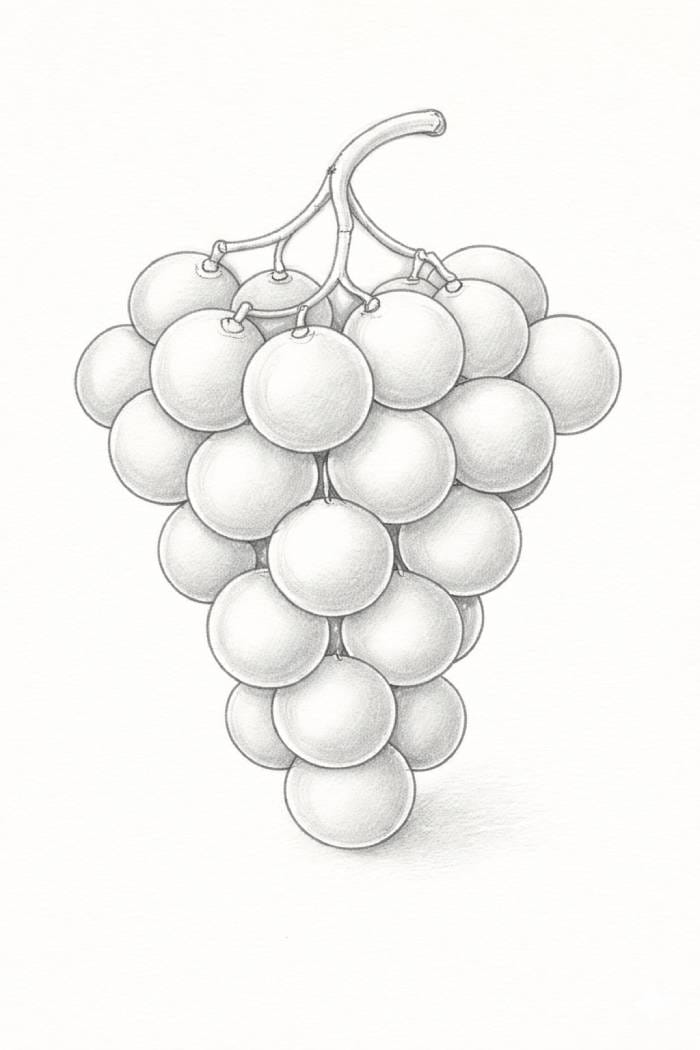
Imagine lightly drawing a large inverted triangle, or teardrop-shaped shape. Fill in this general shape by overlapping small circles. Let the circles fall down from the top, making sure that the lower circles can only be seen partially behind the upper ones. This is the grapes drawing for beginners’ foundation step. It ensures you have the right, organic structure before moving on to refine the details. Start with these simple grape shapes.
Step 1: Sketch out the rough circle layout
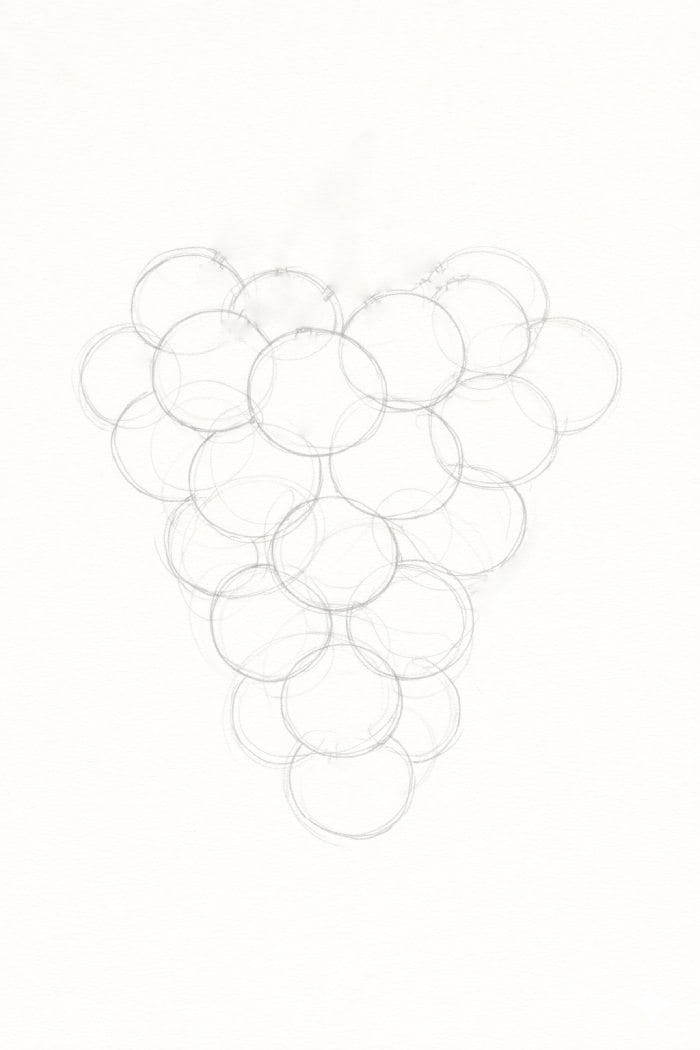
Every great drawing begins with a loose, light sketch.
- Begin with Loose Circles. Use your lightest pencil (HB or H) to lightly sketch out the entire grape bunch. Consider the shape of the grape bunch, which is usually wider at the top than it is toward the bottom. Fill in the shape with overlapping, light circles.
- Keep Sizes Varying:The grapes are not uniform. To give your bunch a more natural and organic appearance, vary the size of the circles. Some should be smaller, others larger.
- Reserve Light Gaps for Highlights. While sketching, reserve a small space on the top side for the light of some key grapes. Do not draw circles around these areas if you plan to add your brightest highlights later.
- Soften Lines:You must make the lines incredibly soft. You will later erase these lines. You can leave indentations on the paper if you press down too hard. This will show through any smooth shading.
Step 2: Add the stem and connection points
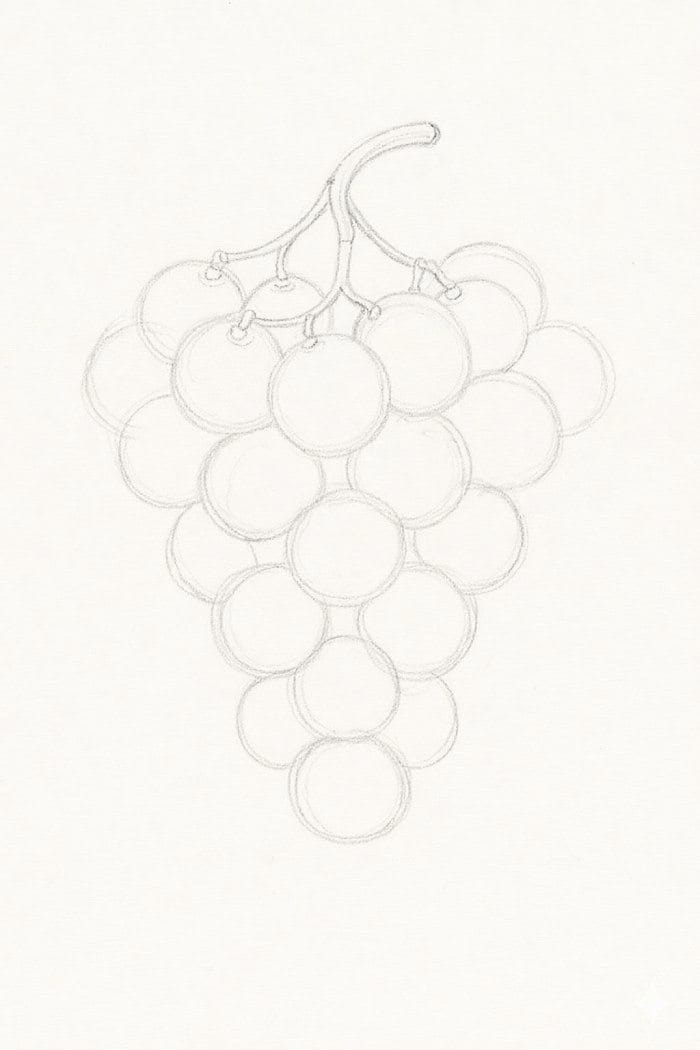
The stem gives the bunch context, form and realism.
- Basic shapes to draw a simple curved stem: First, draw the main stem, slightly curved and thick. Start usually at the top middle of the bunch. Use two parallel, simple lines that are slightly wavy.
- How to Attach Grapes Naturally: Grapes do not float; they are attached to the stem by tiny woody stems. Connect the grapes at the top of the stem with small rings or short Y-shaped lines. Connecting points should be organic and follow the principles of position angle and organic flow.
Step 3: Fine-tune the Grapes’ Outline
It’s now time to turn the simple circles into solid shapes.
- Smoothen the Circles: Use a pencil that is slightly darker (B) to gently smooth out any imperfect or wobbly circles. The outline should be defined but light.
- Create depth by adding overlapping lines: The next step is to create the depth. Darken the line where one grape meets the next. This visual hierarchy instantly gives your drawing a sense of three-dimensionality.
- Remove unnecessary guidelines: Remove the rough sketches and internal lines with your kneaded pencil. You will only be left with the final outline of the grapes.
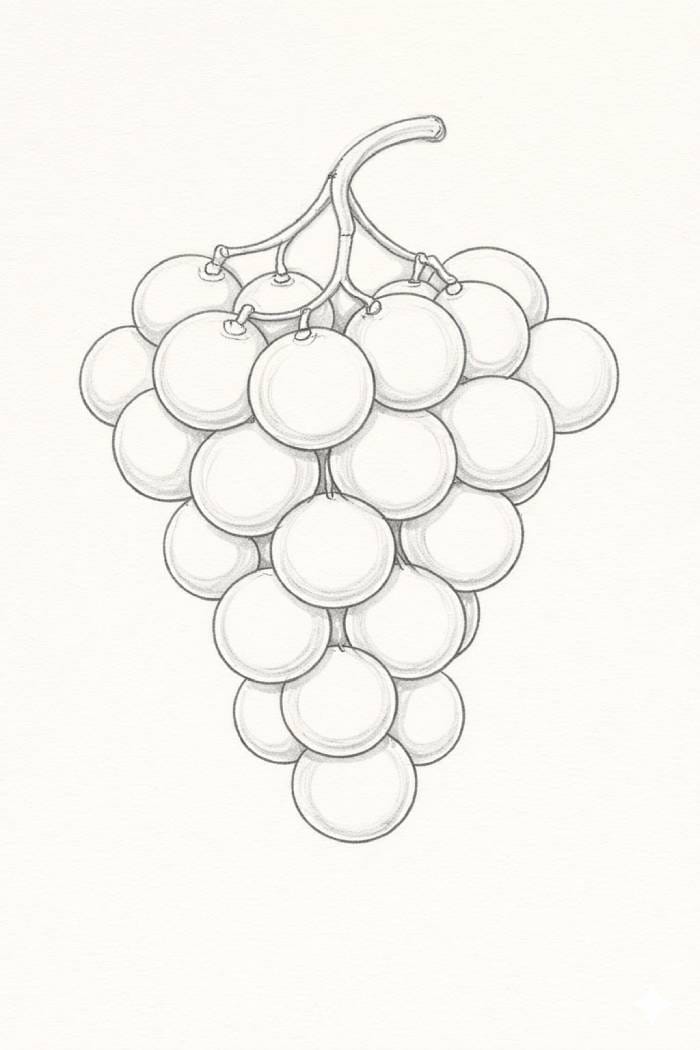
Step 4: Light Shading
This phase involves the introduction of volume and light.
- The Light Source to Identify: Find out where the light is coming from (e.g., top-left). Consistency is the key. Each grape must be consistent.
- Shade Each Grape’s Opposite Side:Because the light comes from the top left, the shadow falls on the bottom right of each grape. Apply a thin layer of graphite to the shadow area using a pencil with a lighter shade (HB or B).
- Use Side Strokes to Add Soft Tone:Do not use sharp or choppy lines. Use circular, side-to-side, or smooth strokes with your pencil held on its side. This is your smooth shade technique. The goal is to create a subtle layer of tone.
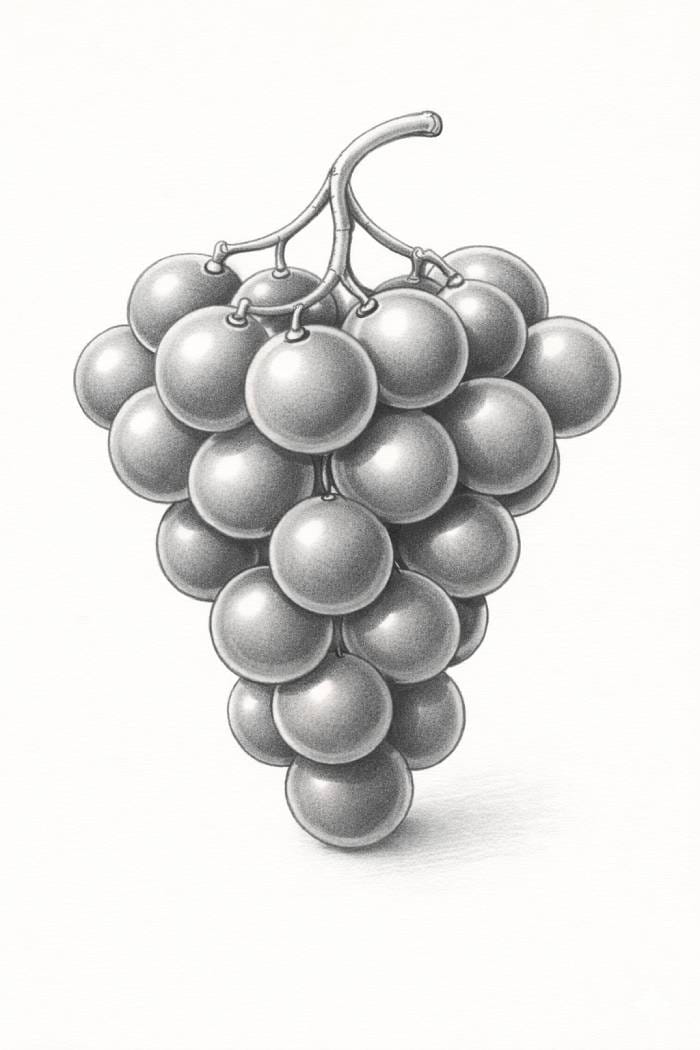
Step 5: Create realistic shading with layers
Realistic transitions and depth are key to achieving realism.
- Add medium-dark shading to the edge using your medium pencil: Switch to your medium pen (2B). Concentrate your attention on the grapes furthest away from the light and those grapes that touch. The shadow of an overlapping grape will darken the surface of the grape.
- Blend Shading With a Blending Tissue or Stick:Use a blending stick to rub graphite gently from the darker graphite towards the lighter graphite. This will create a gradient by softening the pencil marks. Do not blend out highlights that are the brightest.
- Do not touch the highlights. Contrast will give you a glossy result. The paper should be perfectly white when light strikes it.
- How to create a round surface by shading: By applying a light color that darkens slowly and softens towards the edges, you can create the illusion of a sphere. The contrast between the darkest color and the highlight that is not altered gives the grapes a glossy, reflective appearance.
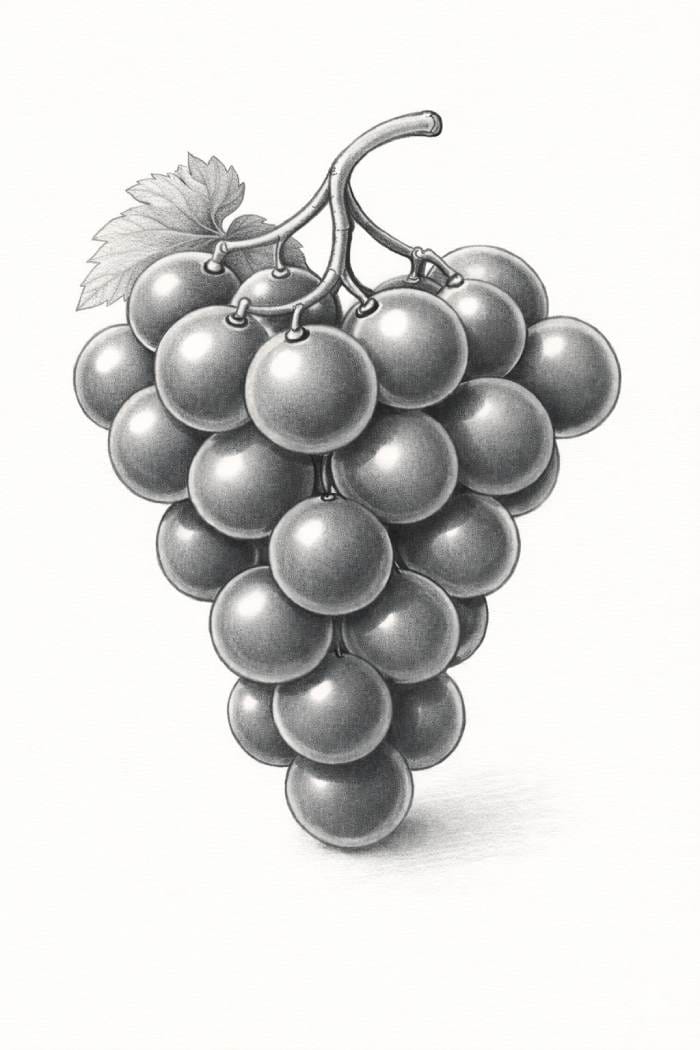
Step 6: Final Texture and Details
Your grapes drawing will come to life with the finishing touches.
- Enhance roundness with tiny reflections:Place a small area of softly reflected light on the side shaded by the grape (a). The light bounced off surfaces nearby, creating a subtle highlight at the bottom of the grape. This tiny detail makes the grape look rounder.
- Darken the shadows between grapes to add depth: Use your darkest pencil (4B, 6B). Darken small triangular spaces where three or four grapes come together. These shadows are known as occlusions. They are important for pushing the background grapes back and separating each form.
- Sharpen dark areas to make the bunch pop:Once again, go over the stem lines and the darkest shadows to make sure they are crisp and black. This will anchor the drawing and give it maximum contrast.
- Optional: Add an extra leaf for more detail: If you’re using color, a simple stylized grape leaf (often in a five-pointed shape) will add context, contrast, and complexity to the composition.
Common mistakes beginners make (and easy fixes)
When you learn to draw, you also learn how to fix mistakes!
| Mistake | Description | Easy fix |
| How to make all grapes of the same size | This results in a machine-made, unnatural look that loses the organic charm. | In Step 1, deliberately vary the size of your circles in the beginning by 10-20%. |
| Over-darkening early | If you use a dark, heavy pencil too early, it will make corrections impossible. It will also ruin the smoothness. | Start each layer using an HB or B pencil. The 4B should only be used for the final shadows. |
| Ignoring light source | Randomly applying shadows can create a flat and confusing look. | Before you begin shading, draw a small arrow at the corner of the paper to indicate the source of light. Keep to the same pattern. |
| Messy outline | Grapes with rough outlines look fuzzy or textured instead of shiny and smooth. | Use a kneaded pencil eraser after Step 3 to remove all internal and exterior lines. This will leave a clean boundary for shading. |
You can improve your drawing of grapes by using these tips
Mastery is achieved through practice. Improve your skills by following these tips.
- Start with a small group of grapes, rather than a big bunch: Concentrate on just three or four grapes. Before moving on to a larger scale, learn how to blend and overlap.
- Examine real photos: Look closely at the grape photos. Note how the light reflects as highlights and dark shadows.
- Use different pencils to shade the grape cluster: Shade the same grape bunch using soft pencils (2B or 4B) and hard pencils (H or HB). Observe how the texture and tone differ.
- Set up a timer to do quick sketches: Try and complete the rough layout in five minutes. This will force you to concentrate on the essential shapes and loosen your sketching.
Final Summary
Congratulations! Congratulations!
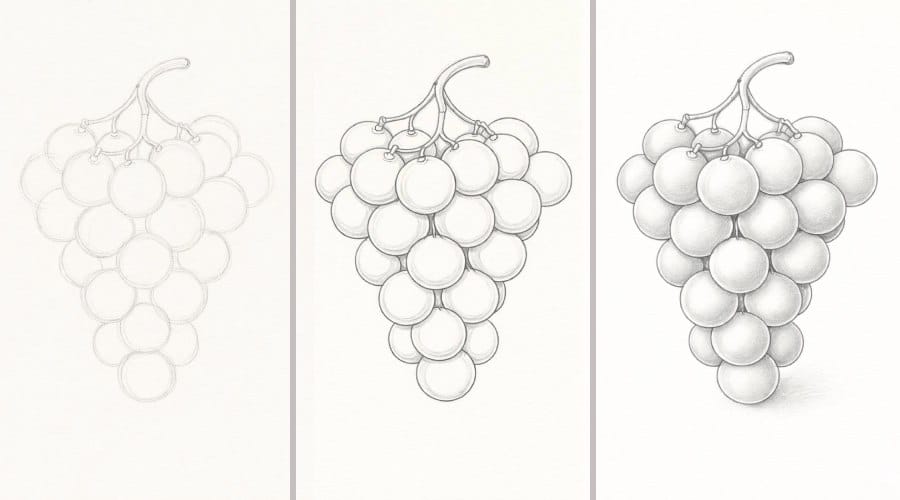
The foundation was laid with simple shapes. We defined the overlap and shape with a light, precise line. We then moved on to the core technique of smooth shade. Building tone gradually and using a blending tool to achieve a glossy, realistic finish. We achieved the required depth and realism by focusing on identifying and deepening shadows and the occlusions between individual fruits.
It’s now your turn! Every pencil stroke you make is an improvement. Do not be afraid to experiment. Try different grapes or light sources, and add other elements such as dew drops.