Poppy Flower Drawing Tutorial: Simple Tips for Realistic Sketches
Are you looking to learn about how you can capture the beautiful beauty of a flower on paper? You’re in the right location! This thorough drawing of the poppy flower tutorial is intended for artists at all levels, but especially those who are new to drawing. We’ll break the process down into step-by-step instructions that guide you from a blank sheet to a stunning, real sketch. Don’t be a slave to rigid lines, flat forms. Learn the secrets to creating vibrant petals, stunning stems and a stunning depth. If you’re an experienced artist or are just beginning, these simple steps will assist you in mastering the art of drawing poppies.
Why Choose Poppy Flowers for Drawing?
Flowers of the poppy are much more than beautiful. They can be a wonderful illustration subject due to their unique symbolism and physical traits. In the past, poppies have been associated with a range of cultural and artistic meanings including peace and memory to sleep, and even the most extravagant beauty. They’re delicate and crinkled flowers and vibrant colors create an exciting task for artists of all kinds. In contrast to other flowers, the structure of a poppy is more fluid and natural, with flowers which seem to move and dance in the breeze. This organic, somewhat wild nature will make them attractive to draw. The ability to capture their unique flowing shape is an enjoyable exercise that can help improve your line observation and work.
Materials You’ll Need for Poppy Flower Drawing
Before we start we’ll gather our tools. One of the advantages of sketching is that it doesn’t require an abundance in expensive tools. The emphasis here is on the technique and not on a fancy collection of equipment.
Essential Tools:
Pencils: The variety of graphite pencils is perfect. A basic 2B or HB pencil is great for beginning sketching and outlines with light colors. To draw darker lines and shading pencils, a 4B or 6B pencil can be extremely helpful.
Erasers: Kneaded erasers are your most trusted friend. It’s ideal to lift graphite with no blurring and to create highlights. An eraser that is made of plastic can be useful to make more precise corrections.
Fine Liner (Optional however recommended): A fine-tipped pen, such as Micron, or a Micron and similar may be used to draw certain particulars after pencil is finished to give a professional appearance.
Drawing or sketchbook: Choose paper with some “tooth” or texture. This helps the graphite stick better and help facilitate shading.
Optional Tools for Added Detail:
colored pencils: When you’re looking to add some color, a set colored pencils is an excellent option. They can be used for delicate layering and mixing, which is great to capture the vibrant poppy shades.
Colors with watercolor: To give your sketch a fluid painterly look it is possible to use watercolors to create a soft shade of colour to sketch.
For those who are in search of supplies looking for ” poppy flower drawing materials” or ” supplies for sketching poppy flowers” will aid you in finding top-quality products that are affordable.
Step-by-Step Poppy Flower Drawing Tutorial
Are you ready to begin? Let’s break the process down into six easy steps. Be sure to use a lighter hand when you begin and you can always lighten lines later.
Step 1: Observe the Shape and Structure

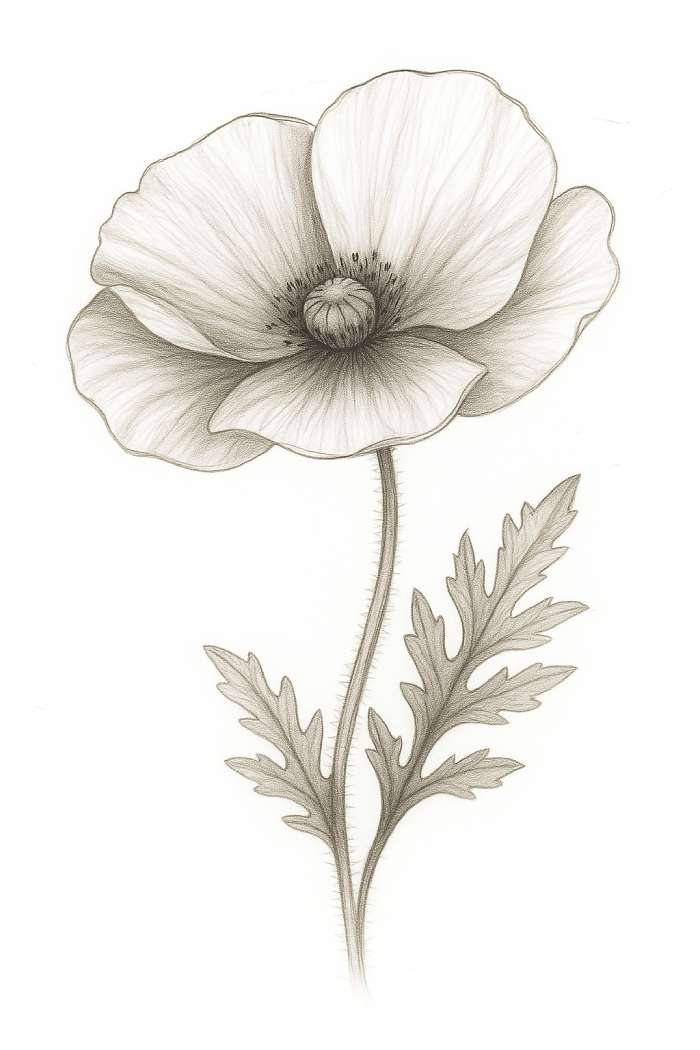
Every drawing is built upon a solid foundation. It’s not a solid shape like daisies. Instead, they have a cup-like shape, with a flowing flow.
Begin by sketching the Basic Shapes. Begin with soft, fluid strokes to sketching your overall design. Create a curve to form the stem and an oval or circle for the flower’s main component.
Make the center: Put an ellipse, or a small circular shape in your primary shape. This will act as the central point from which the petals will emerge.
Sketch the Petals: They usually have several petals that could appear very different based in the direction. Draw the basic petal shapes and then observe the areas that overlap, as well as the places the folds. Think of the petals as soft curving fabric.
Step 2: Draw the Petals

This is where you can bring your flower to life. Concentrate on creating a sense of movement and volume.
Layering for Realistic: Don’t draw each petal as an individual unit. Instead, consider the ways they overlap and curve around one another. The petals that are closest your face will seem more hefty and those to the left will appear smaller and obscured.
Accept Imperfection: Poppies are known for their crinkled, crumpled appearance. Don’t draw perfectly straight lines. Instead, create an array of small delicate lines to suggest folds and wrinkles. The most common error involves drawing flowers that appear rigid. Make sure to draw natural, flowing lines in order to convey their organic beauty.
Step 3: Sketch the Flower Center

The heart of a poppy is a realm of its own, brimming of fine texture and detail.
The Seed Pod: In the middle, draw the center of the seed pod. It’s typically a round shape, with a star-like pattern over the top.
Stamens: Stamens: Surrounding the seed pod, are a myriad small stamens. Draw them as a sequence of lines that are short and radiating with a tiny dot at the bottom of each. Do not stress about drawing each line simply create the appearance of an incredibly dense, fuzzy look.
Enhance Depth using Shading: Utilize the darker shade of pencil (like 4B) to create shadows at the top of the petals when they join the center. This creates the stamens and the seed pod appear to be recessed, giving the flower a 3D feel.
Step 4: Add the Stem and Leaves
Stems as well as leaves offer the context and provide the grounding for your flower.
Natural, Curved Lines: A poppy stem isn’t always perfectly straight. Make use of a soft, flowing line that curves the stem, making it an organic elegant flow. A slight motion makes it appear more natural.
Include Hairs: The stems of poppy are usually covered in tiny, fine hairs. It is possible to suggest this look by making a series of small, light strokes across each length.
Leafs: They have leaves with deep lobed edges that are often closer to ground. Draw these leaves with sharp lines that are organic, paying particular attention to the way they attach on the stem. Don’t make them appear too flat or rigid.
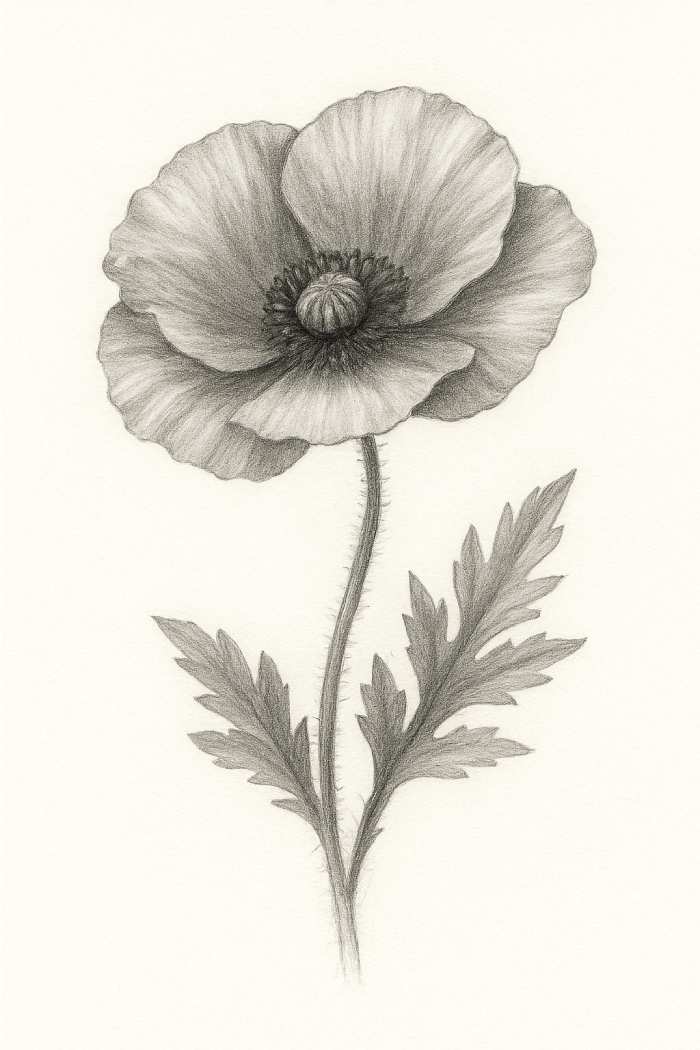
Step 5: Shading and Detailing

Shading is the process that transforms an outline from a sketch into real-looking, 3-dimensional drawings.
Determine the source of your light: Decide where your light source is. This will determine where your shadows and highlights will fall.
Gradual Layering: Utilize your lighter pencils (4B & 6B) to create shadows over time in layers. Include shading in areas where the petals overlap, beneath the seed pod and on the bottom of the flowers. Be sure to leave areas where the light is the strongest light unaffected, as well as lightly shading to make a contrast.
Texture of Petals as well as Leaves: Use the part of your pencil that is facing you to create a smooth appearance on petals. You can also make use of a kneaded eraser that will gently lift graphite, creating soft highlights, highlighting how delicate and crinkly appearance of petals.
Step 6: Optional Coloring
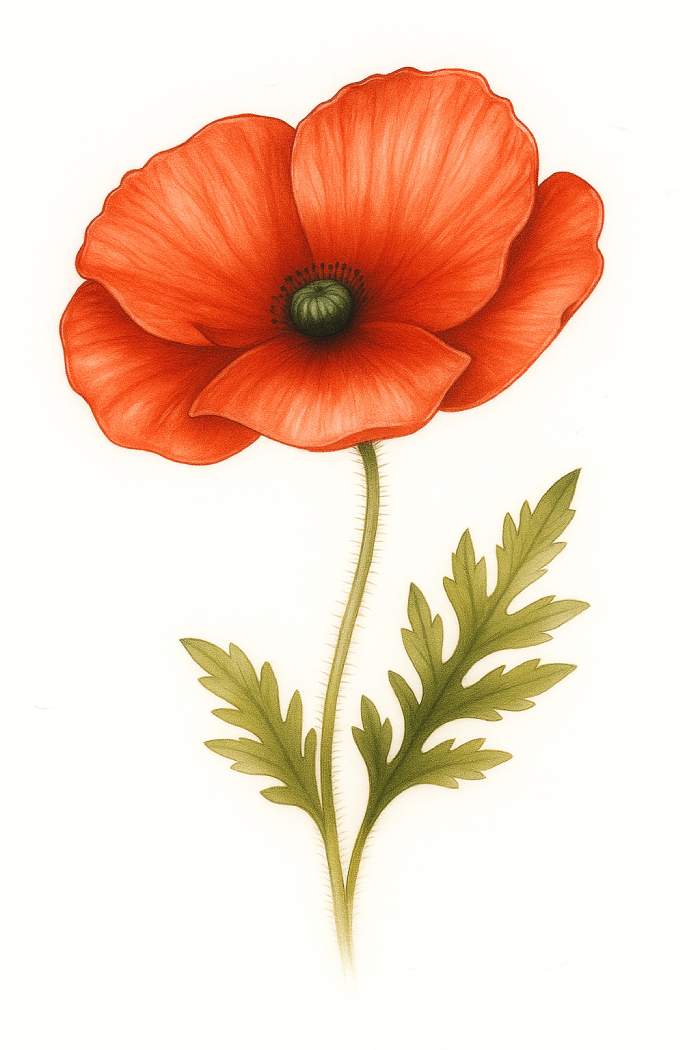
If you’re looking to elevate an illustration to the next step, then adding colors is a fantastic option to accomplish this.
Coloured pencils: Apply a gentle stroke and blend your colors. Begin with an orange or red shade and gradually work into a darker shade. Utilize darker brown, or black color to make the shadows darker around the base and the top.
Colors for watercolors: Paint a thin wash, then let it dry completely. Then, you can apply darker shades over the areas that are shadowed. This creates a bright and transparent effect ideal for poppies.
realistic color palette: While the most commonly used color is red, shade, poppies can be found in a range of colors that include white and orange, as well as pink, and purple. Don’t be afraid of playing with a variety of color palettes in order to create your own unique work of art.
Tips for Making Your Poppy Flower Sketch Realistic
Certain key techniques can drastically improve the realism of your sketches.
Study real flowers and Reference Photographs: The best way to appreciate a flower is to study one. Take note of the subtle lines, the way the petals wrinkle and the play of shadow and light.
Variate the Pressure of Your Line: Don’t draw with an equal pressure. Make use of a gentle hand to draw the outline of your initial lines and delicate details. apply more pressure for the darkest shadows and lines.
Level Shading Gradually: Make your shadows gradual. It’s a lot simpler to add more graphite than to remove it. This gradual process provides smoother transitions and more realistic results.
Practice drawing from different Perspectives: Poppies look different from all angles. You can draw them from the side, the top, and even before they begin to turn brown. This will increase your understanding of their 3-D shape.
Common Mistakes to Avoid
Over-darkening Outlines: One common mistake made by novices is to outline all of the details too much. This can cause your drawing to appear dull and cartoonish.
Doing nothing about Petal Curves and Folds: Making petals appear flat, two-dimensional forms makes your drawing appear less the realism you desire. Pay attention to how petals fold, overlap, and curve.
Flat Shading, without Contrast: Shading must create the illusion of form and light. If your shading isn’t able to convey an array of values that range from dark to light the sketch will look flat.
Creative Ways to Use Your Poppy Flower Drawing
After you’ve drawn your sketch The fun doesn’t need to stop!
Drawing Practice in Sketchbook: Use your poppy sketch to fill your sketchbook with sketches and keep track of your creative journey.
Handmade Bookmarks or Cards: Turn your sketch into a unique, personal present.
Wall Artwork: Scan your drawing and have professionally printed to create stunning, personalized wall art to decorate your home.
Conclusion
Drawing realistically-colored poppy flowers is an enjoyable artistic experience that is available to all. If you break the process into steps that are easy to follow–from studying the basic shapes, to creating subtle shading and detail–you can create an amazing and authentic sketch. Keep in mind that practicing is the key. Be prepared to make mistakes. They are an essential part of the process of learning. With the tools and knowledge Try drawing poppies in various styles, ranging from sketches that are realistic to minimalist or abstract version. The more you play around the more you’ll find your own unique style of art.
FAQ
Q: What can draw a flower like a poppy quickly? A: Start with basic shapes like A circle for the flower’s head, and a curving lines as the stem. Then, sketch lightly the petals that are crinkled, later add details such as the seed pod’s center along with shading in order to make the drawing more the illusion of depth.
Q: What are the most effective tools for drawing poppy flowers? A: You do not require a lot! A couple of graphite pencils (HB 4B, HB) and an eraser that is kneaded, as well as sketchbooks with some texture are the most important tools to create a realistic sketch.
Q: Do novices draw realistically poppies? A: Absolutely! Poppies are a fantastic idea for students because their imperfect, natural shape makes them very tolerant. Concentrating in on the observation process and breaking down the drawing into steps that are simple can make it easy to manage.
Q: Do you know how to color a poppies sketch of a flower? A: Begin by identifying the lighting source. Then, you can use the sides the pencil slowly create layers of graphite. Add the darkest shadows in areas where the petals overlap and are farthest from light sources, while leaving the lighter areas unaffected to add contrast.